You are in our US store • Switch to Europe store

I Love Us Card Tutorial

Hello, crafty cardmaking friends! Tracy here, and today I have a stunning I Love Us card that showcases the Creative Photo Corners as embellishments rather than using them the traditional way. Now, let’s get crafty!

I Love Us Card by Tracy McLennon for Scrapbook Adhesives by 3L

Creative Photo Corners in a Circle

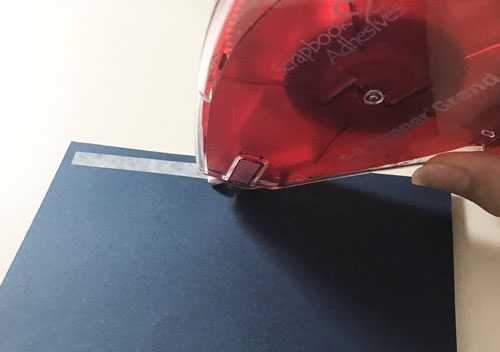
Start by cutting a white cardstock circle that will accommodate the sticker sentiment. Add the sentiment and then using the E-Z Runner® Ultra Strong Refillable Dispenser, add adhesive around the back of the cardstock circle.

I Love Us Card by Tracy McLennon for Scrapbook Adhesives by 3L

Now add Creative Photo Corners Black, all the way round the edge of the white cardstock circle.

I Love Us Card by Tracy McLennon for Scrapbook Adhesives by 3L

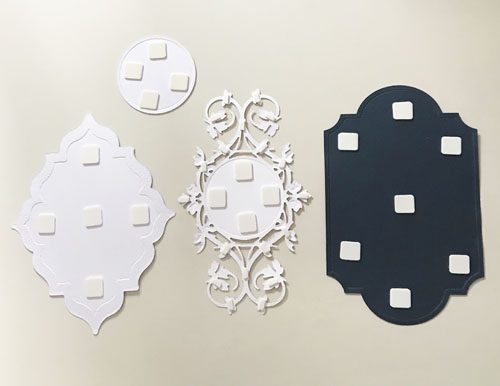
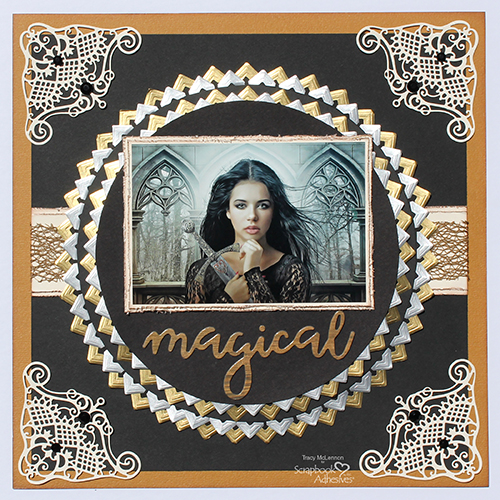
Next, using 3D Foam Squares White Regular; add squares around the edge of the corners, and one in the middle for stability. Then using Creative Photo Corners Silver, adhere the next row of points around the circle.

I Love Us Card by Tracy McLennon for Scrapbook Adhesives by 3L

Once again add another layer of 3D Foam Squares White Regular and then add the final row of Creative Photo Corners Black.

I Love Us Card by Tracy McLennon for Scrapbook Adhesives by 3L

I Love Us – Base Layers

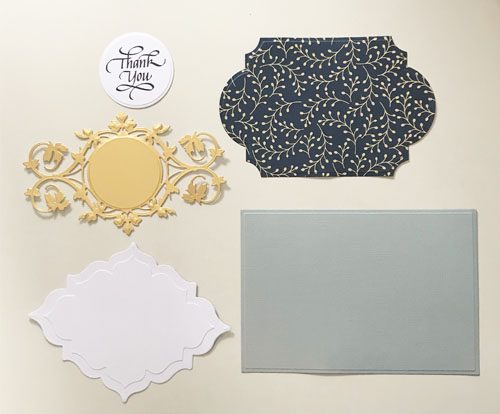
Create a layered card base using white cardstock 6×12 (folded in half). Then cut a piece of black cardstock that is 5.5×5.5, and white cardstock that is 5×5. Adhere the cardstock squares together using Creative Photo Corners Silver and then add that piece to the card base using Crafty Foam Tape.

I Love Us Card by Tracy McLennon for Scrapbook Adhesives by 3L

Adhere the sentiment focal point to the middle of the card using the adhesive that is already on the back of the piece. There you have it! A beautiful I Love Us card.

I Love Us Card by Tracy McLennon for Scrapbook Adhesives by 3L

Thanks for Visiting!
Tracy McLennon

Creative Time: 30 Minutes
Skill Level: Intermediate

Materials Needed
Scrapbook Adhesives by 3L®

Other:
Cardstock (White, Black), Heidi Swapp Glitter Sentiment Sticker, 2.75″ Circle Punch

Pin It!

I Love Us Card by Tracy McLennon for Scrapbook Adhesives by 3L Pinterest Image

Visit our Website and Blog!
Sign up for our Newsletter so you never miss a contest or giveaway!
instagram purple icon facebook icon purple pinterest purple icon twitter purple icon YouTube icon blog subscription purple icon

Have Faith Laminated Pocket Journal and Mini Album

Greetings, Scrapbook Adhesives by 3L® Fans! Shellye McDaniel here to share a Faith Laminated Pocket Journal that doubles as a mini album. It’s easy to create!

Faith Laminated Pocket Journal by Shellye McDaniel for Scrapbook Adhesives by 3L

Beginnings of a Faith Laminated Pocket Journal

Let’s start by creating the cover. I’m using the Self-Laminating Pouches – Cards Medium to create sturdy and professional looking covers for the front and back. Cut a double-sided patterned paper just a bit smaller than the laminating pouch, which is 4×6-inches, and insert it into the pouch. Seal the pouch, check out the video to see how easy it is. Best thing: it’s a great alternative to heat-laminating!

Have Faith Laminated Pocket Journal and Mini Album by Shellye McDaniel for Scrapbook Adhesives by 3L

Embellish the Journal Cover

To embellish the cover I have this adorable die-cut set. It’s assembled with with 3D Foam Squares White Mix and the Dual Tip Glue Pen. For the border at the bottom, I used Crafty Foam Tape White.

Faith Laminated Pocket Journal by Shellye McDaniel for Scrapbook Adhesives by 3L

Faith Laminated Journal Pages

For the inner pages use doubled-over cardstock. These are cut just a tad smaller than the cover size; approximately 3.75 x 5.75-inches when folded in half.

Faith Laminated Pocket Journal by Shellye McDaniel for Scrapbook Adhesives by 3L

Pocket Details

In between the regular pages, I inserted two pocket pages! To make these measure 3″ longer than the page length, score and then fold up. You can double over the patterned paper so that the pocket carries over to the next page.

For the inside of the pockets, die-cut large tags and clip on laminated journal cards! These are so nice to have on hand as a reminder to yourself or to hand to others in need of a little pick-me-up 🙂 I trimmed the 3 x 4-inch journal cards down to fit inside of the Self-Laminating Pouches Small.

Faith Laminated Pocket Journal by Shellye McDaniel for Scrapbook Adhesives by 3L
Have Faith Laminated Pocket Journal and Mini Album by Shellye McDaniel for Scrapbook Adhesives by 3L

Before you attach the photo mats, corner-round the two outer edges and embellished the other side with Creative Photo Corners White.

Faith Laminated Pocket Journal by Shellye McDaniel for Scrapbook Adhesives by 3L

Part of this kit collection is a set of 4 x 6-inch journal cards, which I’m using as an accent page. I am using two cards that were side-by-side horizontally, and then scored and folded in on the line between them.

Faith Laminated Pocket Journal by Shellye McDaniel for Scrapbook Adhesives by 3L

Because I love the smaller journal cards, I attached one of them to the pages. I created a 1/4″ tab at the side and then attached it with the Extreme Double-Sided Tape 1/4in.

Faith Laminated Pocket Journal by Shellye McDaniel for Scrapbook Adhesives by 3L

In attaching all of the base papers, ues the E-Z Runner® Grand Refillable Dispenser with the E-Z Runner® Grand Ultra Strong Refill.

So whether you need a unique gift or class project idea, this little pocket mini faith journal will not disappoint!

Thank you for stopping by!

Creative Time: 2 Hours
Skill Level: Intermediate

Materials Needed
Scrapbook Adhesives by 3L®

HomeHobby by 3L®

Other
Craft Kit and Coffee Cup Die: Echo Park Paper

Pin It!

Faith Laminated Pocket Journal by Shellye McDaniel for Scrapbook Adhesives by 3L Pinterest Image

Visit our Website and Blog!
Sign up for our Newsletter so you never miss a contest or giveaway!

instagram purple icon facebook icon purple pinterest purple icon twitter purple icon YouTube icon blog subscription purple icon

Instagram Giveaway with Jillibean Soup!

Instagram GIVEAWAY: This week we’re collaborating with Jillibean Soup to give away this special prize package which includes both Scrapbook Adhesives by 3L’s amazing adhesives and the “Spoonful of Soul” collection kit from Jillibean Soup. Visit this image on our Scrapbook Adhesives by 3L Instagram page for all the details and enter to win!

ONE winner from each of our feeds will be selected to win this prize package. The winners will be announced on the original post on Monday, July 15th. Will it be YOU? Prizes will be shipped from Scrapbook Adhesives by 3L’s and Jillibean Soup’s offices. All entries are due by July 14th at midnight EDT to qualify to win.

We love to hear from you in our blog comments, but remember this giveaway is on Instagram. Comments here on the blog will not be counted as entries.

Flocked Window Card

Hi, everyone! Are you looking for a fun way to add texture to your next card or scrapbook page? I’m going to show you how to use flock and 3D Foam shapes to do just that in my Flocked Window Card! Along the way, you’ll see how to make a cool window card!

Flocked Window Card by Teri Anderson for Scrapbook Adhesives by 3L

Creating the Window Card

Making a window card is incredibly easy! You can start with a pre-made window card like I did or you can make your own. Create a card from cardstock and then use a paper punch or steel die to cut a shape from the front of it.

Once you’ve got your window card, apply strips of patterned paper at the top and bottom of it. Then take several 3D Foam Creative Shapes and adhere them onto the front of the card.

Flocked Window Card by Teri Anderson for Scrapbook Adhesives by 3L

Remove the liner papers and apply flock onto the shapes. (Don’t have any flock? Try using glitter instead!) Press the flock firmly onto the shapes and then remove the excess flock.

Flocked Window Card by Teri Anderson for Scrapbook Adhesives by 3L

Decorating the Card’s Window

Now you are going to want to decorate the card’s window. Take several die-cuts and adhere them in the window. To make them pop, use 3D Foam Circles (or 3D Foam Squares) to mount them to the card.

Here’s a helpful tip for when you use 3D Foam Circles and 3D Foam Squares. If they are too big for the element you are adhering to a project, simply cut them in half with your scissors.

Flocked Window Card by Teri Anderson for Scrapbook Adhesives by 3L

Finishing the Card

Complete your window card by adding a sentiment to it. Simply stamp your sentiment on cardstock and adhere it to your card with 3D Foam Circles or 3D Foam Squares. Again, use your scissors to cut your shapes down to fit in the open spaces on the card.

Flocked Window Card by Teri Anderson for Scrapbook Adhesives by 3L

One of the things I love about this design is you can do it over and over again with similar supplies and get a different look every time!

Flocked Window Card by Teri Anderson for Scrapbook Adhesives by 3L

Thanks for visiting!
Teri Anderson

Creative Time: 1 hour
Skill Level: Beginner

Materials Needed
Scrapbook Adhesives by 3L®

Other
Patterned Papers, Die Cut Shapes, Circle and Square Shape Shaker Cards: Jillibean Soup (Garden Harvest Collection); Stamp Set: Pretty Pink Posh (Encouraging Greetings Stamp Set); Black Ink: Ranger Ink; White Cardstock: Neenah Paper; White Flock: Stampendous

Flocked Window Card by Teri Anderson for Scrapbook Adhesives by 3L Pinterest Image

Visit our Website and Blog!
Sign up for our Newsletter so you never miss a contest or giveaway!

instagram purple icon facebook icon purple pinterest purple icon twitter purple icon YouTube icon blog subscription purple icon

How to Make a Number Birthday Card

Hi everyone, Yvonne here with a number birthday card with a little bit of humor that will make the recipient smile! The older, the wiser we get, they say but I also think that it makes one realize that age is just a number!

With help from Scrapbook Adhesives by 3L® products, this card is super easy to assemble. The E-Z Runner® Permanent Strips Refillable Dispenser is quick and precise, and won’t stain or bleed when adhering papers. 3D Foam Squares give a gorgeous lift to each number and the banner! Now, let me show you how to make this card.

How to Make a Number Birthday Card by Yvonne van de Grijp for Scrapbook Adhesives by 3L

Number Birthday Card Base

On a white card base, adhere a slightly smaller kraft card panel using the E-Z Runner® Permanent Strips Refillable dispenser. Then adhere card panel cut from patterned cardstock (slightly smaller than the kraft card panel) with the E-Z Runner® Permanent Strips Refillable dispenser.

Adding the Number Die Cuts

Now die-cut and emboss eight numbers from gold cardstock. I chose for the numbers one to eight.

Cut some of the small squares from the 3D Foam Squares White Mix into small stripes to fit onto the back of the number die cuts. Then adhere the numbers to the card base in two straight lines of four numbers. I chose to adhere to the numbers in ascending sequence.

Next print the sentiment and then cut to a banner. I made the sentiment in Word, using a typewriter-like font.

Now back the banner with a slightly larger kraft banner and use the E-Z Runner® Permanent Strips Refillable dispenser to adhere the banner layers.

Adhere the banner to the  card front using the regular sized squares from the 3D Foam Squares White Mix.

How to Make a Number Birthday Card by Yvonne van de Grijp for Scrapbook Adhesives by 3L

Finishing the Card

To finish the number card I simply added some self-adhesive pearls for an extra elegant look.

And…voila…your Numbers Birthday Card is ready to send!

How to Make a Number Birthday Card by Yvonne van de Grijp for Scrapbook Adhesives by 3L

Thanks for Visiting!

Yvonne van de Grijp

Creative Time: 30 Minutes
Skill Level: Intermediate

Materials Needed
Scrapbook Adhesives by 3L®

Other:
Etched Dies: Spellbinders® Paper Arts (Shapeabilities Filigree Numbers Etched Dies Elegant Vignettes by Becca Feeken, Platinum 6 Die Cutting and Embossing Machine), Cardstock (White, Kraft, Gold), Patterned Cardstock. Self-adhesive pearls.

How to Make a Number Birthday Card by Yvonne van de Grijp for Scrapbook Adhesives by 3L Pinterest Image

Visit our Website and Blog!
Sign up for our Newsletter so you never miss a contest or giveaway!

instagram purple icon facebook icon purple pinterest purple icon twitter purple icon YouTube icon blog subscription purple icon

A Trio of Notebooks Tutorial

Hi everyone, Christine here today with a trio of notebooks! Call me traditional but I still like to use a notebook for many things, I’ve yet to put everything on my cell phone! I always carry a notebook in my purse and it makes me smile when they are pretty as well as useful. My notebooks are easy to make and I detail how to insert that elastic strap, which is great for holding receipts and business cards. These also make super teacher gifts. Let me show you how to make this trio of notebooks with Scrapbook Adhesives by 3L®.

A Trio of Notebooks by Christine Emberson for Scrapbook Adhesives by 3L

A Trio of Notebooks Step by Step

I purchased 3 inexpensive mini notebooks from a local store. Next, I measured and cut 6 pieces of patterned paper, this is for the front and back of each notebook. Affix the patterned paper into place with E-Z Runner Grand Refillable Dispenser. You can aapply edge to edge adhesive so no worries of the paper lifting.

A Trio of Notebooks by Christine Emberson for Scrapbook Adhesives by 3L

Use a nail file to sand the edges and this will also enable you to keep those attractive curved corners.

A Trio of Notebooks by Christine Emberson for Scrapbook Adhesives by 3L

Apply a little Distress Ink to the edges, I chose to use Old Paper.

A Trio of Notebooks by Christine Emberson for Scrapbook Adhesives by 3L

Using an eyelet setting tool, create a hole half way down the back cover of the notebooks and set a small eyelet. Thread a double length of thin elastic through the hole. Measure the elastic beforehand so that the loop slots around the notebook firmly.

A Trio of Notebooks by Christine Emberson for Scrapbook Adhesives by 3L

Secure the two elastic ends in place with Extreme Double-Sided Tape 1/2 inch. You don’t want these to move so you need this excellent tape to guarantee a firm grip.

A Trio of Notebooks by Christine Emberson for Scrapbook Adhesives by 3L

To hide the elastic ends secure down a page with Crafty Power Tape. Carry out this procedure for all three notebooks.

A Trio of Notebooks by Christine Emberson for Scrapbook Adhesives by 3L

Here is the finished trio. By switching out the patterned paper you can make them for many occasions.

A Trio of Notebooks by Christine Emberson for Scrapbook Adhesives by 3L

Thanks for stopping by and don’t forget to check out the great products on the website.
Christine

Creative Time: 25 Minutes
Skill Level: Beginner

Materials Needed
Scrapbook Adhesives by 3L®

E-Z Runner Grand Refillable Dispenser
Crafty Power Tape

HomeHobby by 3L®
Extreme Double-Sided Tape 1/2 inch

Other
Mini Notebooks; Patterned Paper (The Paper Tree – Lakeside Blooms); Distress Ink; Eyelet Setting Tool; Eyelets; Thin Elastic.

Pin It!

A Trio of Notebooks by Christine Emberson for Scrapbook Adhesives by 3L Pinterest Image

Visit our Website and Blog!
Sign up for our Newsletter so you never miss a contest or giveaway!

instagram purple icon facebook icon purple pinterest purple icon twitter purple icon YouTube icon blog subscription purple icon

Patriotic Scrapbooking with Holographic Foil

Hi friends! Dana Tatar here today sharing a patriotic scrapbooking layout. What better way to remember the excitement of the July 4th holiday than by adding extra sparkle to the page?! In addition to glittery embellishments, I use Metallic Transfer Foil in Holographic colors on chipboard fireworks.

Patriotic Scrapbooking with Holographic Foil by Dana Tatar for Scrapbook Adhesives by 3L

I just love the colorful shimmer and shine the Metallic Transfer Foil adds to my design! All the sheets of Metallic Transfer Foil are quick and easy to apply using Scrapbook Adhesives by 3L® products. No additional tools, gels, powders, or heat are required, which makes this process super fun.

Make Patriotic Scrapbooking Embellishments

Patriotic Scrapbooking with Holographic Foil by Dana Tatar for Scrapbook Adhesives by 3L

To begin, I adhered the base layers of patriotic patterned paper with the E-Z Runner® Grand Refillable Dispenser. Then I created layered embellishments for the page.

For additional texture, I stitched a couple of the larger patterned paper designs. Then I attached the starburst pieces to the layout with 3D Foam Circles.

Patriotic Scrapbooking with Holographic Foil by Dana Tatar for Scrapbook Adhesives by 3L

Smaller hand-cut embellishments can also create dimension. Attach small designs using Adhesive Dots Small and press firmly onto the center of the embellishment and curl up the edges.

Patriotic Scrapbooking with Holographic Foil by Dana Tatar for Scrapbook Adhesives by 3L

The patterned papers I used for this page have a matte finish. To add shimmer to my design, I selected shiny and glittery embellishments. I used Crafty Power Tape to secure the ribbon to the page. Ultra Thin Adhesive Dots are perfect for adhering plastic embellishments to all types of surfaces. They are nearly flat but strong enough to hold bulkier embellishments without extra height.

Add Foil to a Chipboard Die Cut

Patriotic Scrapbooking with Holographic Foil by Dana Tatar for Scrapbook Adhesives by 3L

Prepare the chipboard firework for foiling. First, apply a layer of adhesive using a 12×12 Adhesive Sheet. Next, place the silver foil onto the adhesive surface and gently rub with a finger. To finish, peel away to reveal the foiled embellishment. Holographic Metallic Transfer Foils add colorful shine and dazzling luster to any adhesive surface.

Thanks for stopping by today!
~Dana

Creative Time: 60 minutes
Skill Level: Intermediate

Materials Needed
Scrapbook Adhesives by 3L®
Adhesive Sheets 12×12 Inch
Metallic Transfer Foil Sheets Holographic
Adhesive Dots Medium Ultra Thin
Adhesive Dots Small
Crafty Power Tape Dispenser 81ft
3D Foam Circles White Mix
E-Z Runner Grand® Refillable Dispenser

Other
Patterned Paper (Pink Paislee); Stickers (American Crafts); Chipboard (Creative Embellishments); Plastic Glitter Bow (American Crafts); Ribbon (Offray); Floss

Pin It!

Patriotic Scrapbooking with Holographic Foil by Dana Tatar for Scrapbook Adhesives by 3L Pinterest

Visit our Website and Blog!
Sign up for our Newsletter so you never miss a contest or giveaway!

instagram purple icon facebook icon purple pinterest purple icon twitter purple icon YouTube icon blog subscription purple icon

Sparkling 4th of July Card Tutorial

Hi everyone, it’s Lisa Adametz guest blogging today. I’m so happy to share with you my Sparkling 4th of July card. If you’ve seen my previous posts, you may notice that I have a love for all things red, white and blue, including our beautiful flag. Enjoy my tutorial on how I used the 3D Foam Stars to create my card.

Sparkling 4th of July Card Tutorial by Lisa Adametz for Scrapbook Adhesives by 3L

Sparkling 4th of July Card Steps

To create a textured background, I embossed white cardstock with a stars embossing folder.

Sparkling 4th of July Card Tutorial by Lisa Adametz for Scrapbook Adhesives by 3L

I’m using 3D Foam Stars  from the 3D Foam Holiday Embellishment Kit, which also includes Red, Blue and Silver Foil sheets. Starting with the large nested star, remove one liner and add red, blue or silver foil. To do this, place the foil sheet on the exposed adhesive with the pretty sided color facing up. Then rub gently all over the shape to transfer the foil and peel it off. For extra sparkle, apply a very fine glitter onto the inner portions of the largest star. Make sure to burnish and remove excess glitter.

Sparkling 4th of July Card Tutorial by Lisa Adametz for Scrapbook Adhesives by 3L

Sparkling 4th of July Card Tutorial by Lisa Adametz for Scrapbook Adhesives by 3L

Sparkling 4th of July Card Tutorial by Lisa Adametz for Scrapbook Adhesives by 3L

Sparkling 4th of July Card Tutorial by Lisa Adametz for Scrapbook Adhesives by 3L

Creating the Sparkling Stripes

For the stripes, I like to use Crafty Power Tape. Lay out the tape strips  across the textured card panel. Cut the excess ends and burnish it to the panel. Remove the liner and add Metallic Transfer Foil or glitter onto the tape stripes.


Sparkling 4th of July Card Tutorial by Lisa Adametz for Scrapbook Adhesives by 3L

Sparkling 4th of July Card Tutorial by Lisa Adametz for Scrapbook Adhesives by 3L

Next, carefully apply the stars to the card front. Use either tweezers or the tip of a pair of scissors to retail the shapes.

Now adhere the card front to a slightly larger layer of blue cardstock. My very favorite adhesive is the E-Z Runner® Ultra Strong Refillable Dispenser. Wrap the right side of the piece with twine at this point.

Sparkling 4th of July Card Tutorial by Lisa Adametz for Scrapbook Adhesives by 3L

Die-cut the letters USA from 3D Foam Creative Sheets Small White. Use the blue foil from the 3D Foam Holiday Embellishment Kit to foil the letters. Now adhere the letters to the card.

Sparkling 4th of July Card Tutorial by Lisa Adametz for Scrapbook Adhesives by 3L

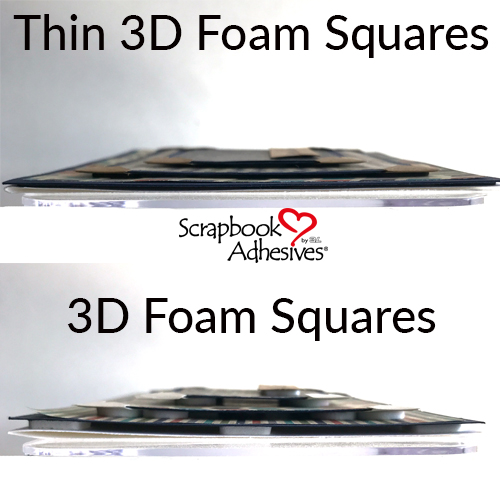
Next die-cut patterned paper and adhere it to cover the card base. Apply Thin 3D Foam Squares White Mix to the back of the blue cardstock. Adhere the entire blue piece (with stars on the front) offset to the bottom and right side of the card base.

Sparkling 4th of July Card Tutorial by Lisa Adametz for Scrapbook Adhesives by 3L

Thank you for having me! I wish you all a safe and happy sparkling Independence Day!
Lisa

Creative Time: 45 minutes
Skill Level: Intermediate

Materials Needed
Scrapbook Adhesives by 3L®
E-Z Runner® Ultra Strong Refillable Dispenser
3D Foam Holiday Embellishment Kit
3D Foam Creative Sheets Small White
Crafty Power Tape 81 ft.
Thin 3D Foam Squares White Mix

Pin It!

Sparkling 4th of July Card Tutorial by Lisa Adametz for Scrapbook Adhesives by 3L

Visit our Website and Blog!
Sign up for our Newsletter so you never miss a contest or giveaway!

instagram purple icon facebook icon purple pinterest purple icon twitter purple icon YouTube icon blog subscription purple icon

Easy to Make Erasable Calendar

Hi everyone! Judy here today to share an easy to make Erasable Calendar using the Self-Laminating Pouches – Card X-Large. I found a fast and easy way to keep track of doctors’ appointments. This could also work as a meal planner! The solution lies in the Self-Laminating Pouches from HomeHobby by 3L®!

Erasable Calendar by Judy Hayes for Scrapbook Adhesives by 3L

I’ve been helping my parents as my mom is recovering from a back injury. With all the therapy, doctor and other appointments, it’s been hard to keep track of it all. I made this erasable calendar to display on the refrigerator. Now we can see all the appointments in one place.

Self-Laminating Pouches are easy to write on with dry erase markers. I made it double-sided so we can see four weeks. I made smaller calendar for myself to keep at home as a reminder of each day. WIN WIN!

Erasable Calendar by Judy Hayes for Scrapbook Adhesives by 3L
Front sides of Erasable Calendars

Making the Erasable Calendar

To start, choose a double-sided patterned paper for a background and cut it 8.5 x 11 inches to fit inside the X-Large Self-Laminating Pouches. Cut a 6.75 x 9 inch paper in a contrasting color for a mat, one for each side. For the days of the week, use a piece of white cardstock cut to 6.25 x 8.5 inches.

Next, draw the dividing lines and handwrite the days of the week. Round all the corners with a corner rounder punch. Alternately, you could design this part on the computer and print it. Secure the both sides’ layers back to back, with the E-Z Runner® Ultra Refillable Dispenser.

Using Self-Laminating Pouches

Place the calendar pages into one X-Large Self-Laminating Pouch. Remove the narrow strip of the liner near the hinge. Center the calendar in the pouch and press the top edge against exposed adhesive. Then gradually remove the remaining liner and press the adhesive side of pouch against the calendar. I use a bone folder to firmly press it along all the edges.

Watch this video to see how to use the Self-Laminating Pouches:

It’s so fun to see the calendar enclosed in Self-Laminating Pouches! To hang it on the refrigerator punch holes in top corners and add a cord for hanging. To complete the calendar, add a dry erase marker and clips. Now it’s ready to keep the family organized!

I made a smaller calendar in the same way, using the Medium Self-Laminating Pouches. The only other difference is that I didn’t use a mat to save space.

Erasable Calendar by Judy Hayes for Scrapbook Adhesives by 3L
Reverse sides of Erasable Calendars

Thanks for visiting!
Judy

Creative Time: 45 Minutes
Skill Level: Beginner

Materials Needed
Scrapbook Adhesives by 3L®
E-Z Runner® Ultra Refillable Dispenser
E-Z Runner® Ultra Refill

Home Hobby by 3L®
Self-Laminating Pouches – Cards X-Large
Self-Laminating Pouches – Cards Medium

Other
Jillibean Soup “Bowl of Dreams” Collection; White Cardstock; Cord; 1/4 Corner Punch

Pin It!

Erasable Calendar by Judy Hayes for Scrapbook Adhesives by 3L

Visit our Website and Blog!
Sign up for our Newsletter so you never miss a contest or giveaway!
instagram purple icon facebook icon purple pinterest purple icon twitter purple icon YouTube icon blog subscription purple icon

With A Click 12 x 12 Page and DIY Foil Accents

Hey there, Latrice Murphy here today guest designing! I am sharing a fun Summer page with some DIY foil accents for a bold look. The weather is still very unpredictable here in the Midwest. I love revisiting photos so I pulled out some great images from my business shoot last Summer in Colorado.

When choosing colors for this layout I went bold and pulled colors from the photo. Loved the blues and golds. I love to mix solids with patterns and adding small embellishments to accent.

With a Click Scrapbook Page and DIY Foil Accents by Latrice Murphy for Scrapbook Adhesives by 3L

Creating DIY Foil Accents

Begin the page by creating a sunburst from cardstock and use it as a template. Using that template, I cut the sunburst patterns from the 3D Foam Creative Sheets Medium White. Just peel off one side and place it onto your Metallic Transfer Foil Gold Holographic Sheet. Rub, rub, rub and done! I totally recommend this DIY Foil Accents technique! It’s so amazing and a fast way to add interest. These 3D Foam Creative sheets are perfect for die cutting also.

With a Click Scrapbook Page and DIY Foil Accents by Latrice Murphy for Scrapbook Adhesives by 3L

With a Click Scrapbook Page and DIY Foil Accents by Latrice Murphy for Scrapbook Adhesives by 3L

With a Click Scrapbook Page and DIY Foil Accents by Latrice Murphy for Scrapbook Adhesives by 3L

With a Click Scrapbook Page and DIY Foil Accents by Latrice Murphy for Scrapbook Adhesives by 3L

To complete the page, I layered one 4 x 4-inch photo with a 4 x 6-inch photo and lift one side with a few 3D Foam Squares. For my wood veneer cameras, I used a little bit of the E-Z Dots® Permanent and foiled on top for more sparkle. Add a couple cardstock stickers and chipboard letters for the title.

With a Click Scrapbook Page and DIY Foil Accents by Latrice Murphy for Scrapbook Adhesives by 3L

With a Click Scrapbook Page and DIY Foil Accents by Latrice Murphy for Scrapbook Adhesives by 3L

This was a fun layout to create! The 3D Foam Creative Sheets Medium White are so fun to work with and who doesn’t love the Metallic Transfer Foil Sheets Holographic!

Thanks for stopping by today. Go out and create.
– Latrice

Creative Time: 60 minutes
Skill Level: Intermediate

Materials Needed
Scrapbook Adhesives by 3L®
E-Z Dots® Permanent Refillable Dispenser
3D Foam Creative Sheets Medium White
Metallic Transfer Foil Sheets Holographic Colors
3D Foam Squares Mix White

Other
Solid Cardstock (American Crafts); Patterned Paper and Chipboard Stickers (Pink Paislee); Wood Veneer and Sequins (Studio Calico); Camera Paper Clip

Pin It!

With a Click Scrapbook Page and DIY Foil Accents by Latrice Murphy for Scrapbook Adhesives by 3L

Visit our Website and Blog!
Sign up for our Newsletter so you never miss a contest or giveaway!
instagram purple icon facebook icon purple pinterest purple icon twitter purple icon YouTube icon blog subscription purple icon