You are in our US store • Switch to Europe store

Little White Church Holiday Decor

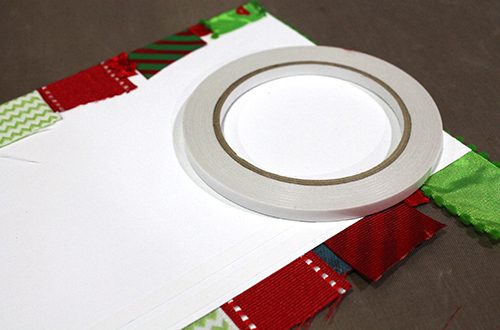
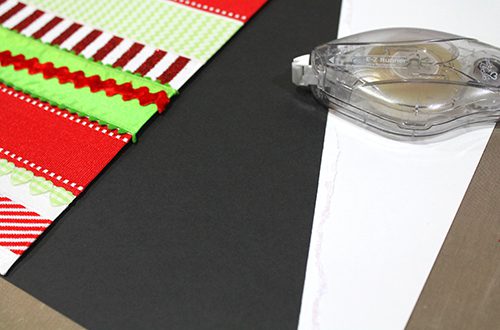
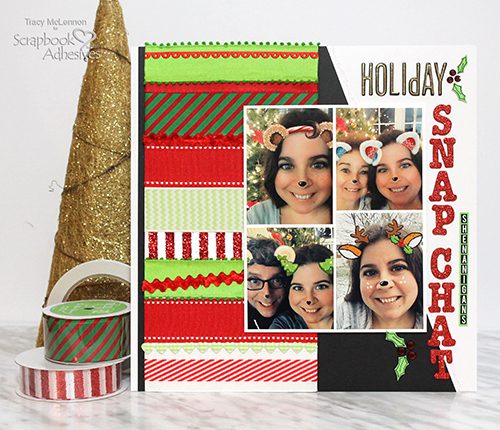
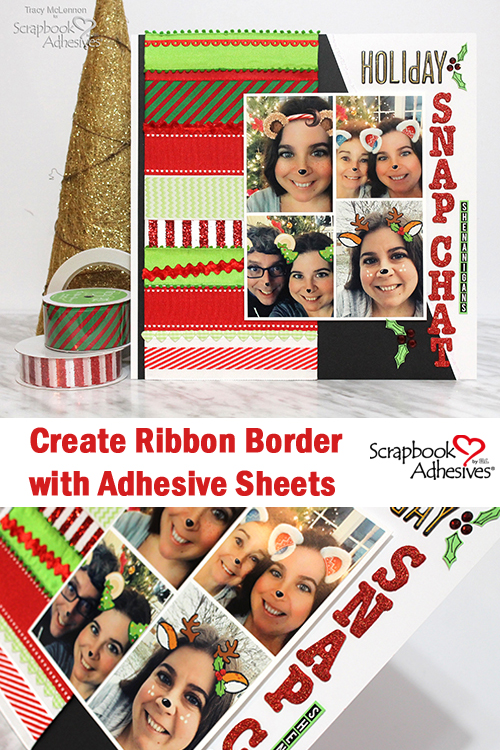
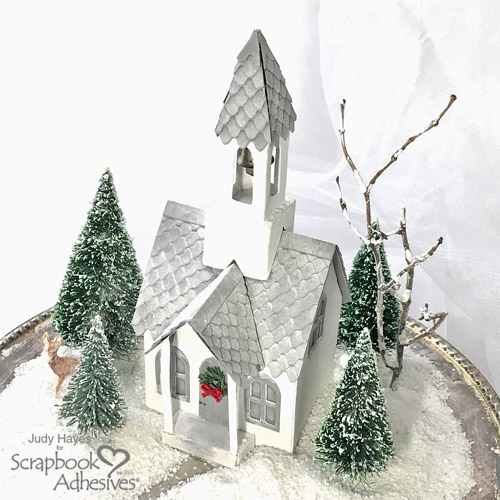
Looking to add a little something to your winter home decor? This Little White Church Holiday décor piece is a great addition! It’s festive for the holiday season but can stay up beyond as a winter decoration.  To assemble the church structure, I used Extreme Double-Sided Tape ¼ in and Extreme Double-Sided Tape ⅛ in. But I used Adhesive Sheets 4 x 6 inch to make the shingle layers easy – isn’t stunning? Loved how it turned out!

Little White Church Holiday Decor by Judy Hayes for Scrapbook Adhesives by 3L

Making the Church

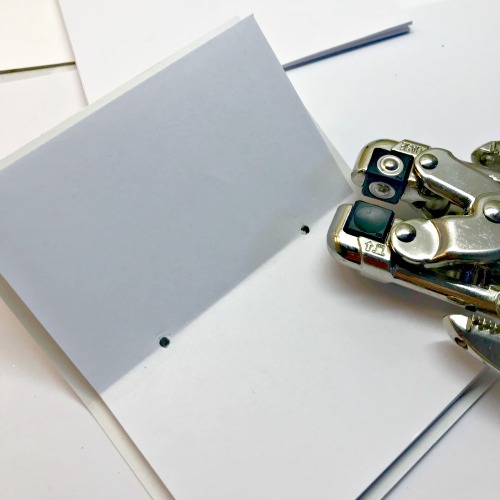
I used heavy cardstock in Kraft in my stash and painted it with white gesso. To cut this step out, use heavy white cardstock.

Little White Church Holiday Decor by Judy Hayes for Scrapbook Adhesives by 3L

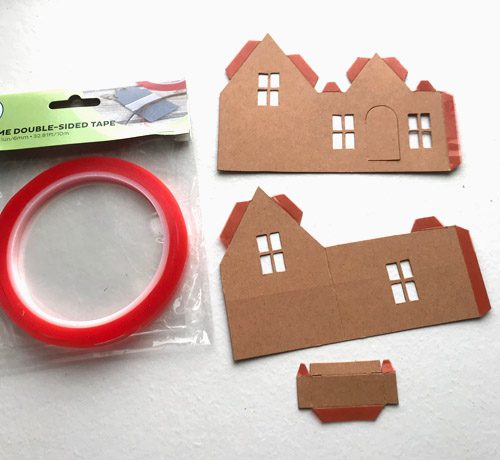
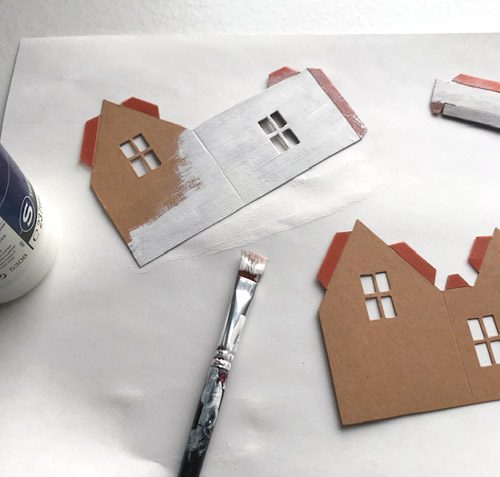
But before painting the pieces, I applied Extreme Double-Sided Tape ¼ in onto the tabs of church pieces. For the tabs on the steeple, Extreme Double-Sided Tape ⅛ in was used because they are very small and narrow. Then paint all the pieces with two coats of white gesso and set aside to dry.

Little White Church Holiday Decor by Judy Hayes for Scrapbook Adhesives by 3L

It’s all in the Details

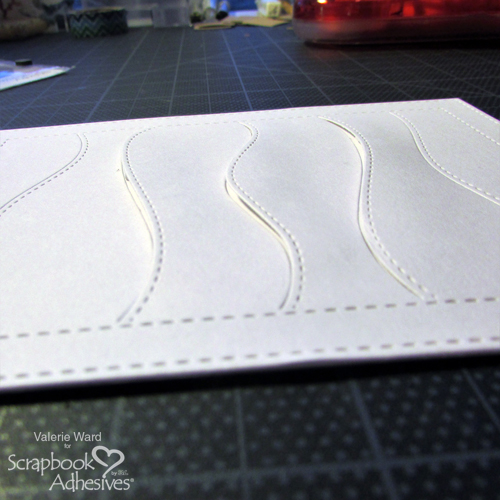
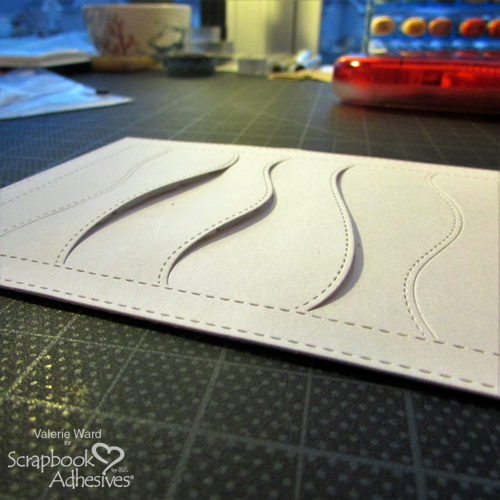
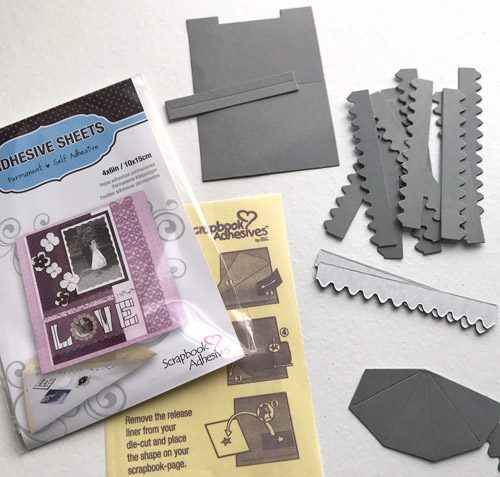
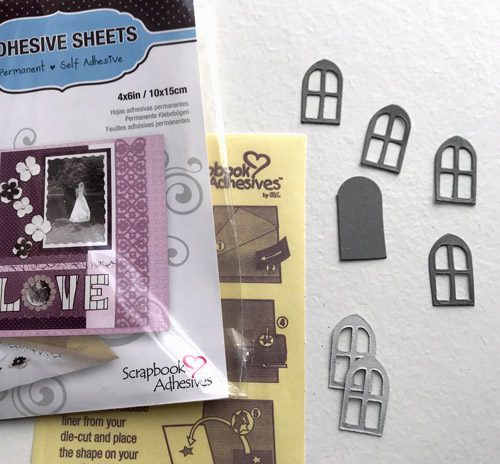
Apply Adhesive Sheets 4 x 6 inch to the back of gray cardstock. Then, die-cut all the roof pieces, windows, and door.

Little White Church Holiday Decor by Judy Hayes for Scrapbook Adhesives by 3L

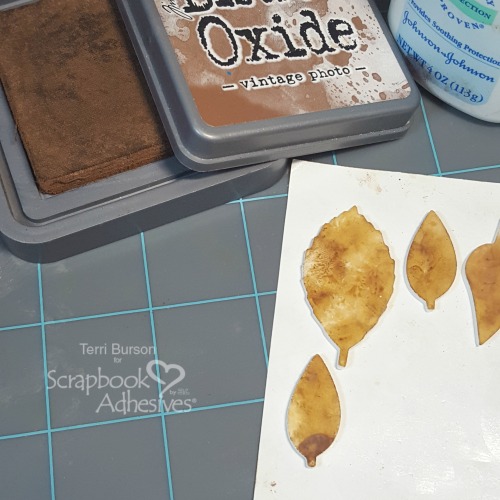
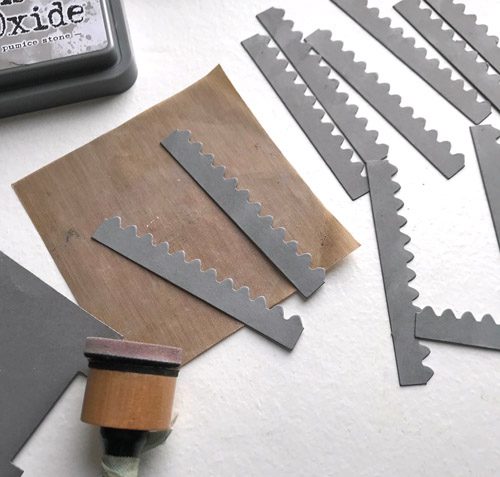
To add a variation of color and interest to the roof shingles, use an ink tool to ink along the edges with Distress Oxide ink.

Little White Church Holiday Decor by Judy Hayes for Scrapbook Adhesives by 3L

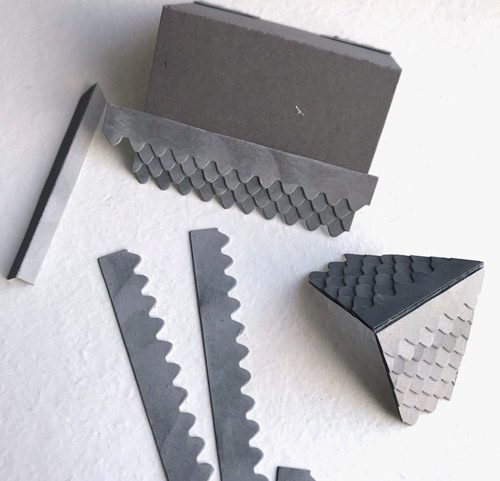
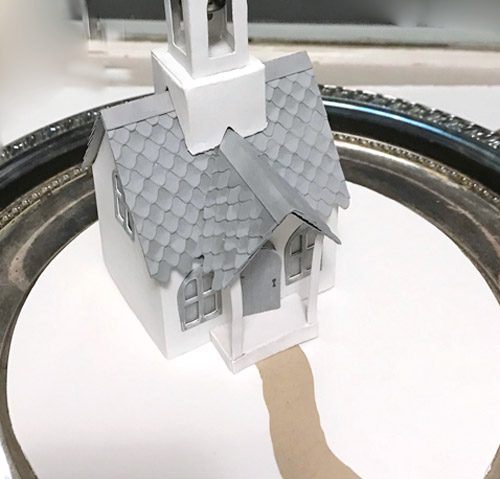
To create the roof, overlap each layer and trim the edges as needed. Using Adhesive Sheets on the back made it so easy – just press in place!

Repeat the same process for steeple roof. Make sure to trim along an angle of each section. Because the shingle pieces near the point are so small, I recommend using Extreme Double-Sided Tape ⅛ in.

Little White Church Holiday Decor by Judy Hayes for Scrapbook Adhesives by 3L

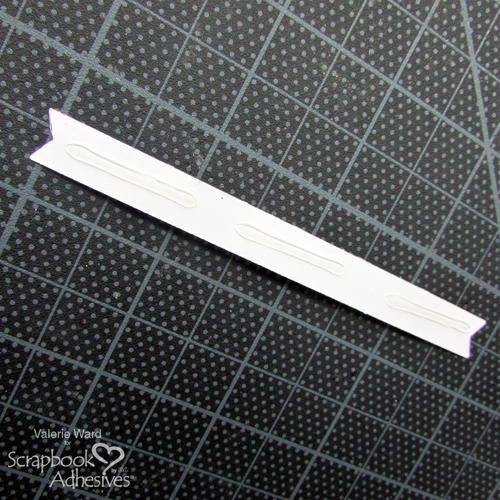
Fasten a ridge strip to the peak.  On each ridge strip, I applied 2 strips of Extreme Double-Sided Tape ¼ in for a secure hold.

All windows were fastened before the church was assembled.  So easy with Adhesive Sheets 4 x 6 inch on the back to simply remove adhesive backing and press window frame in place.

Little White Church Holiday Decor by Judy Hayes for Scrapbook Adhesives by 3L

Cut translucent vellum to fit behind each window and the door. Fastened with E-Z Runner® Micro Refillable Dispenser. Its narrow adhesive strip fit well along the tiny windows.

Assembling the Church

To assemble the little white church, remove the backing from Extreme Double-Sided Tape on the tabs and press the ends together. Next, work on the roof tabs by pressing them in place to the church walls. Then the step and corner posts are fastened. Assemble the steeple without its roof and fastened to the church. Thread a small bell with string and hang in the steeple roof before it was placed on the steeple.

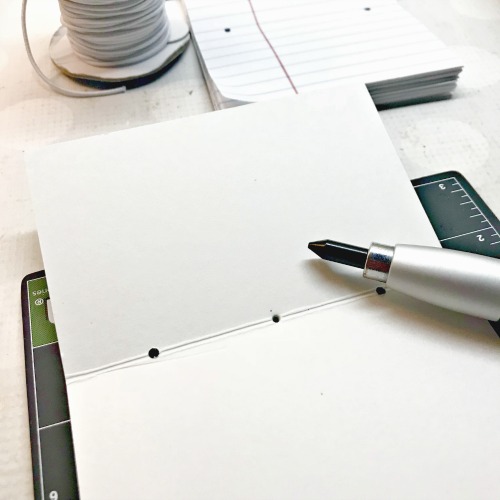
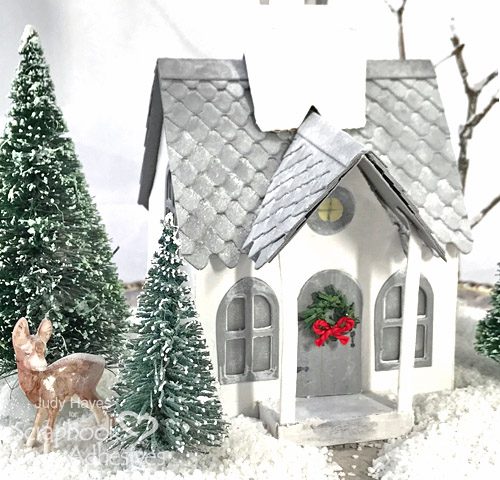
The little hinges and door handle on the door were hand drawn with a fine tip black marker. Wrap a pine twine around a tool handle to make a wreath.  Using the Adhesive Dots Micro twice, first the tiny bow on the wreath and then, the wreath is fastened to the door. Dry brush the white gesso onto vellum in windows and its frames to look like frost and snow.

Making a Scene

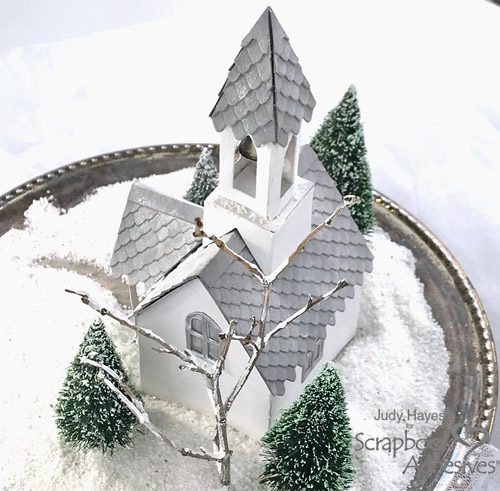
The little white church sits on a white foam core board circle. To achieve this, I traced around a 7-inch plate (to fit my tray) and cut foam core board with a craft knife. Using a light tan cardstock, I cut a “path” and fastened it to the foam core with E-Z Runner® Micro Refillable Dispenser.

Little White Church Holiday Decor by Judy Hayes for Scrapbook Adhesives by 3L

After I was happy with the placement of the trees, I fastened them in place with Adhesive Dots Ultra Thin.  A real tree branch was used to create a bare tree. Randomly paint white gesso on the branches and sprinkled glitter on it to look like snow.  For the “snow” on the pine trees, I achieved this look repeating the same process with the bare tree.

Once everything was arranged, white sand was spread over the foam core base and a little over the church. A powdery residue layer of sand added a dusty snowy look to the roof. A battery tea light can be placed inside the church by simply lifting it.

Little White Church Holiday Decor by Judy Hayes for Scrapbook Adhesives by 3L

This project would be perfect for a table centerpiece because it looks good from all sides!

Little White Church Holiday Decor by Judy Hayes for Scrapbook Adhesives by 3L

Thanks so much for visiting!  I hope you enjoyed this Little White Church project!
Judy

Creative Time: 2-3 hour
Skill Level: Advanced

Materials Needed:
Scrapbook Adhesives by 3L®:
Adhesive Sheets 4 x 6 inch
E-Z Runner® Micro Refillable Dispenser
Adhesive Dots Micro
Adhesive Dots Ultra Thin

HomeHobby by 3L®
Extreme Double-Sided Tape ⅛ in
Extreme Double-Sided Tape ¼ in

Other Supplies: Kraft 100 lb. cardstock; Worldwin Gray Cardstock; Ranger Distress Oxide Pumice Stone ink; Sizzix Village Dwelling, Village Bell Tower, Village Roof Tops dies; Tim Holtz Tiny Bells, Pine Twine, Decorative Deer; White Gesso; Red Pearl Cotton; Little Pine Trees; Tree Branch and Air Dry Clay; Martha Stewart Crystal Glitter, White Foam Core Board

Pin It!

Little White Church Holiday Decor by Judy Hayes for Scrapbook Adhesives by 3L Pinterest

Visit our Website and Blog!
Sign up for our Newsletter so you never miss a contest or giveaway!

instagram purple icon facebook icon purple pinterest purple icon twitter purple icon YouTube icon blog subscription purple icon

Christmas Wreath Card and Gift Tag Set

Can you believe Christmas is a little over a month away? Now it the time to start working on your holiday cards!

I’ve got a fun card to share with you today. I’ll also give the scoop on how to make a matching gift tag to go with it. This little ensemble came together quickly and easily with products from Scrapbook Adhesives by 3L.

Christmas Wreath Card and Gift Tag Set by Teri Anderson for Scrapbook Adhesives by 3L

Creating the Wreath

The most time-consuming part of making both the card and tag was creating the wreaths but it adds an impact. I think you will agree.

Christmas Wreath Card and Gift Tag Set by Teri Anderson for Scrapbook Adhesives by 3L

Began by making the green paper I created the wreaths with. It was so easy! I simply brushed watercolor markers onto watercolor paper and then spread the color with a wet paintbrush.

Once the panel was dry, I adhered it to one of the 3D Foam Creative Sheets so that I could die-cut the wreaths from it. These sheets are perfect for die-cutting elements to use on cards and scrapbook pages as the foam gives die-cuts a little bit of pop.

Christmas Wreath Card and Gift Tag Set by Teri Anderson for Scrapbook Adhesives by 3L

I also adhered some red cardstock to one of the 3D Foam Creative Sheets and die-cut the bow and berries from it. Now, those berries are pretty small. Rather than picking them up with my fingers, I used a paper piercing tool to move them from the sheet to my wreaths.

Completing the Card and Tag

Once I completed my wreaths, I built both the card and the tag around them. To make the wreaths to stand out, I felt the best way was to let one wreath be the “o” in joy and the other be “o” in Noel.

I adhered the wreaths to the card and tag and then stamped letters to each side of  the wreaths. (Don’t have any letter stamps? Consider using letter stickers instead!)

Christmas Wreath Card and Gift Tag Set by Teri Anderson for Scrapbook Adhesives by 3L

Then I simply embellished the card and tag with some additional pieces of paper and twine. I also added some small foam balls that reminded me of snow. I adhered them to the card and tag with some of Adhesive Dots Micro. These dots are perfect for holding small embellishments to cards, scrapbook pages, and tags.

Christmas Wreath Card and Gift Tag Set by Teri Anderson for Scrapbook Adhesives by 3L

I hope you enjoyed checking out this card and tag set! Would love to see your Christmas cards and tags. Please leave a link to your Christmas projects in the comments so I can leave you a little love!

Creative Time: 1 hour
Skill Level:
Beginner

Materials Needed:
Scrapbook Adhesives by 3L®:
E-Z Runner Refillable Grand Dispenser
3D Foam Creative Sheets
Adhesive Dots Micro

Other:
Driving to the Holidays stamp set from Flora & Fauna; Big Timber Outline Uppercase stamp set by Technique Tuesday; Mini Wreath die by Lawn Fawn; White foam balls from Dollar Tree; Zig Clean Color Real Brush Markers by Kuretake; Watercolor paper; White and Black cardstock; Patterned papers by Carta Bella & Doodlebug Design; Twine; Black ink pad

Pin It!

Pinterest Christmas Wreath Card and Gift Tag Set by Teri Anderson for Scrapbook Adhesives by 3L

Visit our Website and Blog!
Sign up for our Newsletter so you never miss a contest or giveaway!

instagram purple icon facebook icon purple pinterest purple icon twitter purple icon YouTube icon blog subscription purple icon

Pom Pom Branches with Adhesive Dots

Hi friends! Dana Tatar here today sharing a fun Christmas craft tutorial – pom pom branches. I’m always looking to add a bright pop of color to my décor, especially during the Winter months when the weather is a bit gray. This project accomplishes just that!

Pom Pom Branches DIY Christmas Decorations Tutorial

I created this colorful décor piece in under 30 minutes using just three items. This decoration reminds me of the colored lights that I love so much, but it doesn’t require any electricity! And there is just something about pom poms that brings out my inner child. I had a little too much fun with this craft!

How to Create Pom Pom Branches

How to Decorate for Christmas with Pom Poms and Adhesive Dots

Step 1. Gather a colorful mix of pom pom embellishments in various sizes. I purchased a variety bag that contained different colors and sizes.

Step 2. Apply an Adhesive Dot to a pom pom, peel off the clear liner, and press onto a branch. Repeat until the branch is full.

Designer Note: I used Medium and Large Adhesive Dots to apply the pom poms shown above to the branches. I also used Small Adhesive Dots and Adhesive Lines to position and hold individual twigs into a more pleasing arrangement.

I decorated these branches for the Christmas holiday, but this project can be easily adapted to any holiday or décor style by simply changing the color of the pom poms. Try painting the branches for an added pop of color. I started this project with black branches and spray painted them white for a frosty finish.

Thanks for stopping by today!
~Dana

Creative Time: 30 Minutes
Skill Level: Beginner

Materials Needed

Scrapbook Adhesives by 3L®:
Adhesive Dots Small, Medium, and Large
Adhesive Lines

Other: Pom Poms; Branches; White Spray Paint

Pin It!

Pinterest Pom Pom Branches DIY Christmas Decor

More Christmas Décor Ideas

Looking for more Christmas décor ideas? Check out these inspiring projects!

Autumn Recipe Mini Tag Album

Hello crafters.  Terri here, and today I’m sharing this Autumn Recipe Mini Tag Album.    This is perfect for sharing those favorite Thanksgiving recipes with family and friends.  I’ll be showcasing a couple featured embellishments as well so pull up a chair and gather ’round!

Autumn Recipe Mini Tag Album by Terri Burson for Scrapbook Adhesives by 3L

Creating Recipe Memories

I hope you had a wonderful Thanksgiving!  In our house, someone always brings a dish that has everyone scrambling for the recipe.  Gather those recipes together and put them in an album such as the one I’ve created today.   You could have this ready for next year, with your guests adding their recipe to the pages, or gift this post-holiday!

Autumn Recipe Mini Tag Album by Terri Burson for Scrapbook Adhesives by 3L

Add Handmade Seasonal Elements

For my first embellishment, I’m featuring the 3D Foam Leaves.  I have a process video below which shows you how to use baby powder to take off the top layer of adhesive.  You will also learn how I used distress oxide inks to color my leaves.  It’s so much fun, quick and super easy.

Autumn Recipe Mini Tag Album by Terri Burson for Scrapbook Adhesives by 3L

Autumn Recipe Mini Tag Album Video

My second embellishment is this 3D pop up pumpkin.   I rely on my E-Z Runner® Grand Refillable Dispenser with E-Z Runner® Grand Ultra Strong Refill cartridge inserted, to seal my die cuts together. This is my go-to duo for that added level of security.  You’ll find the assembly process in the video as well.

Autumn Recipe Mini Tag Album by Terri Burson for Scrapbook Adhesives by 3L

There are so many people in my life that would love this as a special family gift.  Recipes are a part of our heritage and food brings us together.  What better gift, than to share a loving memento featuring those favorite family dishes?

Autumn Recipe Mini Tag Album by Terri Burson for Scrapbook Adhesives by 3L

Next year, bring this album out and use it as a display piece.  Have extra recipe tags ready, to add more family recipes!

Autumn Recipe Mini Tag Album by Terri Burson for Scrapbook Adhesives by 3L

I hope you have the best holiday season ever!  Preserve those memories.  When it’s all said and done, memories are what we leave behind.  So are the recipes!  Be sure and visit my blog, Waving My Wand, if you’d like links to the products that I’ve used today.  See you next time!  Terri

Creative Time: 45 minutes
Skill Level: Intermediate

Materials needed:
Scrapbook Adhesives by 3L®:
3D Foam Leaves
E-Z Runner® Grand Refillable Dispenser
E-Z Runner® Grand Ultra Strong Refill

Other:
Carta Bella Paper, Brother Crafts Scan N Cut, Spellbinders Platinum Die Cut Machine, Umbrella Crafts Jumbo Nesting Tag Dies, daubers, scissors, baby powder,  May Arts Ribbon, Ranger Ink

Pin It!

Autumn Recipe Mini Tag Album by Terri Burson for Scrapbook Adhesives by 3L Pinterest

Visit our Website and Blog!
Sign up for our Newsletter so you never miss a contest or giveaway!

instagram purple icon facebook icon purple pinterest purple icon twitter purple icon YouTube icon blog subscription purple icon

3D Foam Leaves Thanksgiving Card

Happy Thanksgiving, everyone! Yvonne here sharing a card just for the occasion, using 3D Foam Leaves with lots of glitters. The veins on the leaves are so easy to create and make your leaves look oh so pretty!

3D Foam Leaves Thanksgiving Card by Yvonne van de Grijp for Scrapbook Adhesives by 3L

Thanksgiving Card Base

Simply mount a piece of kraft panel to a patterned cardstock panel and then onto a white card base, using the E-Z Runner® Grand refillable Dispenser to adhere all the layers.

Die-cut the swirled circle from gold cardstock and adhere onto the card base with 3D Foam Squares White Regular Size.

Stamp the sentiment with brown ink upon a piece of white cardstock and then die-cut and emboss with a circle shape.  Adhere it to the card base using 3D Foam Squares White Regular Size.

Glittered Fall Leaves

Remove the top liner from one of the 3D Foam Leaves. Place pieces of brown twine on top of the leaves to create the veins. Cut excess parts with scissors.

3D Foam Leaves Thanksgiving Card by Yvonne van de Grijp for Scrapbook Adhesives by 3L

Sprinkle glitter on of the “vein” and leaf. Gently rub the glitter using your fingers to secure. If you use small amounts of glitter in different colors, you can create a beautiful multiple colored fall leaf.

3D Foam Leaves Thanksgiving Card by Yvonne van de Grijp for Scrapbook Adhesives by 3L

Repeat to make as many leaves as you need to use on your card.

3D Foam Leaves Thanksgiving Card by Yvonne van de Grijp for Scrapbook Adhesives by 3L

Adhering the 3D Foam Leaves to the card is super easy! Simply lift the glittered leaf from the sheet and place onto the card (yep, because it’s self-adhesive!).

3D Foam Leaves Thanksgiving Card by Yvonne van de Grijp for Scrapbook Adhesives by 3L

Final Touches

Now finish your card by adding some mulberry flowers, berries and a bow to the card using Adhesive Dots Medium. Lastly, add a satin bow and some extra accents like adhering rhinestones.

And voila…your card is finished! Wishing you happy crafting and a happy Thanksgiving, Yvonne

3D Foam Leaves Thanksgiving Card by Yvonne van de Grijp for Scrapbook Adhesives by 3L

Creative Time: 40 minutes
Creative Skill: Intermediate

Materials needed:
Scrapbook Adhesives by 3L®:

3D Foam Leaves
E-Z Runner® Grand Refillable Dispenser
Adhesive Dots Medium
3D Foam Squares White Regular Size

Other Supplies:
Edged Dies: Spellbinders® Paper Arts (Miss you Swirl by Marisa Job, Standard Circles Small, Platinum 6 Die-cutting and Embossing Machine), Stamp: Quietfire Design (Give Thanks), Glitter (Red, Gold, Soft Green, Dark Green, Copper), Mulberry Flowers, Berries, Satin Bow, Rhinestones, Twine, Paper Trimmer, Tweezers

Pin It!

Pinterest 3D Foam Leaves Thanksgiving Card by Yvonne van de Grijp for Scrapbook Adhesives by 3L

Visit our Website and Blog!
Sign up for our Newsletter so you never miss a contest or giveaway!

instagram purple icon facebook icon purple pinterest purple icon twitter purple icon YouTube icon blog subscription purple icon

Glorious Ribbon Border using Adhesive Sheets

Hello scrappy friends, Tracy here and today I have a fun texture filled ribbon border layout tutorial to share. I don’t know about you, but I just love everything about Christmas layouts. It’s so easy to add a little sparkle, fun colours and like this layout lots of texture with ribbon. Confession: I am a ribbon hoarder. I just can’t get enough. SO this layout digs into my stash of holiday ribbon to create a colourful festive border.

Glorious Ribbon Border using Adhesive Sheets by Tracy McLennon for Scrapbook Adhesives by 3L

Creating the Ribbon Border

Start by gathering your ribbon, a 6×12 piece of white cardstock, Premium Double-Sided Tape 1/4in and an Adhesive Sheet 6×12 Inch.

Glorious Ribbon Border using Adhesive Sheets by Tracy McLennon for Scrapbook Adhesives by 3L

Cut the ribbon pieces to about 8″ long. Attach the Adhesive Sheet 6×12 Inch to the white cardstock.

Glorious Ribbon Border using Adhesive Sheets by Tracy McLennon for Scrapbook Adhesives by 3L

Attach the pieces of ribbon to the 6×12 cardstock, the Adhesive Sheet 6×12 Inch keeps each piece in place nicely.

Glorious Ribbon Border using Adhesive Sheets by Tracy McLennon for Scrapbook Adhesives by 3L

On the back side of the white cardstock, add a strip or two of the Premium Double-Sided Tape 1/4in. Then fold the ribbon ends around the cardstock attaching them in back. Can you see the start of a ribbon border?

Glorious Ribbon Border using Adhesive Sheets by Tracy McLennon for Scrapbook Adhesives by 3L

Using the E-Z Runner® Ultra Strong Refillable Dispenser, I adhered the ribbon border to a piece of 12×12 black cardstock, leaving a small border on the left side. Then cut diagonally from the top, down to the bottom right-hand corner. I also added a torn strip of white cardstock along that diagonal edge. Adhere this entire piece to a full sheet of white cardstock. I added Stickles to the torn edge for a little extra sparkle.

Glorious Ribbon Border using Adhesive Sheets by Tracy McLennon for Scrapbook Adhesives by 3L

I matted my 4 mini prints with a single piece of white cardstock and adhered that to the layout using 3D Foam Squares White Regular Size.

Glorious Ribbon Border using Adhesive Sheets by Tracy McLennon for Scrapbook Adhesives by 3L

Next, I added the title using different letter stickers. Then added gems and hand cut holly leaves to accent.

Glorious Ribbon Border using Adhesive Sheets by Tracy McLennon for Scrapbook Adhesives by 3L

Glorious Ribbon Border using Adhesive Sheets by Tracy McLennon for Scrapbook Adhesives by 3L

Thanks so much for stopping by!
Tracy

Creative Time: 45 Minutes
Skill Level: Beginner

Materials needed:
Scrapbook Adhesives by 3L®:
Adhesive Sheets 6×12 Inch
E-Z Runner® Ultra Strong Refillable Dispenser
3D Foam Squares White Regular Size

HomeHobby by 3L®:
Premium Double-Sided Tape 1/4in

Pin It!

Glorious Ribbon Border using Adhesive Sheets by Tracy McLennon for Scrapbook Adhesives by 3L Pinterest

Dimensional Hillside Christmas Cards

Hi crafters! It’s Valerie here today with two Christmas cards to show how to add a dimensional hillside landscape on them with the help of our various adhesives.

Dimensional Hillside Christmas Cards by Valerie Ward for Scrapbook Adhesives by 3L

The two cards are very similar, but a little different, too. However, the way I used my Scrapbook Adhesives products on them is exactly the same.

Dimensional Hillside Christmas Cards by Valerie Ward for Scrapbook Adhesives by 3L

Step 1

The first step is to die cut your main pieces for the front of the card base. The large die is called a Hillside Cover die (it fits perfectly on an A2 sized card); I used it to die cut a piece of sparkly white cardstock. Then I used a thin banner die to die cut a regular piece of white cardstock for my sentiment to be stamped on.

Dimensional Hillside Christmas Cards by Valerie Ward for Scrapbook Adhesives by 3L

Step 2

Here is where I pull out my wonderful Foam Squares! To create the dimension I wanted, I used 2 different sets of Foam Squares: 3D Foam Squares White Mix and Thin 3D Foam Squares White Mix.

Dimensional Hillside Christmas Cards by Valerie Ward for Scrapbook Adhesives by 3L

I need both the thin AND the regular thicknesses of the Foam Squares because I wanted the hills to pop out gradually. You can see in this next photo how I applied the thicker ones (I cut them in half) in the center of the hills, and the thinner ones on the ends of the hills to bring the hill depth back down to a flat surface level. Then I used my E-Z Runner Grand Refillable Dispenser adhesive for the rest of the surface.

Dimensional Hillside Christmas Cards by Valerie Ward for Scrapbook Adhesives by 3L

In these next two photos, you’ll see the desired dimension I achieved (you might wonder why the cardstock isn’t sparkly; well, the original photos I took didn’t show up on my camera for some reason, so I re-did the step with regular white cardstock).

Dimensional Hillside Christmas Cards by Valerie Ward for Scrapbook Adhesives by 3L

Doesn’t that dimensional hillside look fun?!

Dimensional Hillside Christmas Cards by Valerie Ward for Scrapbook Adhesives by 3L

Step 3

In this next step, I need to adhere the little images down to the “hills.” I started this process thinking I would only need Adhesive Dots Micro3D Foam Squares White Mix, and Thin 3D Foam Squares White Mix.

Dimensional Hillside Christmas Cards by Valerie Ward for Scrapbook Adhesives by 3L

Here is where I quickly realized the Adhesive Dots Large would come in handy for the bigger areas on the backs of these images.

Dimensional Hillside Christmas Cards by Valerie Ward for Scrapbook Adhesives by 3L

On the back of the train’s motor unit image, I wanted to attach the train conductor, so I used  E-Z Dots Refillable Permanent Dispenser for this step.

Dimensional Hillside Christmas Cards by Valerie Ward for Scrapbook Adhesives by 3L

Here’s what she looks like after she’s attached on the back (so cute!).

Dimensional Hillside Christmas Cards by Valerie Ward for Scrapbook Adhesives by 3L

For attaching all the images, because of the different depths on the card front, I needed to use various adhesives. On this specific piece, even though it is small, I used 3 different adhesives: 3D Foam Squares White MixThin 3D Foam Squares White Mix, and Adhesive Lines.

Dimensional Hillside Christmas Cards by Valerie Ward for Scrapbook Adhesives by 3L

Step 4

The last piece to attach is the banner with a sentiment on it. I used Adhesive Lines for this.

Dimensional Hillside Christmas Cards by Valerie Ward for Scrapbook Adhesives by 3L

These three pieces worked perfectly.

Dimensional Hillside Christmas Cards by Valerie Ward for Scrapbook Adhesives by 3L

Here is the banner attached to the front of the card.

Dimensional Hillside Christmas Cards by Valerie Ward for Scrapbook Adhesives by 3L

The card is complete now, and in this image, you can see what the scene looks like, and how the images look after being placed on the dimensional hills:

Dimensional Hillside Christmas Cards by Valerie Ward for Scrapbook Adhesives by 3L

Card 1 Completed

The first card has Santa, elves, reindeer, and the train. I did not add sequins to this one.

Dimensional Hillside Christmas Cards by Valerie Ward for Scrapbook Adhesives by 3L

Card 2 Completed

On this second card, I chose to use only reindeer and multiple Santas. I also added a bunch of sequins with my Adhesive Dots Micro.

Dimensional Hillside Christmas Cards by Valerie Ward for Scrapbook Adhesives by 3L


Dimensional Hillside Christmas Cards by Valerie Ward for Scrapbook Adhesives by 3L

I hope you enjoyed, have a wonderful day, and Happy Crafting!
Valerie

Creative Time: 45 minutes per card
Skill Level: Beginner

Materials Needed:
Scrapbook Adhesives by 3L®:

E-Z Runner Grand Refillable Dispenser
E-Z Runner Permanent Strips Refill
3D Foam Squares White Mix
Adhesive Dots Micro
Thin 3D Foam Squares White Mix
E-Z Dots Refillable Permanent Dispenser
E-Z Dots Permanent Refill
Adhesive Dots Large
Adhesive Lines

Other Products Used: hillside etched die, mini Santa & reindeer stamps & coordinating dies, coloring medium & marker coloring paper, holiday sentiment stamp & sentiment banner die, sparkle cardstock, clear &/or white sequins, embossing ink, gold embossing powder, embossing heat tool, die cutting machine.

Save It to Pinterest!

Pinterest Dimensional Hillside Christmas Cards by Valerie Ward for Scrapbook Adhesives by 3L

Visit our Website and Blog!
Sign up for our Newsletter so you never miss a contest or giveaway!

instagram purple icon facebook icon purple pinterest purple icon twitter purple icon YouTube icon blog subscription purple icon

Holiday Place Card Tutorial

Hi everyone, Christine here today with a festive place card tutorial.  Adding a personalized touch to your holiday table is always nice but do you have time?  These are speedy makes so yes! Just what we want to hear.

Holiday Place Card Tutorial by Christine Emberson for Scrapbook Adhesives by 3L

Creating the Place Card Basics

Print name onto an ivory card using a printer. Align your chosen die and run through a die cutting machine.

Holiday Place Card Tutorial by Christine Emberson for Scrapbook Adhesives by 3L

Score across the middle of the die cut, this will create your folded place card. Using the die again, cut with gold mirror card. Slice in half and affix this behind with E-Z Runner® Permanent Strips Refillable Dispenser to create a small drop shadow.

Holiday Place Card Tutorial by Christine Emberson for Scrapbook Adhesives by 3L

Remove the top layer from 3D Foam Circles White Mix and sprinkle glitter, these make the perfect glitzy flower centers.

Holiday Place Card Tutorial by Christine Emberson for Scrapbook Adhesives by 3L

Die cut your flower and leaf set, affix the glittered 3D Foam Circle and use 3D Foam Squares White Regular Size for the back of the flower.

Holiday Place Card Tutorial by Christine Emberson for Scrapbook Adhesives by 3L

Again using the trusty 3D Foam Squares White Regular Size hold in place the gold twine.

Holiday Place Card Tutorial by Christine Emberson for Scrapbook Adhesives by 3L

Each finished place card adds an easy and speedy touch of elegance to your table.

Holiday Place Card Tutorial by Christine Emberson for Scrapbook Adhesives by 3L

Holiday Place Card Tutorial by Christine Emberson for Scrapbook Adhesives by 3L

Thanks for stopping by!
Christine

Creative Time: 30 Minutes
Skill Level: Intermediate

Materials Needed:
Scrapbook Adhesives by 3L®:

3D Foam Circles White Mix
3D Foam Squares White Regular Size
E-Z Runner® Permanent Strips Refillable Dispenser

Others:
Craft Dies: Spellbinders® Paper Arts (Callista Rectangle, Cinch and Go Poinsettia, and Foliage); Gold mirror cardstock; Ivory, red and green cardstock; Gold glitter; Gold twine; Computer Font or stamp for name

Pin It!

Pinterest Holiday Place Card Tutorial by Christine Emberson for Scrapbook Adhesives by 3L

DIY Christmas Mini Covered Notebook Tutorial

Hello and happy Saturday! Shellye McDaniel here with another quick and easy gift idea for your holiday exchanges: Mini Covered Notebooks!

DIY Christmas Mini Covered Notebook Tutorial by Shellye McDaniel for Scrapbook Adhesives by 3L

Covered Notebook Instructions

To begin I’m using wide-ruled notebook paper, a sheet of lightweight chipboard, a 6X6 paper pad, and embellishments. From Scrapbook Adhesives by 3L®: 3D Foam Holiday Embellishment KitAdhesive Sheets 12×12 inchExtreme Double-Sided Tape 1/4in, and Keepsake Envelopes.

DIY Christmas Mini Covered Notebook Tutorial by Shellye McDaniel for Scrapbook Adhesives by 3L

Started by taking several sheets of plain copy paper or notebook paper; roughly 15-20 sheets. Cut them in half to measure 8.5 x 5.5″. Now cut the sheets in half again so that they measure 4.25 x 5.5″.  Gather all of the papers into a stack and then fold in half to measure 4.25 x 3.75″.

DIY Christmas Mini Covered Notebook Tutorial by Shellye McDaniel for Scrapbook Adhesives by 3L

With a 4.75″ X 6″ piece of lightweight white chipboard, fold it in half to find the center. Next, place the paper stack on top of the chipboard and punch two holes along the center as shown above.

DIY Christmas Mini Covered Notebook Tutorial by Shellye McDaniel for Scrapbook Adhesives by 3L

Time to dress the cover of the chipboard. 6 x 6″ paper pads come in very handy for this! Cut the paper and Adhesive Sheet down to match the size of the chipboard.  Adhere the Adhesive Sheet to the chipboard, remove the yellow liner and then attach the paper to the adhesive.

DIY Christmas Mini Covered Notebook Tutorial by Shellye McDaniel for Scrapbook Adhesives by 3L

After punching the first two holes, I decided that I wanted an elastic closure. Use an eyelet punch to create a hole in the middle spine of the cover.  Thread through both ends of a piece of elastic and knot off before adding the pages to the book.

DIY Christmas Mini Covered Notebook Tutorial by Shellye McDaniel for Scrapbook Adhesives by 3L

Add the pages to the inside of the cover using twine inserted through all of the holes.

DIY Christmas Mini Covered Notebook Tutorial by Shellye McDaniel for Scrapbook Adhesives by 3L

Embellishing the Notebook

To the inside cover add one of the 2.5 x 4″ Keepsake Envelopes. This is a perfect spot to store stamps, business cards, gift cards, etc.

DIY Christmas Mini Covered Notebook Tutorial by Shellye McDaniel for Scrapbook Adhesives by 3L

A add a strip of the 1/4″ Extreme Double-Sided Tape to the edge of the cover, just above the Keepsake Envelope. You can add cute pom pom trim as I did.

DIY Christmas Mini Covered Notebook Tutorial by Shellye McDaniel for Scrapbook Adhesives by 3L

This adorable 3D snowman has been in my stash for some time and I thought he would be great on the cover. I embellished him further with a 3D Foam Tree (also available in the 3D Foam Holiday Embellishment Kit) and then glittered it with green.

DIY Christmas Mini Covered Notebook Tutorial by Shellye McDaniel for Scrapbook Adhesives by 3L

Finally, I tie some pretty check ribbon and it’s all ready for gifting! I made up several of these in different patterns and types of paper on the inside.  You can also find inexpensive premade notebooks that you can give the same treatment.

DIY Christmas Mini Covered Notebook Tutorial by Shellye McDaniel for Scrapbook Adhesives by 3L

Thank you for joining me today!

Creative Time: 30 minutes
Skill Level: Beginner

Materials needed:
Scrapbook Adhesives by 3L®:

3D Foam Holiday Embellishment Kit
Adhesive Sheets 12×12 inch
Extreme Double-Sided Tape 1/4in
Keepsake Envelopes

Other Supplies: Lawn Fawn Knit Picky 6X6 Paper Pad, Paper Mart Ribbon, May Arts Pom Pom Trim, Elastic, Notebook Paper, Green Glitter, and Snowman Sticker: Martha Stewart Crafts

Save to Pinterest!

Pinterest DIY Christmas Mini Covered Notebook Tutorial by Shellye McDaniel for Scrapbook Adhesives by 3L

Visit our Website and Blog!
Sign up for our Newsletter so you never miss a contest or giveaway!

instagram purple icon facebook icon purple pinterest purple icon twitter purple icon YouTube icon blog subscription purple icon

DIY Christmas Ornaments with Adhesive Dots

DIY Christmas ornaments are easy and fun to make! With the holiday season just about upon us, it’s that time of year for making handmade gifts! These ornaments will bring a bounty of cheer and joy to all!

Hello friends, Linsey here today sharing this simple DIY craft that is fun for the whole family! I was inspired by ornaments I’ve seen online. So grab the kids and let’s get to making!

DIY Christmas Ornaments with Adhesive Dots by Linsey Rickett for Scrapbook Adhesives by 3L

Let’s Make Christmas Ornaments

  1. Cut 12 circles out of cardstock/patterned paper in whatever size you want your ornaments to be. I made a 3″ bauble and a 2 1/2″ bauble, thus 12 3″ circles and 12 2 1/2″ circles were cut. This can be done with a cutting machine, punches or by simply tracing and cutting circles by hand.
DIY Christmas Ornaments with Adhesive Dots by Linsey Rickett for Scrapbook Adhesives by 3L

2. Fold all the circles in half and stack them on top of each other. Here are some tips for getting a symmetric-looking color distribution on the final bauble:

  • If using 3 colors A B C, then stack them in the order of ABBCCAABBCCA.
  • With 2 colors A B, then stack them in the order ABBAABBAABBA.
  • If using a single type of card, but double-sided, then alternate “heads up” and “tails up”.

3. Wrap a length of wire all the way around the stack so that it runs along the fold. Twist the ends together to secure. If you don’t have wire, you can also just staple the stack together, once at the top and once at the bottom, so that the staple sits right on the fold.

DIY Christmas Ornaments with Adhesive Dots by Linsey Rickett for Scrapbook Adhesives by 3L

Forming the DIY Christmas Ornaments

4. Stick a Medium Adhesive Dot onto a circle, about 1/4 of the way from the bottom. Fold the facing flaps together and press to secure the bond.

5. On the next circle along, stick a Medium Adhesive Dot about 1/4 of the way from the top. Continue like this all the way around, alternating high and low adhesive dots.

DIY Christmas Ornaments with Adhesive Dots by Linsey Rickett for Scrapbook Adhesives by 3L

6. Once you’ve glued all the adjacent flaps together, this is what the finished bauble looks like.

DIY Christmas Ornaments with Adhesive Dots by Linsey Rickett for Scrapbook Adhesives by 3L

Attach a pretty ribbon and loop for hanging on your tree or give as a gift!

DIY Christmas Ornaments with Adhesive Dots by Linsey Rickett for Scrapbook Adhesives by 3L

Thanks so much for visiting today! I’ve enjoyed sharing my DIY Christmas ornaments and hope that you feel inspired to make a few of your own this holiday season!

Until next time, happy crafting!
Linsey

Creative Time: 45 minutes
Level: Beginner

Materials Needed:
Scrapbook Adhesives by 3L®:

Adhesive Dots Medium

Other: Patterned Paper: Authentique Paper (Nostalgia Collection Kit); Cricut machine; Thin crafting wire; Ribbon: Really Reasonable Ribbon (5/8″ Plaid Houndstooth Red and White, 5/8″ Plaid Celery Green, and Delicate White Crochet Lace)

Pin It!

Pinterest DIY Christmas Ornaments with Adhesive Dots by Linsey Rickett for Scrapbook Adhesives by 3L

Visit our Website and Blog!
Sign up for our Newsletter so you never miss a contest or giveaway!

instagram purple icon facebook icon purple pinterest purple icon twitter purple icon YouTube icon blog subscription purple icon