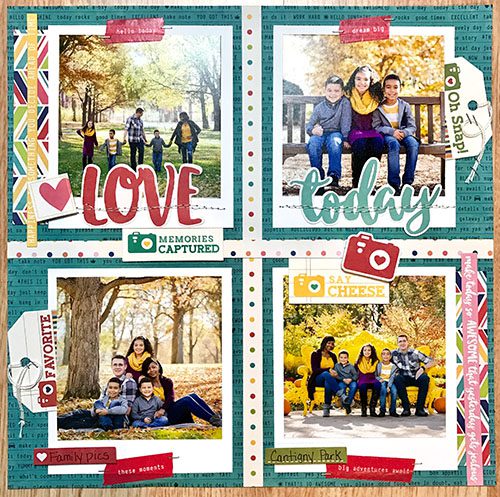
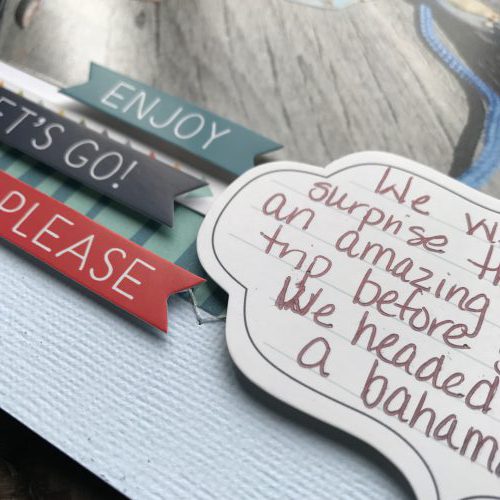
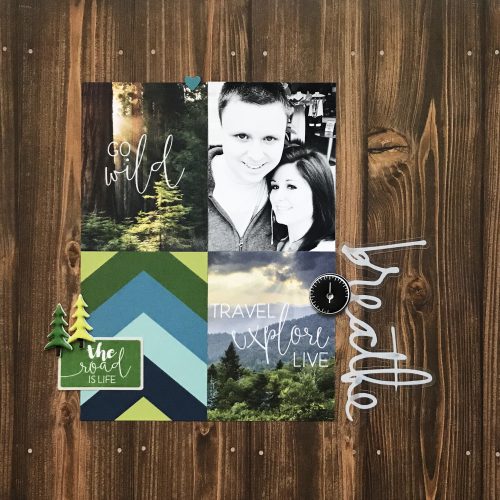
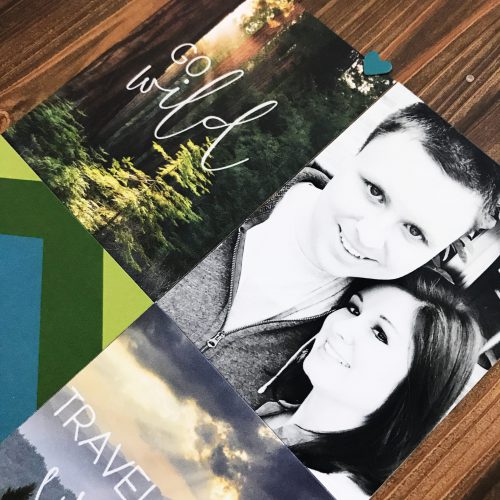
As scrapbookers, we always feel like we’re behind or not caught up. Am I right? I’ve learned not to stress about it. I really love to scrapbook my family pages from six months or more. Want to know why? Because I can relive those special moments.
Today I’m sharing our family photos – I like to use multiple photos on layouts like this. There’s a tip I want to share about adhering those photos with E-Z Dots® Repositionable Refillable Dispenser so let’s get started!
Scrapbooking with E-Z Dots® Repositionable
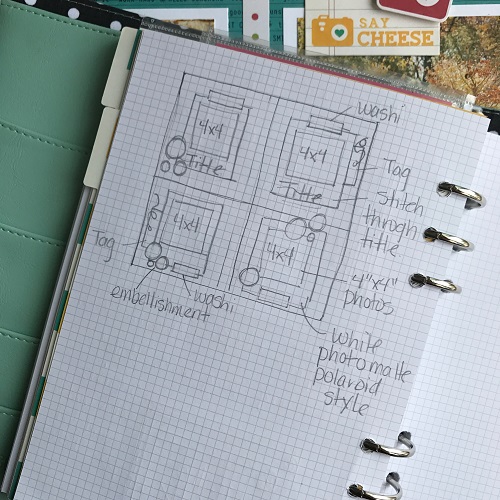
First up here is my sketch I used to create this page.
I print my photos to a 4 x 4″ size to create a Polaroid type of photo matte.
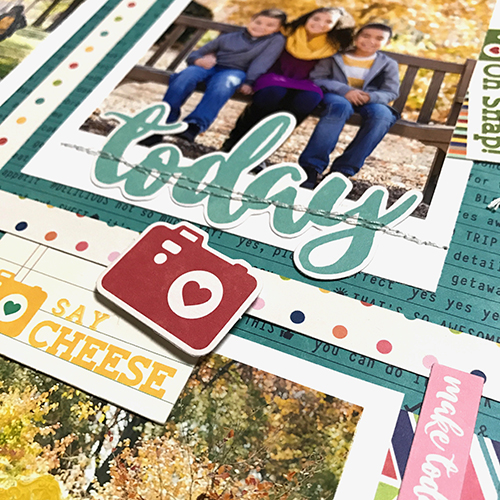
TIP: Any pieces that I knew would be sewn down later were placed on the layout using the E-Z Dots® Repositionable Refillable Dispenser. I use it because it’s easier to sew through without leaving residue on my machine needle. So try this tip when you stitch your photos, die cuts or any elements in your page!
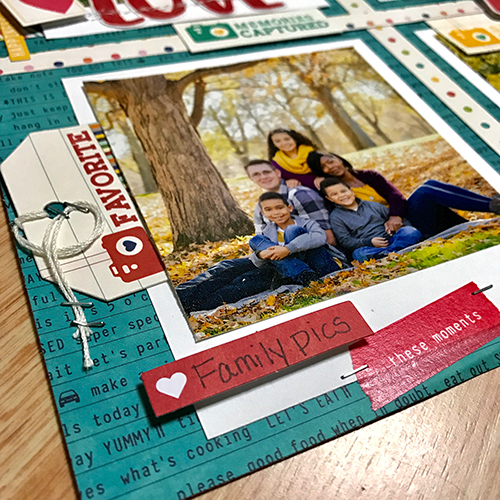
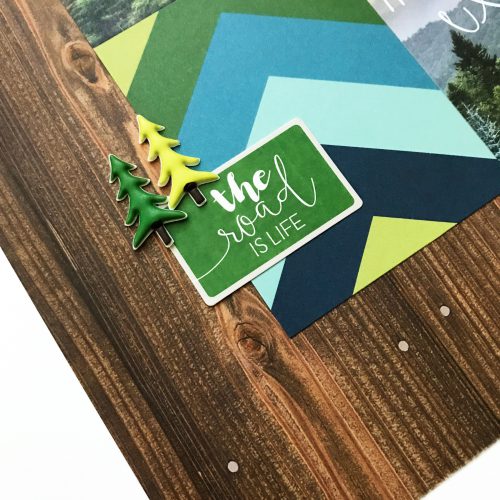
I then stuck with a collection from Jillibean Soup and used all the bit and pieces from it including the tags, washi tape and cardstock stickers. Cardstock stickers were raised up with the Crafty Foam Tape White. Tags were trimmed down since only a little peeked out and added under photos with the E-Z Dots® Permanent Refillable Dispenser. Washi tape sometimes likes to come undone so I always add a couple staples to keep it in place perfectly.
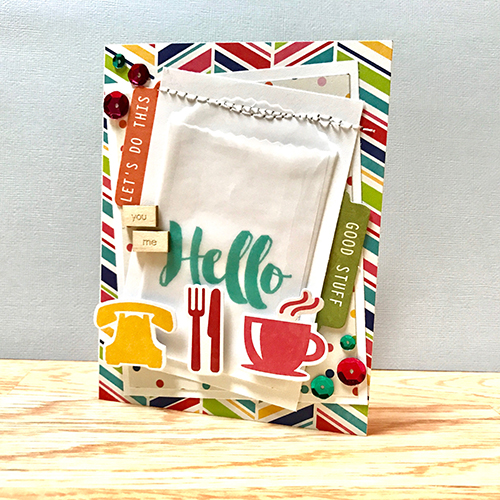
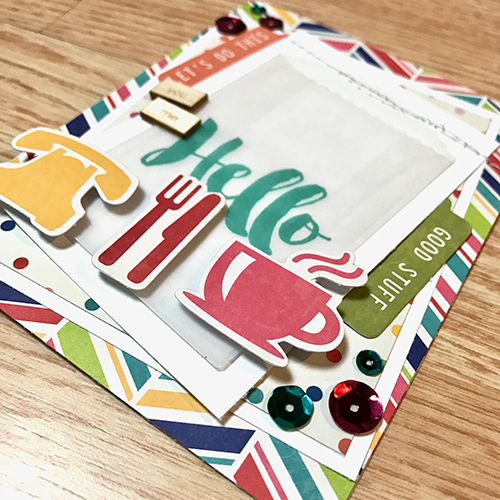
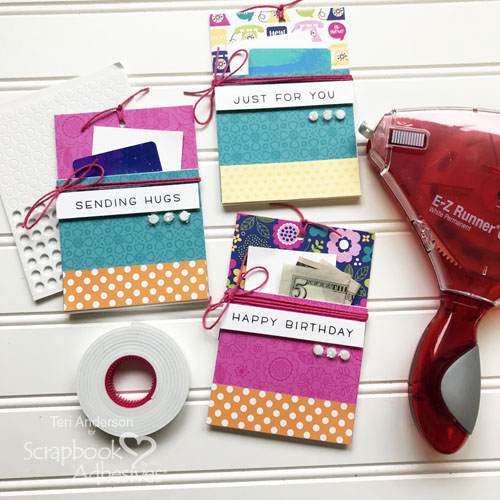
Bonus Card! I created a quick card with my left over paper pieces as I usually do. Today’s card is the perfect one to send to a friend who you’d like to get together with over coffee or lunch. Just slip a gift card in the front and say hello to someone special.
I used the Home and Hobby Dual Tip Glue Pen to adhere the sequins on this card.
I hope this inspires you to maybe pull out some older photos from last year and realize some past moments.
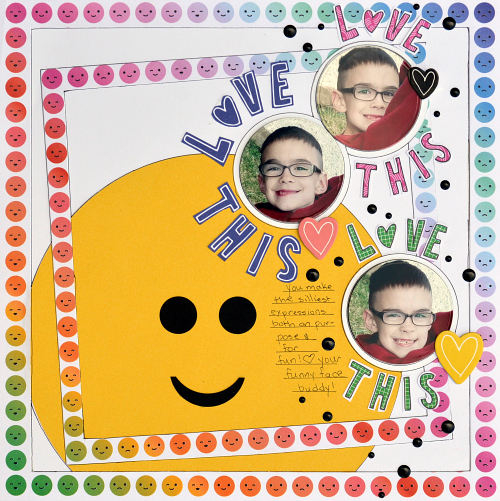
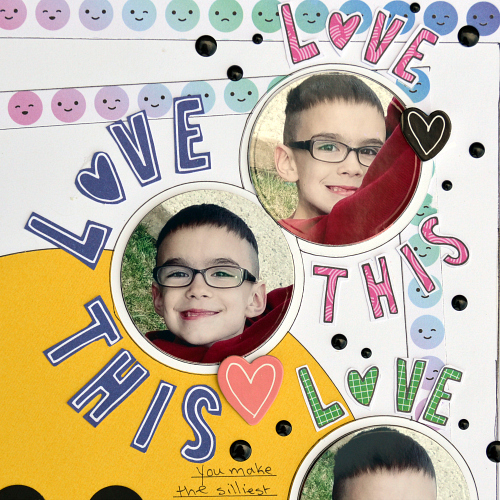
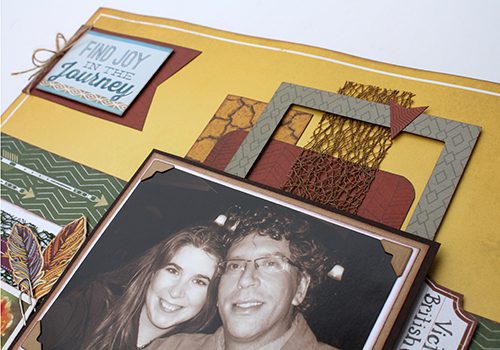
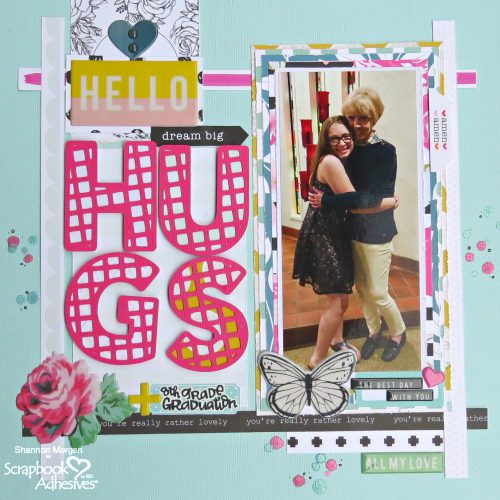
Greetings on this beautiful spring Sunday! Christine joining you with a layout that is sure to make you smile! Anybody else out there get frustrated with trying to attach small words and cut file pieces to projects? Today I am going to highlight how you can make this job easier with the E-Z Runner® Micro Refillable Dispenser.
I didn’t add a lot of dimension to this layout but stuck with a lot of flat elements.
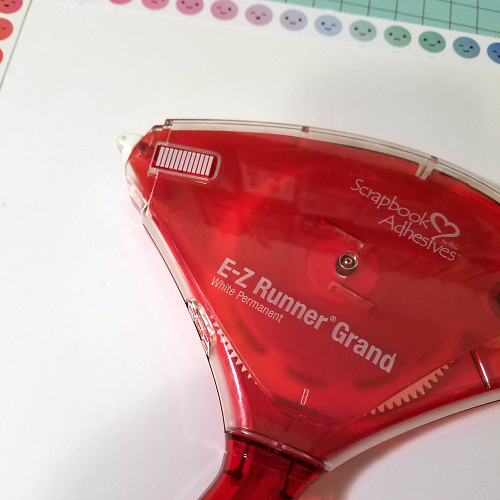
I’m a busy mom so when I have time to scrap I want my adhesive to make the job quick and easy. The E-Z Runner® Grand Refillable Dispenser helped get the job done efficiently. It was the perfect width for my emoji borders and of course worked just great on the other bigger pieces.
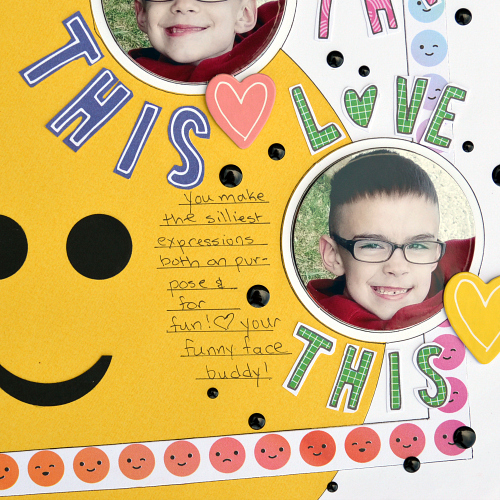
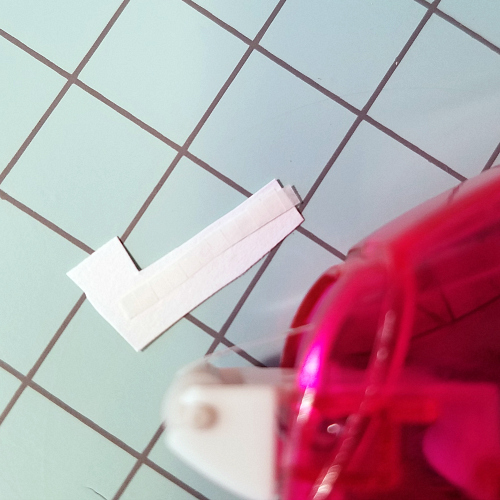
In addition to using cut files, I also LOVE to fussy cut. But as I mentioned earlier that can be a total pain to add to a layout! This is where the E-Z Runner® Micro Refillable Dispenser comes into play.
I used this runner to add the tiniest of strips (just 1/8 of an inch) to the back of all my letters. It was even easy to use on the curvy S! I’m not gonna lie, I may have squealed when I saw how great this worked. Such a time saver!
If you don’t already own it, you definitely want to grab one of these handy refills for your E-Z Runner before you dive into your next project with tiny pieces!
Welcome to Day 5 of our blog hop with Paper House Productions design team! Boy, time flies! Today is our last day of this inspirational hop. Did you pick up any tips or techniques from our two wonderful design teams?
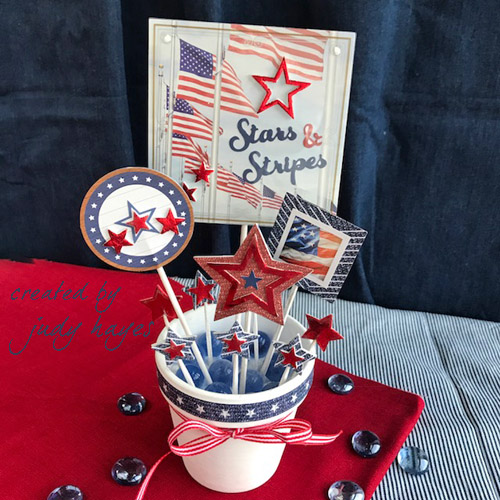
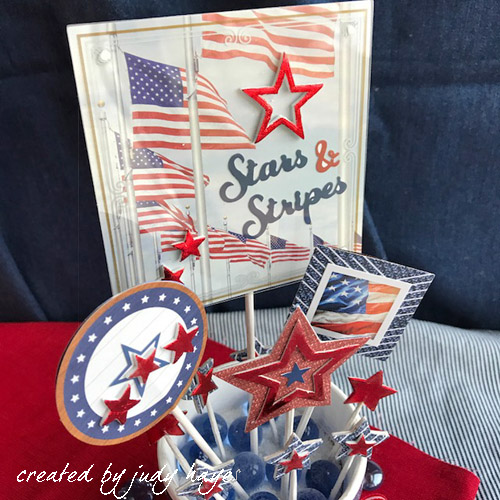
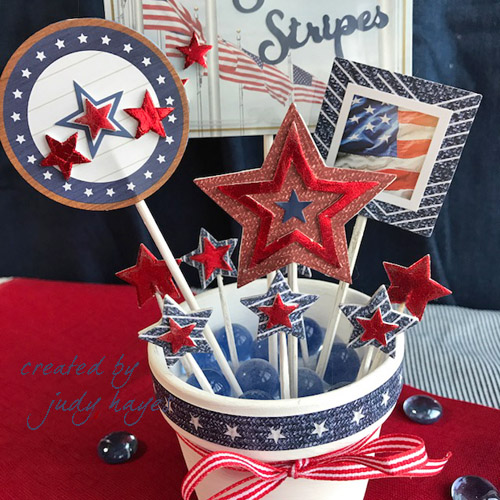
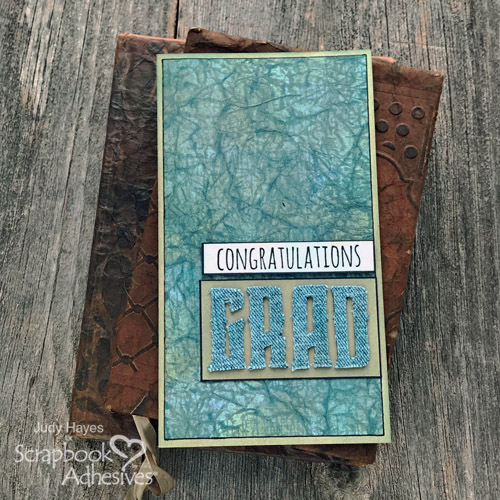
Patriotic Centerpiece by Judy Hayes
Hey everyone! I’m excited to share a patriotic home decor piece with Stars and Stripes Centerpiece featuring Paper House® Let Freedom Ring Washington DC Paper Crafting Collection!
I’ve used some of the cardstock stickers and one of the Snap Shots™ of flags on the picks. The acetate overlay from Washington DC Mixed Card Pack fastened with Adhesive Dots Mini at each corner. “Wear Adhesive on the Outside” by applying red foil to the 3D Foam Stars both from the 3D Foam Holiday Embellishment Kit. Place various patterned papers to white 3D Creative Sheets and then die-cut star shapes. Sandwich two of same star sizes together with painted toothpick. Next add a 3D Foam Stars on front of each, remove the top liner to gently rub red foil on to the stars. Some have cardstock sticker in center for more accent.
Embellish the painted flower pot with a band of Let Freedom Ring Cardstock Sticker and a striped ribbon, held in place with Premium Double-Sided Tape ⅛ʺ (otherwise it would slide right off the pot!). Other for picks were sandwiched with paper layers and held with Extreme Double-Sided Tape ½ʺ. White sand fills the pot with blue marbles on top to hold the picks standing tall and patriotic! For a tutorial on my project, visit my blog by clicking: Designs by Judy Hayes.
Paper House Productions:
Paper House® Let Freedom Ring Washing DC Paper Crafting Kit; Mixed Card Pack; Washington DC SnapShot™ Sticker
Other:
DecoArt Americana Décor Chalky Finish Paint
Spellbinders Pierced Stars dies
Wood Skewers; Wood Toothpicks; Clay Pot; White Sand; Blue Marbles; Ribbon
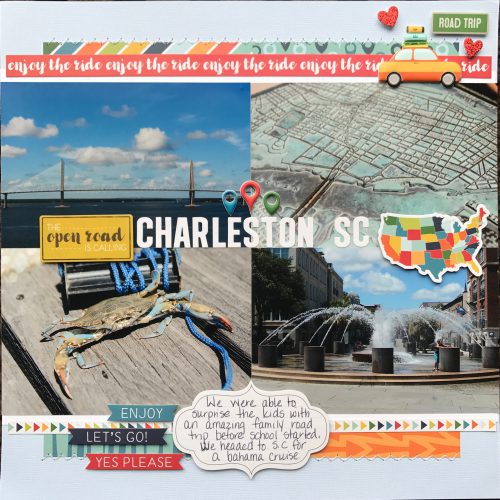
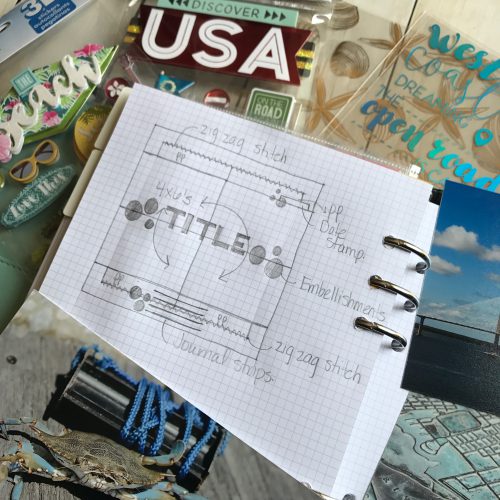
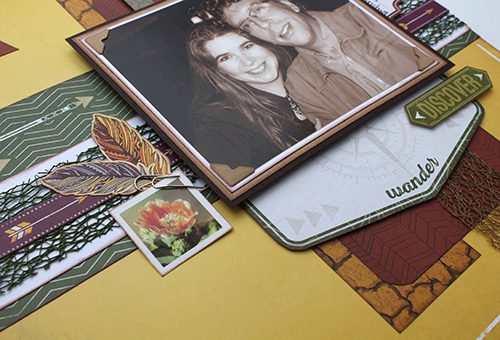
Travel Scrapbook Page by Latrice Murphy
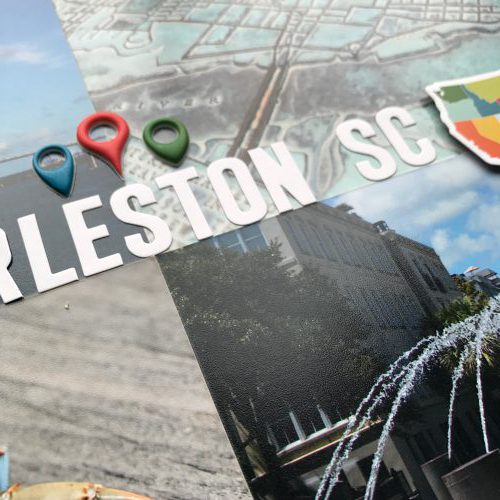
On to today’s project. I’ve created a fun travel layout using the Discover USA Paper Crafting Kit. We traveled to South Carolina not too long ago for a family cruise and I was great to site see a bit before heading out on the ship. My layout uses four 4 x 6 photos. I wanted to use multiple photos because I took a lot of shots on this trip. This page will be the first of many in a group. I plan to use the rest of my kit to create even more layouts.
I’ve created a sketch for you that I used as my inspiration. Sketches for me are just a jump start. Take it where you want and have fun.
As you see in the sketch I created groups of embellishments to balance the page out. I mixed puffy and cardstock stickers to add interest. The cardstock stickers needed some dimension so that’s where I used my favorite 3D Foam Squares White Mix. Check out the details below.
Welcome to Day 4 of our blog hop with Paper House Productions design team! We hope you are loving the fabulous inspiration shared by the two creative design teams. Don’t forget there’s an opportunity to win a giveaway…hang on for details at the end of the post!
Tracy McLennon
It is just SO much fun hopping along with Paper House Productions. Today I am happy to share this scrapbook layout using some of my favourite sticky things from Scrapbook Adhesives by 3L® and the Southwest Adventure Collection from Paper House Productions.
Along with my go-to adhesives like my E-Z Runner® Grand and 3D Foam Squares for ALL of my papercrafting, I have added another favourite to my list. I also LOVE using ribbon and trims on my projects, to keep those textured items in place I turn to my Extreme Double Sided Tape.
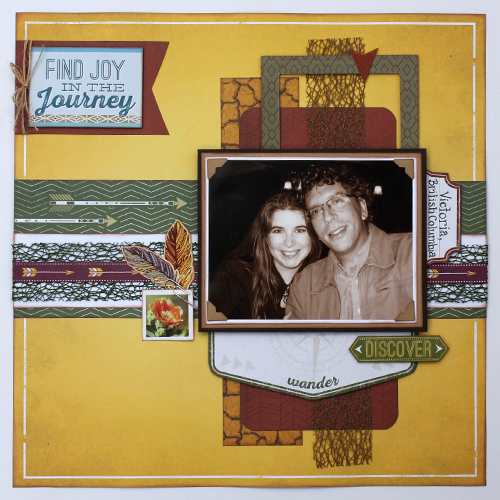
Vicki Chrisman
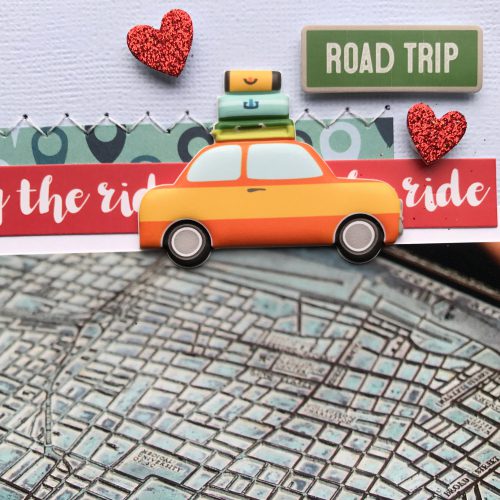
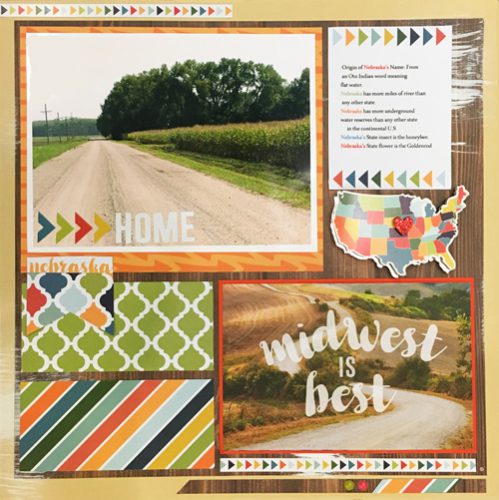
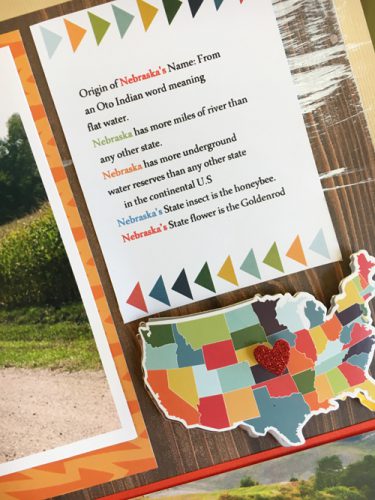
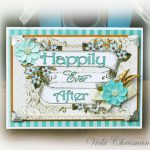
Welcome to our continuing fun this week with Paper House Productions! Be sure to check out all the fun projects, and get in on the Giveaway. Today I’d like to share a layout I created using Crafty Power Tape, E-Z Runner® Grand and Paper House Productions’ Midwest Tags sheet , Mountain Tags Country Strong and Discover USA papers. I live in Nebraska so I was SO thrilled about this Midwest themed paper!
The 3-D stickers added fun interest and dimension to my layout. The pack of 3D stickers I used even had a cute little heart to add right were Nebraska is on the map.
I love my E-Z Runner® Grand for layouts! For narrow strips of paper I use for borders and accents, I find that Crafty Power Tape is amazing. I have a tutorial on my blog that shows you how I put it all together, visit by clicking: This Art That Makes Me Happy.
Supplies List Scrapbook Adhesives by 3L®: E-Z Runner® Grand Dispenser Crafty Power Tape Paper House Productions:
Discover USA Map Paper
Midwest Tags
Mountain Tags
Discover USA 3D Stickers
Latisha Yoast
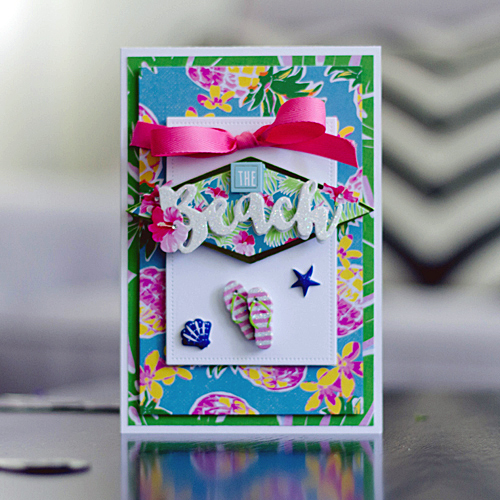
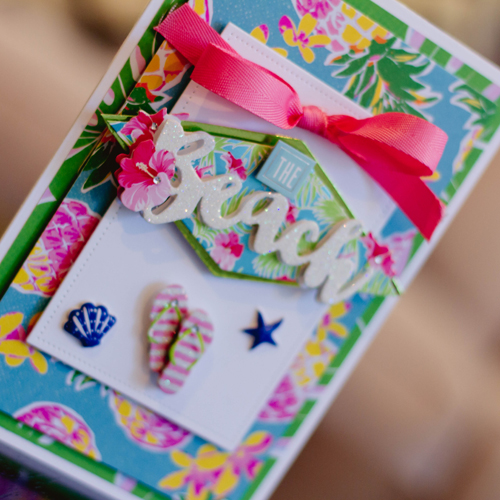
I created a fun beach card using the Paradise Found Crafting Kit. Since I live in Florida, this card will work for anything I need it to. Plus the colors in this kit are so tropical, pretty and remind me of warm weather.
I like to use foam adhesive on just about every project, it gives my card great dimension and a professional touch. I used foam squares as well as crafty foam tape. With the foam tape, you can cut a longer piece of foam for those longer pieces of paper. To attach my bow, I used a small adhesive dot, and that thing will not move. Dodd adhesive dots are the perfect permanent adhesive for embellishment.
Supplies:
Scrapbook Adhesives by 3L®:
E-Z Dots® Permanent Refillable
Crafty Foam Tape White
3D Foam Squares White Regular
Dodz Adhesive Dots Small Paper House Productions:
Paradise Found Beach Paper Crafting Kit Others:
White and Green Cardstock; Pink Ribbon
Jana Maiwald-McCarthy
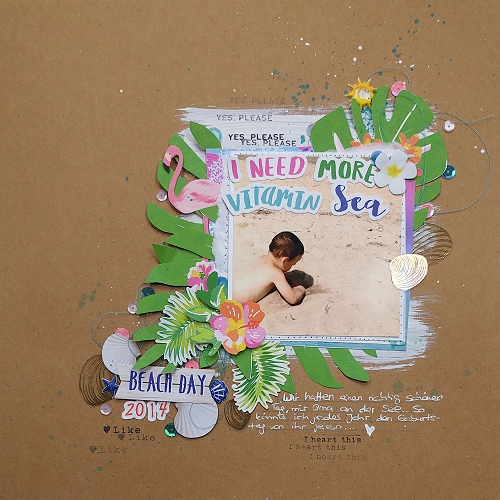
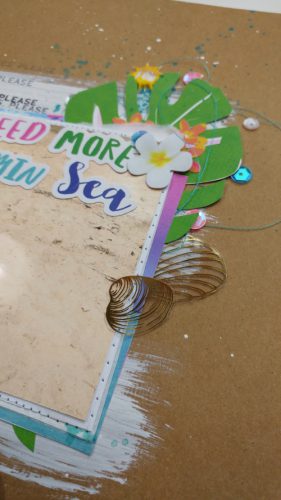
I really love the Paradise Found Beach Paper Crafting Kit from Paper House Productions. It is full of bright colors and beautiful elements. The photo is from a day at the beach back in 2014 and shows my little one playing in the sand. We had such a great day!
I used Kraft cardstock here to get the sandy beachy feel. I cut some leaves from patterned paper to give layering and dimension elements as well the feel of being under palm trees. With 3D Foam Squares White Small, I adhered the pieces down and added my sewn mat photo. The lower left corner is a cluster of stickers from the Paradise Found 12″ Cardstock Sticker Sheet and popped up with a combination of 3D Foam Squares White Small and Adhesives Dots 3D.
My final touch here, sequins were glued them down with Adhesive Dots Mini. For a video tutorial on my scrapbook page, visit my blog by clicking: Scissors Glue and Paper.
Welcome to Day 2 of our blog hop with Paper House Productions design team! We’re excited to be sharing more wonderful inspiration created with both companies’ products. Check out what each of the talented design teams have done. If you missed Day 1, click: 2017 Blog Hop with Paper House Productions – Day 1! Don’t forget there’s an opportunity to win giveaways…stay tuned for details at the end of the post.
Christine Meyer:
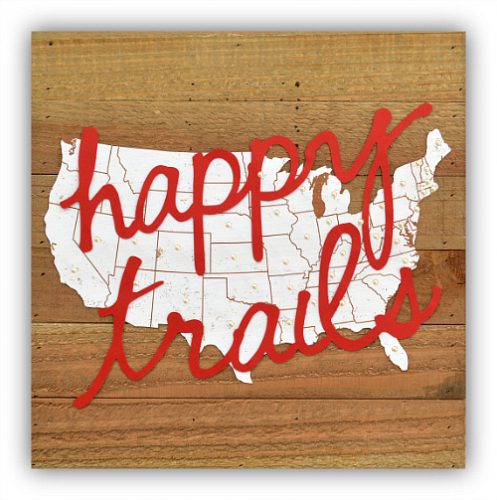
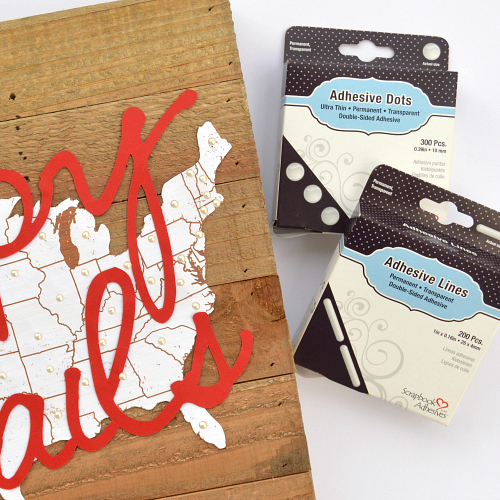
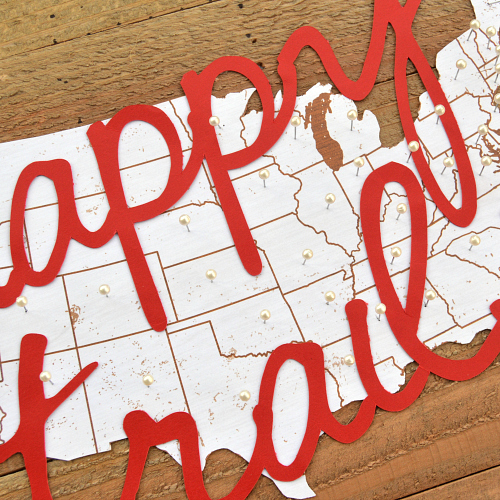
From the moment I laid eyes on the Let Freedom Ring Collection from Paper House Productions I knew exactly how I wanted to use this patterned paper. This travel themed week gave me the perfect excuse to create a map wall hanging. I used pins on the map to document all the states that my husband and I have traveled to together and it hangs in our bedroom as a reminder of our fun adventures.
I also used the Adhesives Lines to attach my cut file – they were easy to use and follow the script font. To see my video tutorial, visit my blog by clicking: Scrapping with Christine.
Welcome to Day 1 of Blog Hop with the wonderful folks at Paper House Productions! We are excited to be sharing inspiration from both design teams and products this week. Enjoy the “eye candy” and don’t forget to enter to win , we have 3 prizes from each company! Find the details at the end of the post. Now for the FUN part – take it away team!
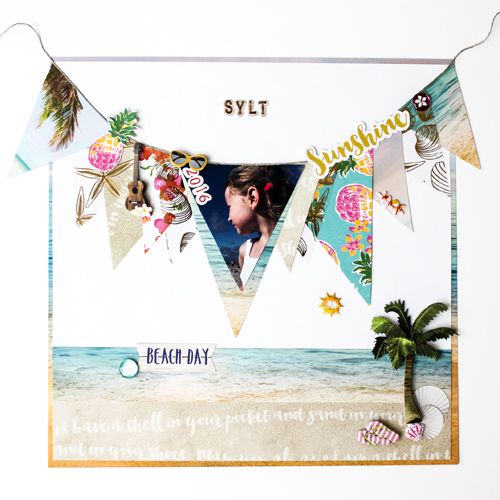
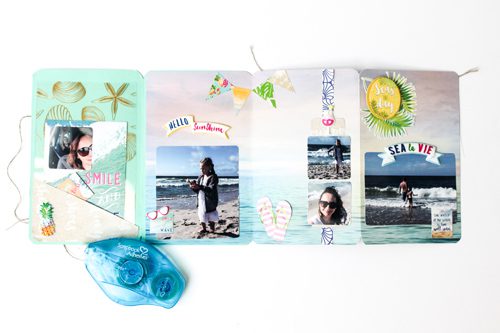
Stephanie Schutze I created a layout and a mini album with the wonderful Paradise Found Paper Crafting Kit, the matching Paradise Found Cardstock Sticker, Hello Sunshine Puffy Sticker and The Beach 3D Sticker. I also used Shells Acetate and to adhere all things together the E-Z Dots® Permanent Refillable Dispenser.
I had so much fun with these bright colors of the papers and stickers and wanted to see all of them on my layout. Therefore I decided to create a banner and decorated it with stickers.
I also made a matching mini album. The photos are from our short vacation at the island Sylt in Germany. I love the playful look of the Paradise Found collection, it fit’s perfectly to my beach photos.
Supplies: Scrapbook Adhesives by 3L®: E-Z Dots® Permanent Refillable Dispenser. Paper House Productions: Paradise Found Paper Crafting Kit Paradise Found Cardstock Sticker Hello Sunshine Puffy Sticker The Beach 3D Sticker Shells Acetate
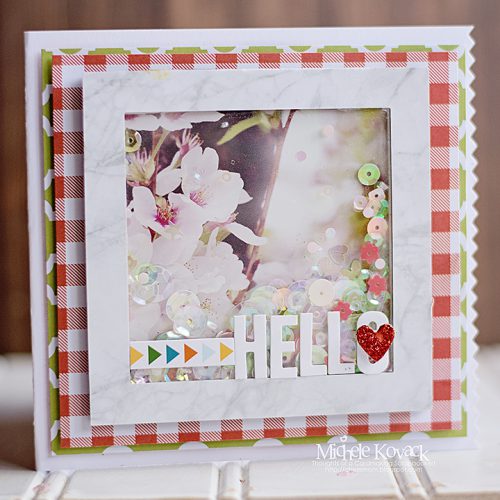
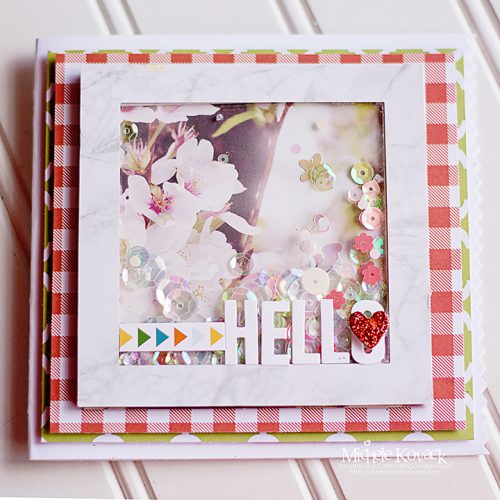
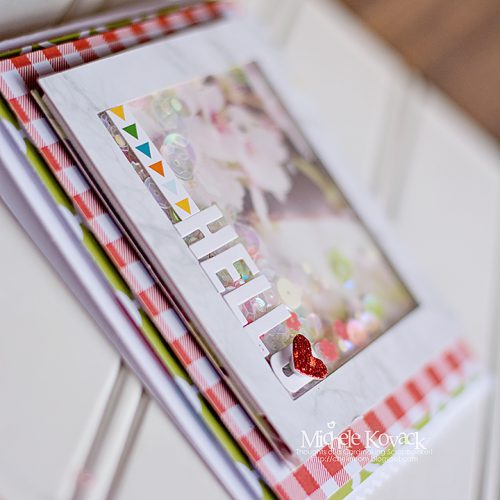
Michele Kovack Good morning! I am thrilled to be a part of the blog hop with Scrapbook Adhesives by 3L® and the Paper House. I am sharing my latest addiction…shaker cards! They are so fun and interactive!
I created the shaker portion using a frame, Cherry Blossom’s snapshot, and acetate square from Paper House’s Let Freedom Ring Collection. I used Crafty Foam Tape between layers.
I added a sticker sentiment, heart, and arrow border from the Discover USA Collection directly on top of the acetate. The red and green patterned paper are from the same collection. I adore these papers so much! They remind me of an all American picnic! I adhered all of the layers onto my white card stock using E-Z Squares.
Paper House Productions Cherry Blossom’s snapshot Discover USA Collection Let Freedom Ring Collection Hop over to our friends at Paper House Productions by clicking: 2017 Blog Hop with Paper House Productions – Day 1!
Blog Hop Prize Details
Enter to win by leaving a comment through the Rafflecopter App. A winner will be randomly picked. International entries are welcome.
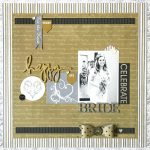
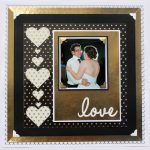
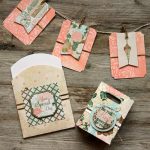
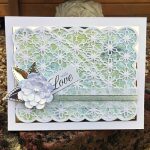
Celebrate a wedding with special projects from our Design Team. Commemorate the occasion with scrapbook pages, cards, decor ensembles and gift ideas. Find inspiration and tutorials to make your special day amazing!
Click on the images or text to go to the blog posts.
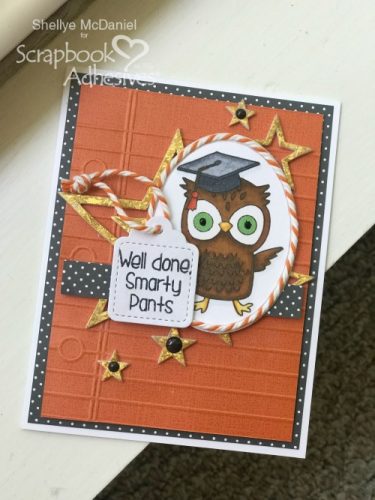
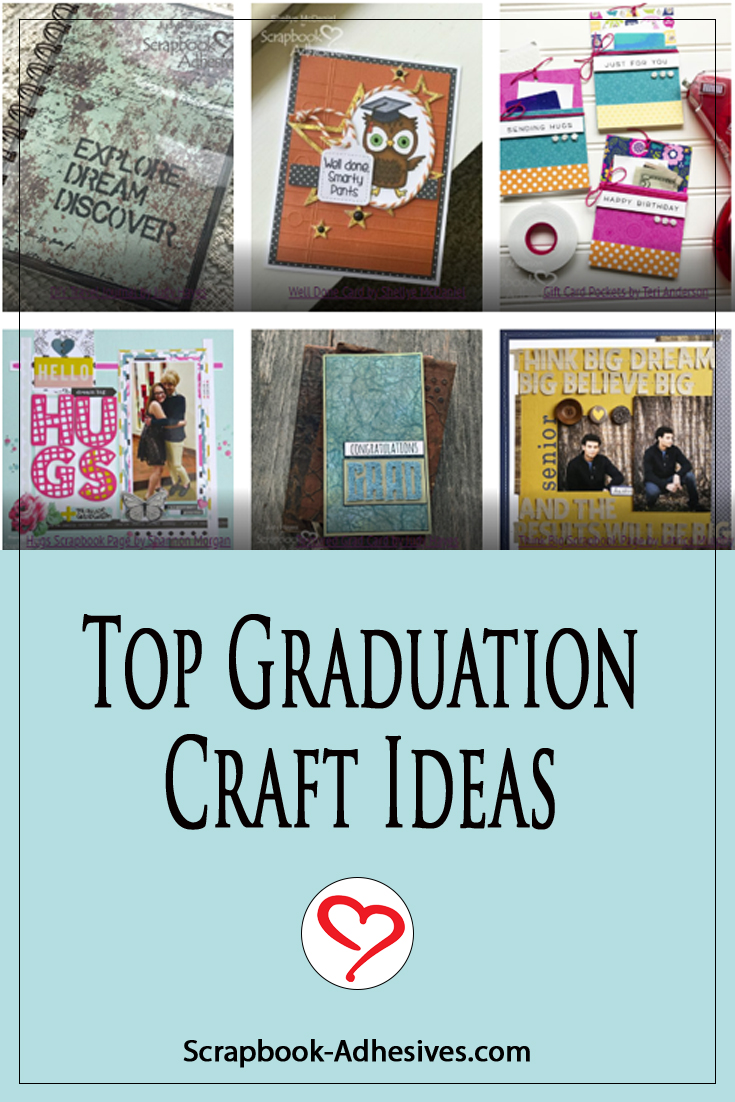
These fun papercraft ideas will inspire you to score an A+! We’re excited to share these graduation projects with you and the happy graduate! Click the project names in the image to take you to the details and tutorials.
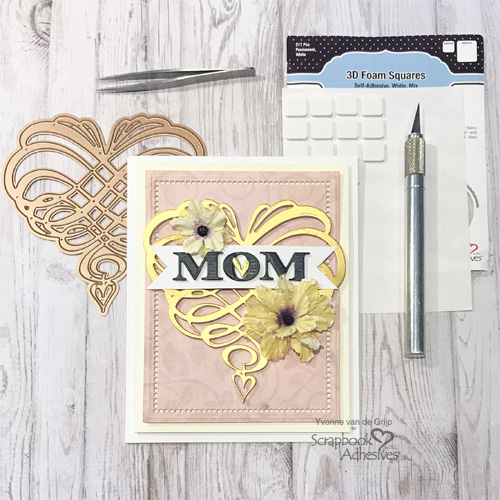
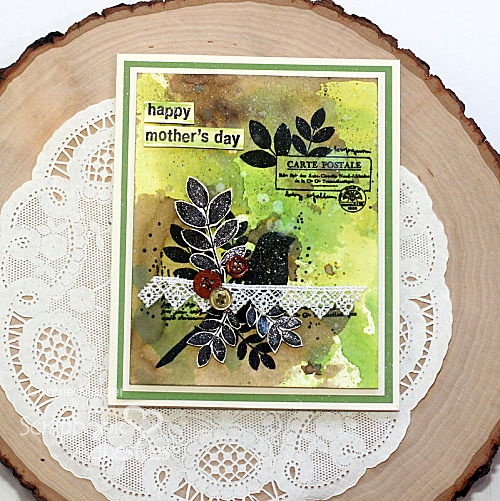
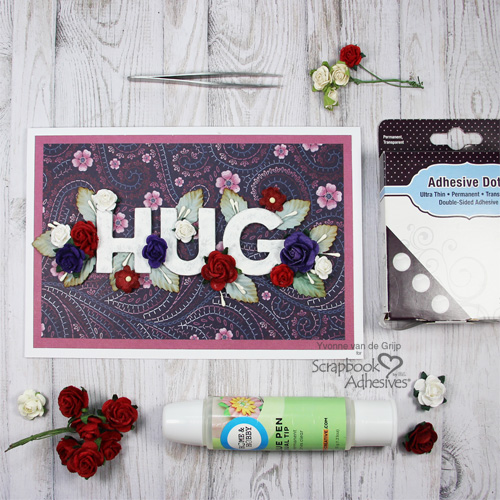
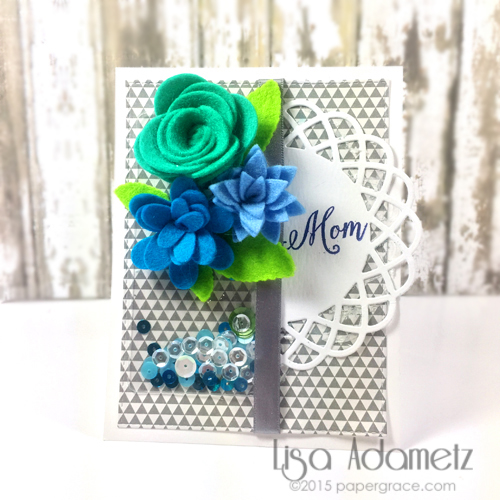
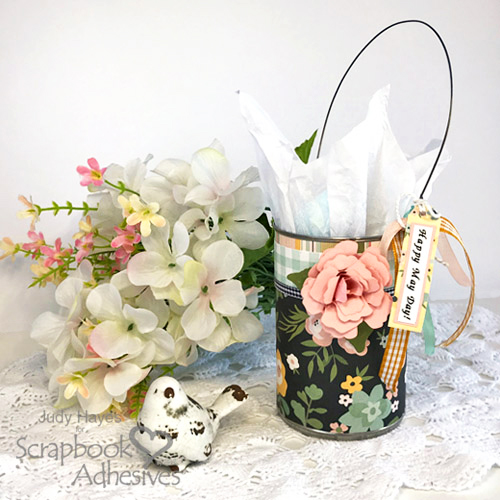
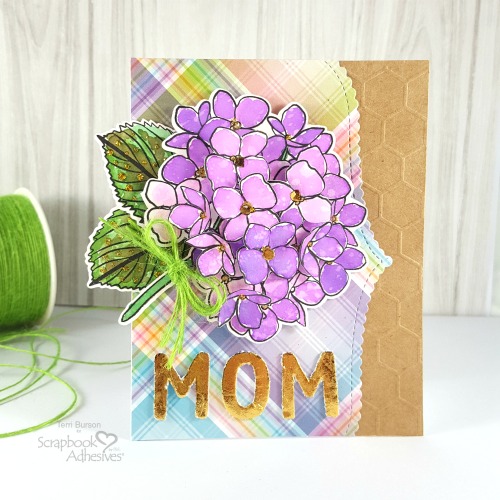
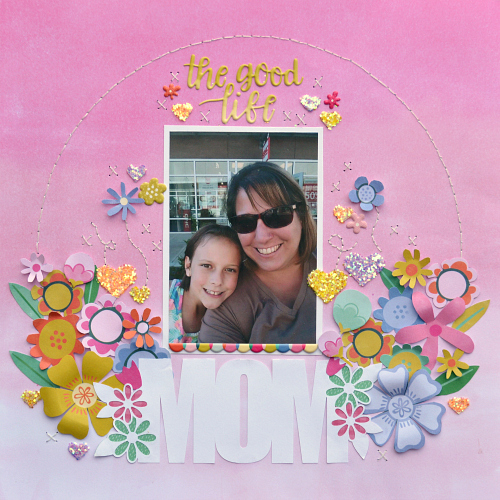
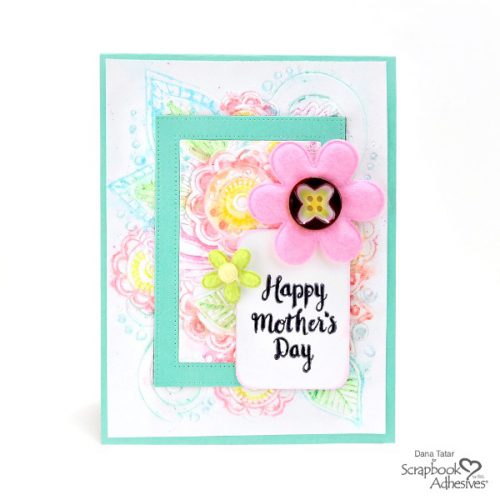
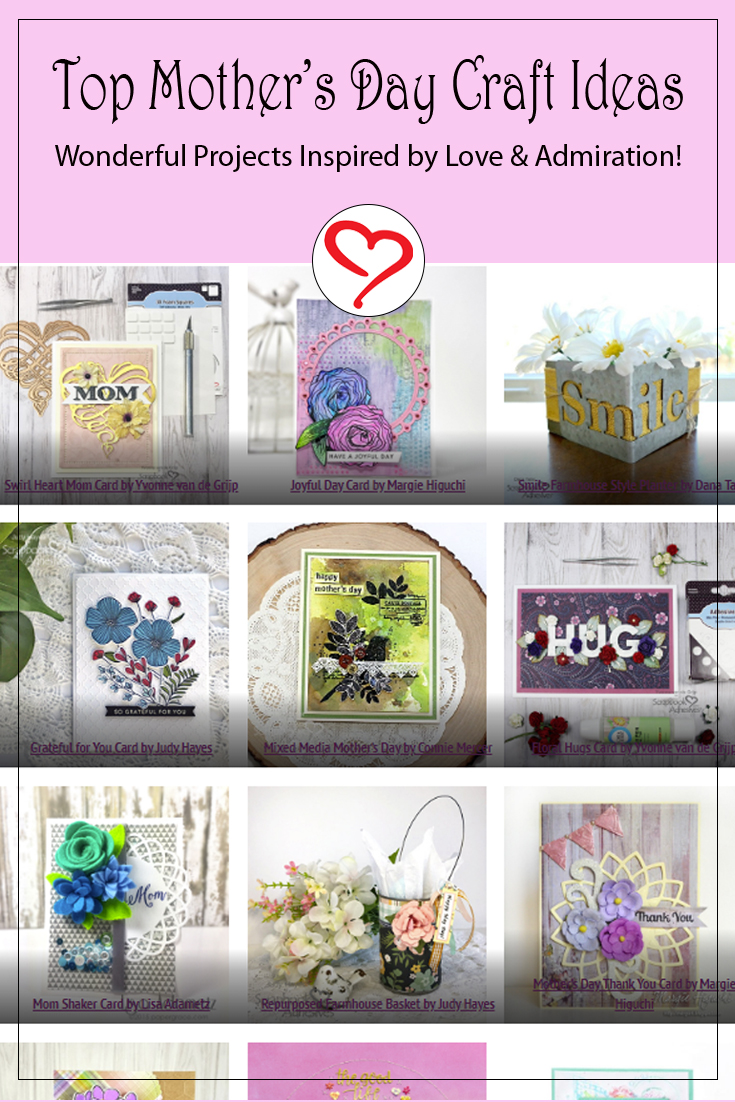
Celebrate Mother’s Day with Wonderful Projects inspired by Love and Admiration!
Our design team shares many ways to show how much we appreciate her through beautiful inspiration. Click to the titles below to send you off for more details and tutorials.