You are in our US store • Switch to Europe store

Koala Valentine’s Day Card

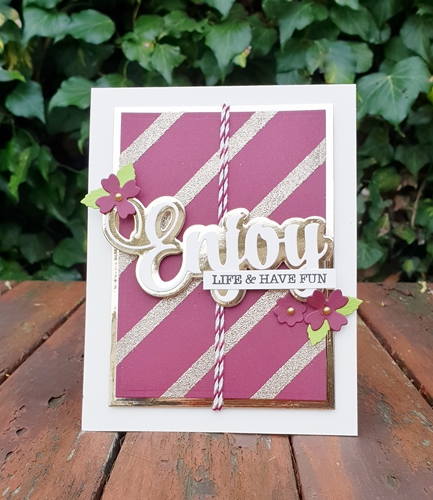
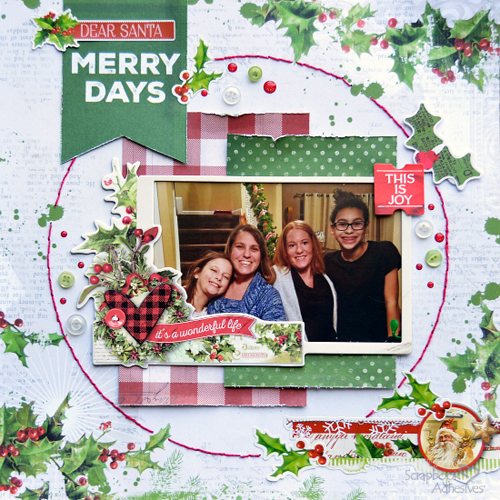
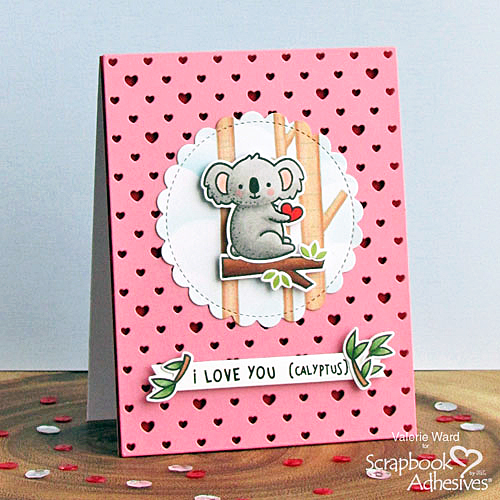
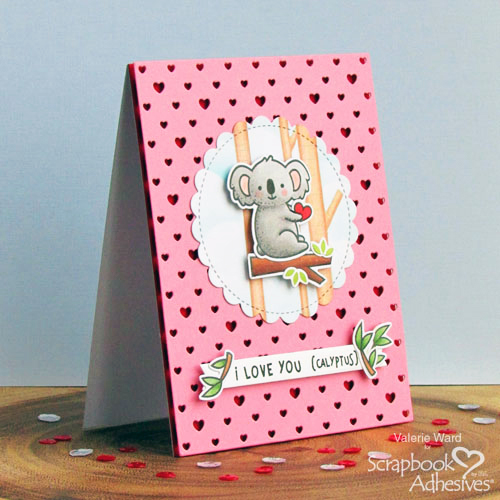
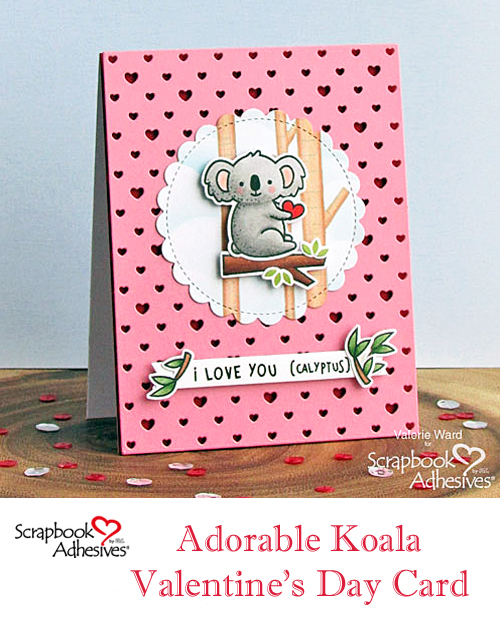
Hello! Valerie here today, and Valentine’s Day is right around the corner, so today I have a pink Valentine’s Day card featuring a pretty heart backdrop and an adorable koala!

Koala Valentine's Day Card by Valerie Ward for Scrapbook Adhesives by 3L

Koala Valentine’s Day Card Instructions

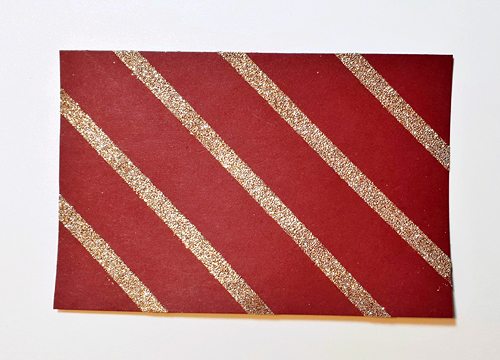
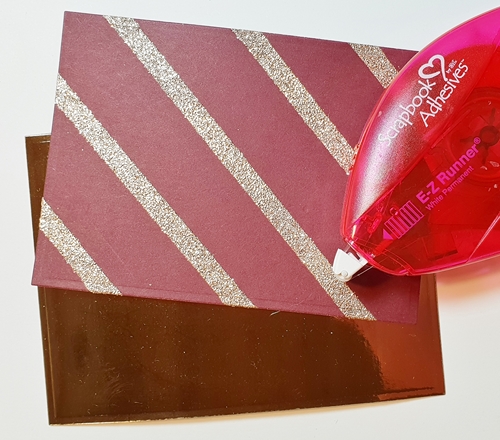
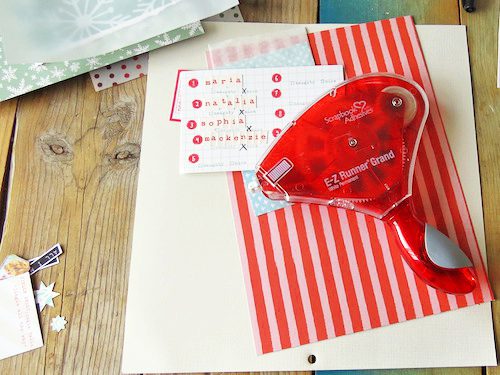
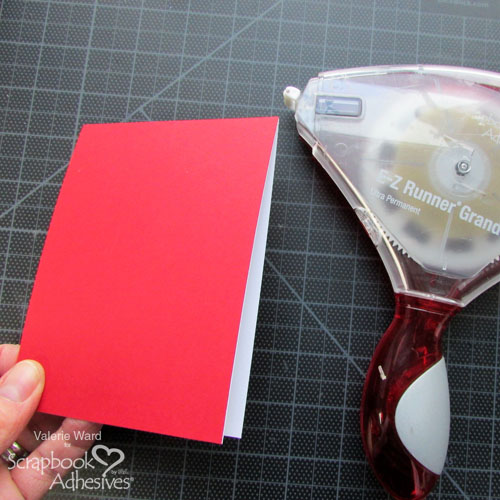
Step 1 – Attach Red Front Panel

The first thing you need to do is attach the top red panel base with E-Z Runner Grand Ultra Strong Refill; I use this amazing adhesive inside the E-Z Runner® Grand Refillable Dispenser.

Koala Valentine's Day Card by Valerie Ward for Scrapbook Adhesives by 3L

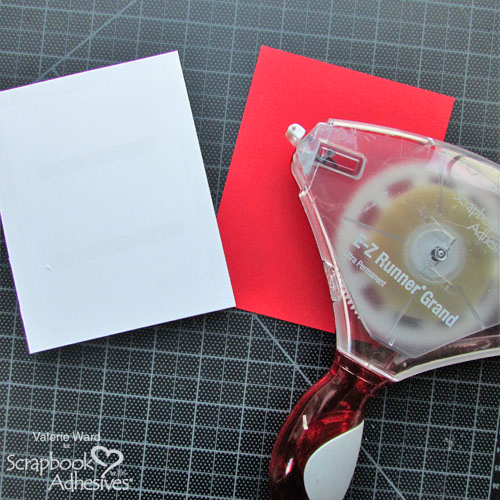
Here it is attached, and this panel is not going anywhere! This permanent adhesive is super strong and immediately tacky.

Koala Valentine's Day Card by Valerie Ward for Scrapbook Adhesives by 3L

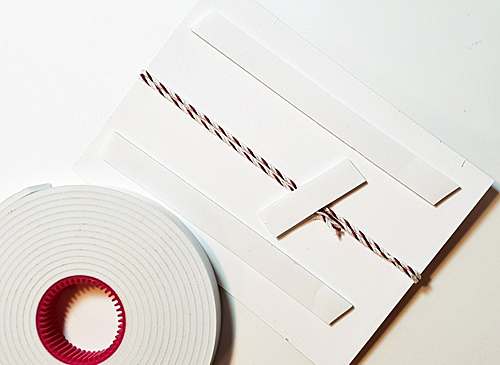
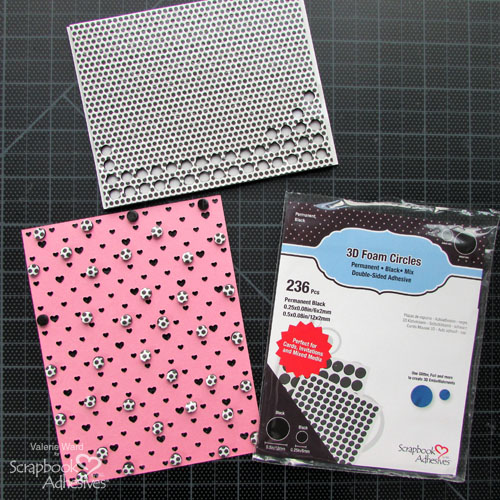
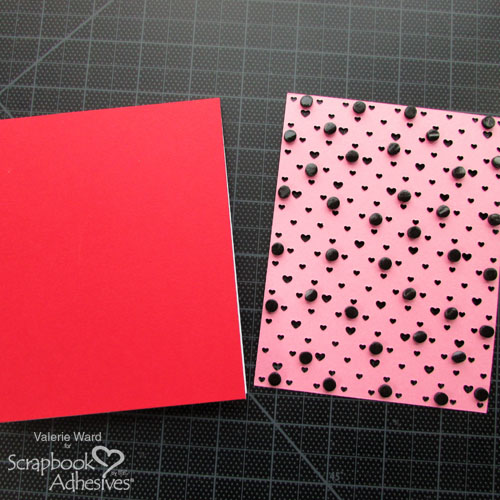
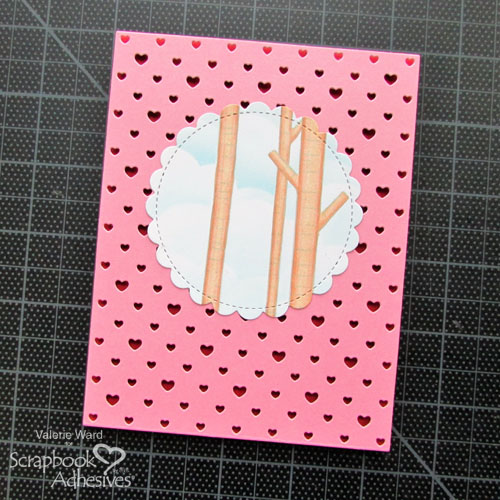
Step 2 – Attach Heart Backdrop

Now I have the next panel to attach on top of the red panel base; it is a piece of pink cardstock that I die cut using a polka heart backdrop die. I want it raised up, so I used my 3D Foam Circles Black Mix because these little black circles are the perfect size to fit in between all the little heart openings; they are also nice & thick, so the panel will have a nice raised up effect. AND, they’re BLACK, so they will not be easily seen! One more cool thing about this adhesive is the leftover piece of foam after you use the circles can be used cut it up and it becomes more great foam adhesive to use on future projects!

Koala Valentine's Day Card by Valerie Ward for Scrapbook Adhesives by 3L

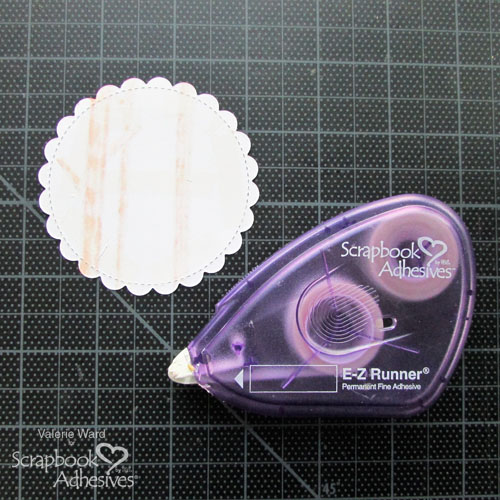
Step 3 – Adhere the Scalloped Circle

I used my E-Z Runner Permanent Fine Adhesive Dispenser to adhere the scalloped circle scene to the top of the card.

Koala Valentine's Day Card by Valerie Ward for Scrapbook Adhesives by 3L

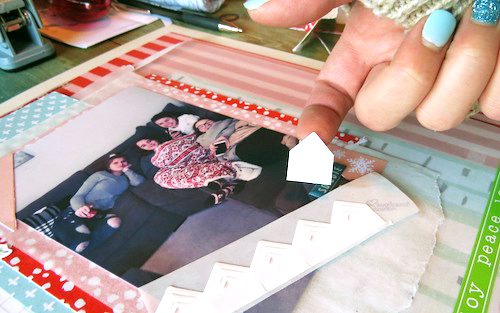
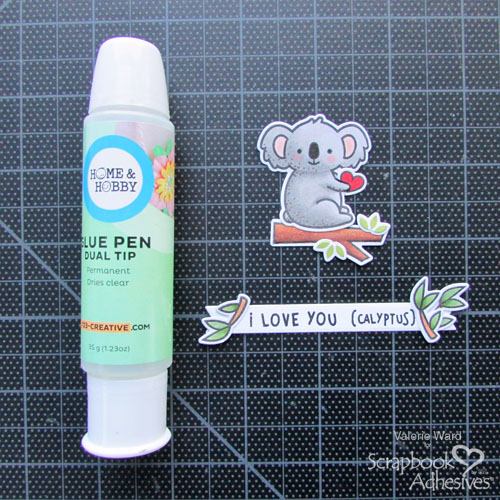
Step 4 – Assemble and Attach Koala & Banner

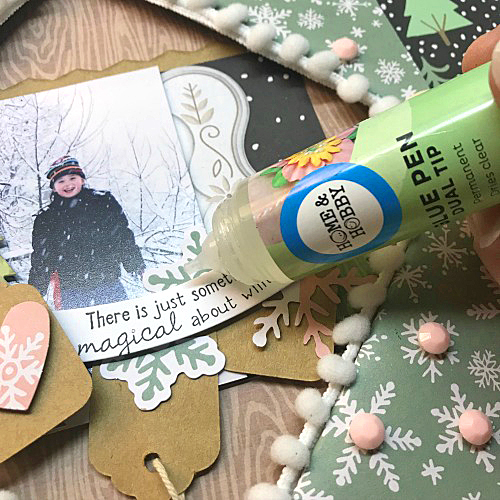
My colored images needed to be glued together, so for this step, I used my Dual Tip Glue Pen.

Koala Valentine's Day Card by Valerie Ward for Scrapbook Adhesives by 3L

Once the images were glued together and dried, I flipped them over and attached 3D Foam Squares White Mix squares to the backs. I’m using white 3D Foam here so it blends better with the white papers.

Koala Valentine's Day Card by Valerie Ward for Scrapbook Adhesives by 3L

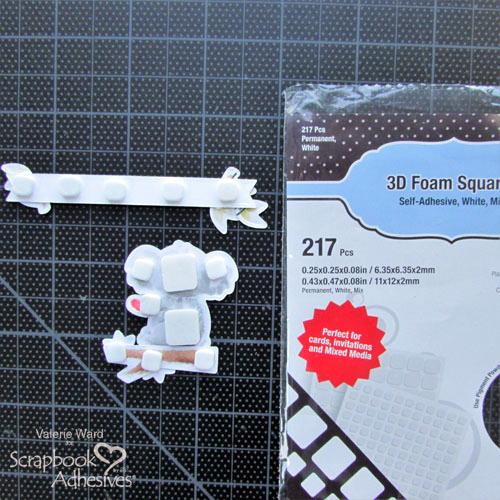
Then I applied the images to the front scalloped circle.

Koala Valentine's Day Card by Valerie Ward for Scrapbook Adhesives by 3L

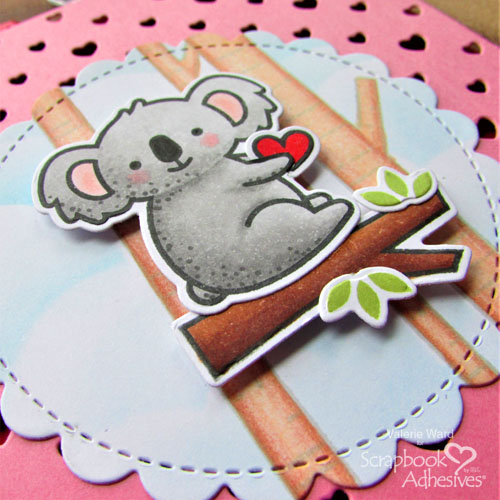
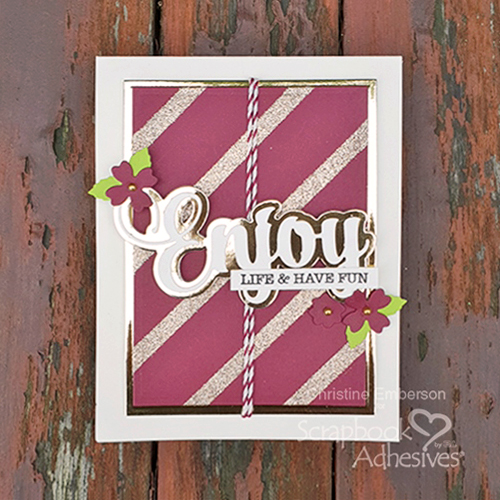
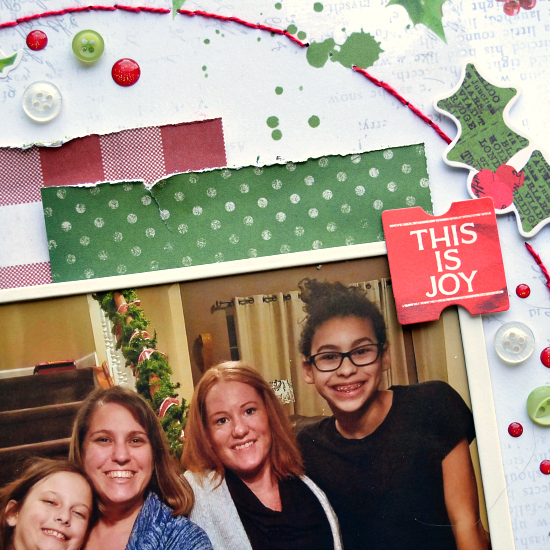
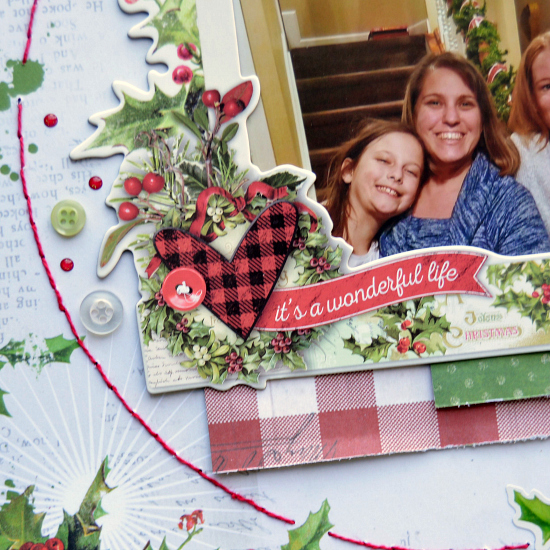
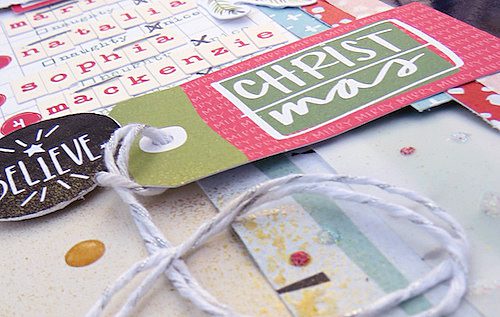
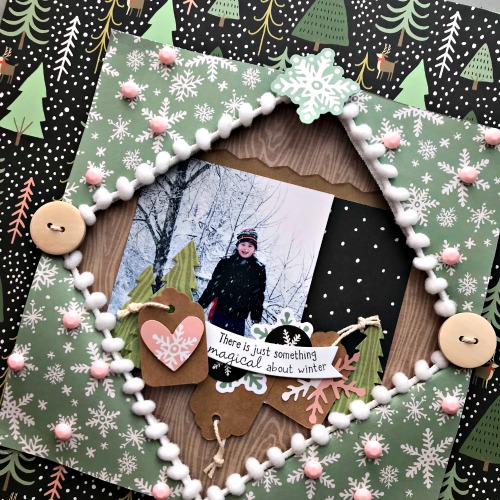
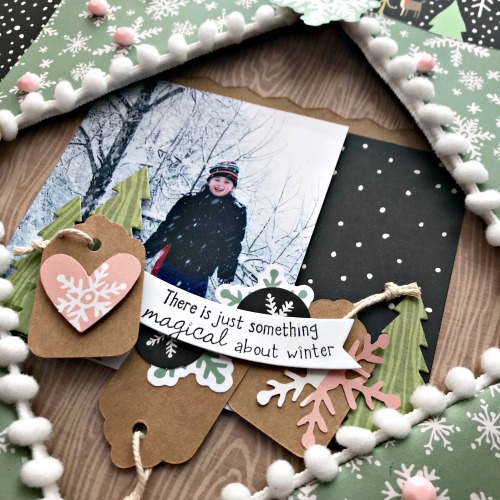
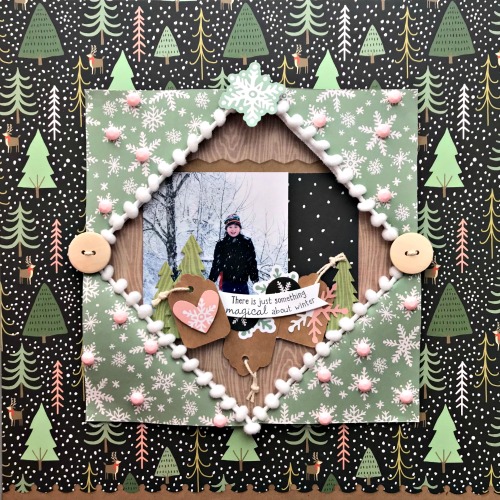
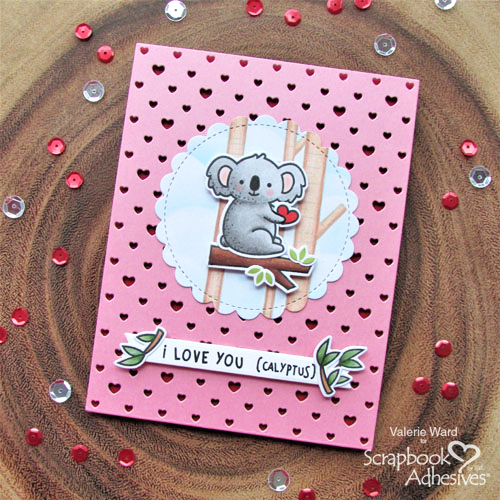
Here we are, all complete! A couple of images of the finished card 🙂

Koala Valentine's Day Card by Valerie Ward for Scrapbook Adhesives by 3L

Thank you for joining us today! Have fun with your Valentine’s Day cards for not only a special someone but for friends and family, also, because who doesn’t like to receive Valentines?! I know I do!

Valerie

Creative Time: 30 Minutes
Skill Level: Beginner

Materials Needed
Scrapbook Adhesives by 3L®

E-Z Runner® Grand Refillable Dispenser and E-Z Runner Grand Ultra Strong Refill
3D Foam Circle Black Mix
E-Z Runner Permanent Fine Adhesive Dispenser
3D Foam Squares White Mix

HomeHobby by 3L®
Dual Tip Glue Pen

Other
Heart Backdrop Craft Die; Scalloped Circle Craft Die; Banner Craft Die; Stamp and Coordinating Craft Die Set; Coloring Medium

Pin It!

Koala Valentine's Day Card by Valerie Ward for Scrapbook Adhesives by 3L Pinterest

Heritage Scrapbooking with Creative Photo Corners

Hi friends! Dana Tatar here today sharing a peek inside my family heritage scrapbooks. The albums below date back to the 1940s and belonged to my Grandfather. It is so fun to look at memorable events from the exciting times in his life: high school graduation high school, meeting my Grandmother and settling into his first home. Many of the photos have come loose from the original photo corners, so I’m carefully piecing the pages back together with new Creative Photo Corners.

Heritage Scrapbooking with Creative Photo Corners by Dana Tatar for Scrapbook Adhesives by 3L

In addition to preserving the albums that are already complete, I’m working with my Mother to sort and organize her loose family photos into albums.

Preserving Heritage Scrapbooking with Creative Photo Corners

The birthday portrait dates back to the early 1900s. Don’t they look like they’re having fun?! The Kraft Creative Photo Corners are great for securing sepia-toned photos to the page.

Creative Photo Corners are perfect for heritage photos, no adhesive ever touches the photo or document they hold. The adhesive is on the back side of the corners, they hold permanently but allow you to remove the item if needed. They’re acid and lignin free, and archival safe for preserving your delicate and precious memories.

Heritage Scrapbooking with Creative Photo Corners by Dana Tatar for Scrapbook Adhesives by 3LSome of the newer photos look better when paired with Black Creative Photos Corners.

Heritage Scrapbooking with Creative Photo Corners by Dana Tatar for Scrapbook Adhesives by 3L

The White Creative Photo Corners are also nice.

Heritage Scrapbooking with Creative Photo Corners by Dana Tatar for Scrapbook Adhesives by 3L

I used Adhesive Dots Large to attach fragile papers and vintage mounted photos to the album pages.

Heritage Scrapbooking with Creative Photo Corners by Dana Tatar for Scrapbook Adhesives by 3L

I’ve decided to continue with the clean and simple style of my Grandfather’s scrapbooks. I’m securing photographs with Creative Photo Corners and adding notations by hand.

I show Creative Photo Corners used in the traditional way today, but they can be used to create fun borders and unique design elements.  Here are some of my favorite alternative uses for photo corners:

Thanks for visiting and Happy New Year!
~Dana

Skill Level: Beginner
Creative Time: 10 Minutes (Per Album Page)

Materials Needed
Scrapbook Adhesives by 3L®
Creative Photo Corners Kraft
Creative Photo Corners Black
Adhesive Dots Large
Creative Photo Corners White
Creative Photo Corners Mix Pack

Other
Family Photos; Scrapbook Album (Heidi Swapp)

Pin It!

Heritage Scrapbooking with Creative Photo Corners by Dana Tatar for Scrapbook Adhesives by 3L Pinterest


Visit our Website and Blog!
Sign up for our Newsletter so you never miss a contest or giveaway!

instagram purple icon facebook icon purple pinterest purple icon twitter purple icon YouTube icon blog subscription purple icon

DIY Gold Background Tutorial

Hi everyone, Christine here today. With it being the start of a brand new year, this card is a reminder to ENJOY life and have fun. This golden card is so simple to make with an effective background created with Crafty Power Tape (yes it’s tape) and embossing powder! Let me show you how to Wear Your Adhesive on the Outside!

DIY Gold Background Tutorial by Christine Emberson for Scrapbook Adhesives by 3L

Creating a DIY Gold Background

With a piece of colored card panel, apply Crafty Power Tape in a diagonal stripe design. If you wish, use a ruler as a guide or estimate by sight.

DIY Gold Background Tutorial by Christine Emberson for Scrapbook Adhesives by 3L

Smooth down to make sure that each strip is affixed. Trim around the edge of your card to remove the excess pieces. Then remove the white liners, you’ll notice that Crafty Power Tape liners remove easily and quickly!

DIY Gold Background Tutorial by Christine Emberson for Scrapbook Adhesives by 3L

Next sprinkle over embossing powder, your choice of color, I’ve gone with gold for my golden New Year’s theme.

DIY Gold Background Tutorial by Christine Emberson for Scrapbook Adhesives by 3L

Tap away the excess and then heat set with a heat gun for glorious golden stripes!

DIY Gold Background Tutorial by Christine Emberson for Scrapbook Adhesives by 3L

Using E-Z Runner® Permanent Strips Refillable Dispenser, I placed the panel onto a gold foil card mat.

DIY Gold Background Tutorial by Christine Emberson for Scrapbook Adhesives by 3L

For some interest, I looped burgundy twine around the layer twice vertically and affixed on the reverse with Crafty Foam Tape.

DIY Gold Background Tutorial by Christine Emberson for Scrapbook Adhesives by 3L

To balance out the back and add height, add strips of Crafty Foam Tape before matting onto the card base. The Enjoy sentiment was die-cut and affixed with 3D Foam Squares Regular.

DIY Gold Background Tutorial by Christine Emberson for Scrapbook Adhesives by 3L

The finishing touches like flowers with little pearl centers and leaves die cuts were placed around the sentiment. This card was fun to do 🙂

Thanks for stopping by and wishing you a fantastic 2019!

Christine

Creative Time: 30 Minutes
Skill Level: Intermediate

Materials Needed
Scrapbook Adhesives by 3L®

3D Foam Squares White Regular
Crafty Power Tape
Crafty Foam Tape
E-Z Runner® Permanent Strips Refillable Dispenser

Other
Craft Dies: Spellbinders® Paper Arts (Enjoy Expressions, Swallow and Heart and A2 Matting Basics); Gold Mirror Cardstock; Burgundy, Ivory, and Green Cardstock; Gold Embossing Powder: WOW; Burgundy Twine; Pearls

Pin It!

DIY Gold Background Tutorial by Christine Emberson for Scrapbook Adhesives by 3L Pinterest

Seasons Givings 2019: New Years Party Ensemble

Happy New Year! We’re thrilled to be a part of the 7th year of the Seasons Givings Blog Hop! Each participating company and designer offers an opportunity to win a prize. This way companies and designers thank our followers for their support. You’ll find an inspiring project on each blog too. Start the New Year with a creative bang! Don’t forget to pin your favorite projects, and follow some new companies and designers!

Who doesn’t love a party to ring in a New Year?! Today Linsey Rickett shares a party ensemble that is sure to inspire to make a party of your own! Also, read all the way to the end for our giveaway details!

2019 New Years Party Ensemble by Linsey Rickett

New Years Party Ensemble by Linsey Rickett for Scrapbook Adhesives by 3L

Ring in the New Year with festive party decorations! My party ensemble consists of beautiful large rosette pinwheels, a new years banner and a collection of fun photo booth props!

A ‘Happy 2019’ banner is sure to set off your New Years display! I cut five rectangles out of patterned paper and one out of black cardstock. Simply add letters and numbers with the E-Z Runner® Permanent Strips Dispenser. Accents were added with Adhesives Dot Medium.

Rosette pinwheels are easy to make and add pizazz! I simply accordion-fold several sheets of patterned papers and assembled the ends with E-Z Runner® Permanent Strips Dispenser. To finish it off, I added a die cut in the center using an Adhesives Dot Medium.

New Years Party Ensemble by Linsey Rickett for Scrapbook Adhesives by 3L

A photo booth is a must for any party these days and of course, you’ve got to have all the props to go with it! Make fun photo booth props with paper straws and die cuts. I assembled all the pieces with a combination of E-Z Runner® Permanent Strips Dispenser and Adhesives Dot Medium.

What will you be creating for the New Year? On behalf of Scrapbook Adhesives by 3L® and me, thank you for your support this year and we wish you a Happy 2019!!

Creative Time: 1 hour
Skill Level: Beginner

Materials Needed
Scrapbook Adhesives by 3L®

E-Z Runner® Permanent Strips Dispenser
Adhesives Dots Medium
3D Foam Circles Black Mix

Other
Cardstock; Patterned Paper; Paper Straws; Die Cuts

Pin It!

New Years Party Ensemble by Linsey Rickett for Scrapbook Adhesives by 3L Pinterest

Giveaway Details

Season's Givings Blog Hop 2019

Enter to win through the Rafflecopter App. Comments are monitored and will take time to publish. International entries are welcome.

a Rafflecopter giveaway

If you cannot see the comment section (at the bottom of this post), please click: Seasons Givings 2019: New Years Party Ensemble, and scroll down to the bottom of the post.

Visit our Website and Blog!
Sign up for our Newsletter so you never miss a contest or giveaway!

instagram purple icon facebook icon purple pinterest purple icon twitter purple icon YouTube icon blog subscription purple icon

Your next stop is: Ink Blot Shop

Visit Season’s Givings Blog Hop Participants:

Lawn Fawn

Scrapbook and Cards Today Magazine

Hero Arts

My Favorite Things

Reverse Confetti

My Sweet Petunia

Picket Fence Stamps

Scrapbook Adhesives by 3L – You are here!

Ink Blot Shop

Indigo Jade Art

Sunny Studio Stamps

Paper House Productions

Kraftin Kimmie Stamps

The Stamp Simply Ribbon Store

Newton’s Nook Designs

Kelly Klapstein

Latisha Yoast

Lydia Fiedler

Lori Craig

Dina Kowal

Nichol Spohr

Chari Moss

Jenn Shurkus

Vera Yates

Ashley Newell

Beth Pingry

Giovana Smith

Dana Joy

Heather Hoffman

Margie Higuchi

Mindy Eggen

Julie Tilman

Cindy Lawrence

Jessica Frost-Ballas

Kelly Latevola

Emily Midgett

Ilina Crouse

Emily Leiphart

Kristi Goulet

Debi Adams

Tracey McNeeley

Wanda Guess

Ashley Harris

Tracey McLennon

Janine Tinklenberg

Amy Rysavy

Caly Person

Marcie Sharp

Mary-Ann Coulter Maldonado

Amy Tsuruta

Tricia Barber

Shemaine Smith

Christine Meyer

Lisa Henke

Shellye McDaniel

Kathy Schweinfurth

Yvonne Van Der Grijp

Lynette Kaufmann

Laura Williams

Dana Tatar

Cheiron Brandon

Patti Gilliam

Gracie Chavez

Carisa Zglobicki

Debbie Seyer

Mariana Grigsby

Michelle Woerner

Deborah Saaranen

Lisa Stein

Ceal Pritchett

Thanks and Happy New Year!

Your Favorite Projects from 2018!

2018 has been an amazing year of inspiration! We are so thankful to our talented designers, and for you, our loyal fans! We thank you for your support here, and on our social accounts. Today is a quick post to show you what you all loved this year, according to our top Instagram posts.

Favorite 9 Posts of 2018 - Scrapbook Adhesives by 3L


Here are the links to each post:

Top Row

1. Paper Embellishment Bits by Shellye McDaniel

2. Dimensional Brushstroke Flowers Hello Card by Judy Hayes

3. Adding Sparkle and Shine to a Stamped Card by Teri Anderson

Second Row

1. Farmhouse Gift Wallet with Jillibean Soup by Christine Emberson

2. Christmas Hinged Gift Box Tutorial by Shellye McDaniel

3. Making a Mother’s Day Gift Ensemble by Judy Hayes

Third Row

1. DIY Planner Flag Embellishments by Shellye McDaniel

2. Let’s Hit the Great Outdoors by Linsey Rickett

3. Memories Scrapbook Page by Margie Higuchi


We look forward to a fantastic 2019! Happy New Year!

Connect and Stick with 3L!

Visit our Website and Bookmark our Blog!
Sign up for our Newsletter so you never miss a contest or giveaway!

instagram purple facebook purple pinterest purple twitter purple SAby3L YouTube icon blog purple

My Favorite Adhesives on a Christmas Page

As we are wrapping up the season, I always enjoy putting together a few more Christmas scrapbook pages to capture the year’s memories. This layout showcases both the E-Z Runner® Grand dispenser and 3D Foam adhesives at their finest. I’ll show you why these are my favorites and why you need them for a perfect layout! It’s Christine joining you today with one last Christmas scrapbook page for the 2018 holiday season.

My Favorite Adhesives on a Christmas Page by Christine Meyer for Scrapbook Adhesives by 3L

I’m not doing any special techniques with the adhesives today, but instead showing you my favorite products from Scrapbook Adhesives by 3L and how I use them to put together a layout effectively!

My Favorite Adhesives on a Christmas Page by Christine Meyer for Scrapbook Adhesives by 3L

My Favorite Dimensional Product: 3D Foam

First up let’s talk about how useful the 3D Foam Squares and 3D Foam Circles are! I use them in several locations on this layout. First up, I put the 3D Foam Squares underneath my paper layers. I don’t use them throughout, just along the top border to pop up each layer a little and make the torn paper stand out even more. I use the 3D Foam Circles underneath the holly embellishment to lift it up above my stitching.

They’re made with high-density foam, which means they won’t crush in a scrapbook. 3D Foam is acid-free and lignin-free, making it safe to use with photos and paper.

Additionally, I use them underneath the “this is joy” ticket. When you are working with chipboard embellishments like the frame, you can add 3D Foam Squares to really elevate embellishments and keep nice even layers.

My Favorite Adhesives on a Christmas Page by Christine Meyer for Scrapbook Adhesives by 3L

My Favorite Dispenser: E-Z Runner® Grand

The E-Z Runner® Grand is simply the best XL tape runner out there! First, it comes with the White Permanent Strips; a permanent double-sided adhesive that applies in curves, short or long runs. The dispenser is lightweight and easy to use in either hand. Even better than all is the fact that it is easy to refill. Just pop the cartridge out and put it back in again! There are four different adhesive types you can switch between, even mid-use!

Check out this quick video showing how to use and refill the E-Z Runner Grand Dispenser.

Today’s layout primarily features the E-Z Runner Grand Dots Permanent Refill.  I opt for that because my chipboard frame had a lot of curves and details on the edges (as shown in the picture). With the Dots Permanent Refill I can cover all of it without having to tuck or trim away extra adhesive.

-Christine

Creative Time: 60 Minutes
Skill Level: Intermediate

Materials Needed
Scrapbook Adhesives by 3L®
3D Foam Circles White Mix
E-Z Runner® Grand Refillable Dispenser
E-Z Runner® Grand Permanent Dots Refill
3D Foam Squares White Mix

Other
Flavors of the Month Kit from The ScrapRoom Kit Club

Pin It!

My Favorite Adhesives on a Christmas Page by Christine Meyer for Scrapbook Adhesives by 3L Pinterest

Visit our Website and Blog!
Sign up for our Newsletter so you never miss a contest or giveaway!

instagram purple icon facebook icon purple pinterest purple icon twitter purple icon YouTube icon blog subscription purple icon

Morgan Family: Holiday 2018 Documented

The holidays are flying by, it’s almost New Year’s Eve! Meanwhile, I am still trying to record 2018 in the books before it ends. At least, I documented one event of family time in a scrapbook layout  – catching family time was a priority especially in December. Everyone had a great night!

Morgan Family: Holiday 2018 Documented by Shannon Morgan for Scrapbook Adhesives by 3L

Starting the Documented Layout

Look for colors that compliment your picture, I chose a mix of non-traditional Christmas colors with the standard of red, green, and white in my patterned papers and embellishments.

Morgan Family: Holiday 2018 Documented by Shannon Morgan for Scrapbook Adhesives by 3L

Focusing around that perfectly imperfect photo, I created layers for dimension and interest. Of course, my go-to adhesive to assemble for all this is the E-Z Runner® Grand Dispenser. It’s the tool I reach for on every single project.

I love Creative Photo Corners! You just need two corners for this layout. The Creative Photo Corners White are perfect accents for the look I was going for.

Morgan Family: Holiday 2018 Documented by Shannon Morgan for Scrapbook Adhesives by 3L

Did you know there are many different sizes of Adhesive Dots available from Scrapbook Adhesives by 3L®? One of the best sizes in my honest opening is the Adhesive Dots Micro. It is so versatile! For this project, I used them for placing my twine and sequins.

Morgan Family: Holiday 2018 Documented by Shannon Morgan for Scrapbook Adhesives by 3L

If you are looking for an easy way to create dimension, you need to look at 3D Foam Squares! There are many 3D Foam products to choose from Thin 3D Foam Squares to 3D Foam Circles to 3D Foam Shapes. There’s bound to be one that fits your project needs.

Morgan Family: Holiday 2018 Documented by Shannon Morgan for Scrapbook Adhesives by 3L

Creative Time: 60 minutes
Skill Level: Beginner

Materials Needed
Scrapbook Adhesives by 3L®

Adhesive Dots Micro
3D Foam Squares Black Regular Size
E-Z Runner® Grand Refillable Dispenser 
Creative Photo Corners White

Other
SRM Stickers, My Minds Eye, Cocoa Daisy, October Afternoon, Elle’s Studio, Illustrated Faith, Twine, Sequins, Staples

Pin It!

Morgan Family: Holiday 2018 Documented by Shannon Morgan for Scrapbook Adhesives by 3L Pinterest

Create a Winter Window Layout Tutorial

Hello, all!  Shellye McDaniel here with a sweet dimensional scrapbook layout with a window feature. It’s a simple way to draw focus to a single  photo, so let’s get started!

Create a Winter Window Layout by Shellye McDaniel for Scrapbook Adhesives by 3L

Create the Window Feature

To begin take a 12×12-inch sheet of double-sided scrapbook paper and place a 6×6-inch square in the center for tracing.

Create a Winter Window Layout by Shellye McDaniel for Scrapbook Adhesives by 3L

Next cut from point-to-point of the traced square, from the center, as shown below.

Create a Winter Window Layout by Shellye McDaniel for Scrapbook Adhesives by 3L

Fold the edges back gently by bringing the flaps over the front of the patterned paper.

Create a Winter Window Layout by Shellye McDaniel for Scrapbook Adhesives by 3L

Now use small pieces of Crafty Foam Tape and attach it to the backside of each corner of the flaps.

Create a Winter Window Layout by Shellye McDaniel for Scrapbook Adhesives by 3L

Attach the flaps to the front of the scrapbook paper. Make sure that each of the flaps is evenly spaced and forms a neat square.

Making the Second Layer

For the second layer attach a wood-grain patterned paper to the back of the page using strips of the Crafty Foam Tape as shown below.

Create a Winter Window Layout by Shellye McDaniel for Scrapbook Adhesives by 3L

I now have the perfect background slate for photos and embellishments!

Create a Winter Window Layout by Shellye McDaniel for Scrapbook Adhesives by 3L

The Embellishing Details

Add pom trim to the inside of the window with strips of Extreme Double-Sided Tape 1/8in to hold it in place.

After threading with twine, attach two wooden buttons to the sides of the window with Adhesive Dots 3D.

Create a Winter Window Layout by Shellye McDaniel for Scrapbook Adhesives by 3L

Of course, the snowflakes need some bling, use pink rhinestones with the smallest of the 3D Foam Circles White Mix. By using 3D Foam I can continue the dimensional effect!

Create a Winter Window Layout by Shellye McDaniel for Scrapbook Adhesives by 3L

Add the cardstock tags and then with the Dual Tip Glue Pen attach pieces of the die-cut snowflakes. I like using just a small dollop of the glue so that the die-cuts aren’t completely flat.

Create a Winter Window Layout by Shellye McDaniel for Scrapbook Adhesives by 3L

Create a Winter Window Layout by Shellye McDaniel for Scrapbook Adhesives by 3L

Create a Winter Window Layout by Shellye McDaniel for Scrapbook Adhesives by 3L

Finally, my Winter Window Layout is complete!  It’s like peering outside and seeing my little one enjoying a snowy day 🙂

Thank you for stopping by!

Creative Time: 30 Minutes
Skill Level: Intermediate

Materials Needed
Scrapbook Adhesives by 3L®

Crafty Foam Tape
3D Foam Circles White Mix
Adhesive Dots 3D

HomeHobby by 3L®
Extreme Double-Sided Tape 1/8in
Dual Tip Glue Pen

Other
Patterned Paper: Fancy Pants (Trees) and We R Memory Keepers (Woodgrain); Die Cuts: Fancy Pants; Pom Trim: Offray; Pink Rhinestones: Paper Studio; Kraft Tags; Kraft Border; Buttons

Pin It!

Create a Winter Window Layout by Shellye McDaniel for Scrapbook Adhesives by 3L

Visit our Website and Blog!
Sign up for our Newsletter so you never miss a contest or giveaway!

instagram purple icon facebook icon purple pinterest purple icon twitter purple icon YouTube icon blog subscription purple icon

Glitter Snowflakes Jar

Christmas has past and I wanted something to replace my holiday decorations and brighten my décor through the winter months. For me, winter means snow, so I made this Glitter Snowflakes Jar in my favorite color with 3D Foam Snowflakes and Adhesive Sheets 4 x 6 inch. It can be used as a home décor piece as it is or with little battery LED lights or a candle.  Even empty it sparkles!  It would be pretty filled with cotton balls!


Glitter Snowflake Steps

I chose to use a recycled clear jar for my Glitter Snowflakes Jar.  Color was added to the inside with alcohol inks.  That step can be skipped by using a colored jar.


I used 3D Foam Snowflakes along with 6 different small die cut paper snowflakes. I chose  snowflake dies that fit the 3D Foam Snowflakes.


For the die cut snowflakes, apply Adhesive Sheets 4 x 6 inch to white cardstock on one side.


Cut several snowflakes of each design with dies placed on side of paper with Adhesive Sheet. That will be front side on the jar. Tape may be needed to hold dies in place as the Adhesive Sheets liner is slippery.


Wear Your Adhesive on the Outside

The next step is to place 3D Foam Snowflakes on the jar. To remove snowflakes from sheet, gently lift each point and then remove the whole snowflake. That method keeps the snowflake from getting too distorted. Place 3-4 snowflakes at a time on the jar.

Remove the liner from each 3D Foam Snowflake and place a paper snowflake on each one.  I varied the styles to add variety. Do not remove liner on paper snowflakes yet! Cover each with embossing powder and press it into the foam snowflake and shake off the excess. Use a dry paint brush to remove excess around snowflake points as it tends to cling to the glass.

Glitter Snowflakes Jar by Judy Hayes for Scrapbook Adhesives by 3L

This photo shows closest snowflake with embossing powder applied to it. The liner is still in place on paper snowflake.  The next step is to remove the liners on paper snowflake and sprinkle with glitter, then heat emboss. Repeat to cover jar with snowflakes.  Add circles (from 3D Foam Snowflakes sheet) between snowflakes and heat emboss.  (The snowflake steps are same as shown below with jar lid.)


Jar Lid Detailing

Paint jar lid white and wrap Crafty Foam Tape White around lid edge. Remove the liner and cover with embossing powder.  Heat to emboss.


Apply Adhesive Sheets 4 x 6 inch to both sides of piece of white cardstock.  Die cut circle to fit jar lid. Peel liner from back side and fasten to jar lid.


Remove liner from top side.  Place large 3D Foam Snowflake on circle. Do not remove liner from snowflake.


Sprinkle glitter over circle and press in place.  Shake off excess and use soft dry paint brush to remove loose glitter.  (My paint was not fully dry so glitter clung to it.)


Remove liner from 3D Foam Snowflake and place die cut paper snowflake on it with adhesive liner side up. Do not remove liner from paper snowflake yet. Sprinkle with embossing powder. Remove liner from small paper snowflake and sprinkle with glitter, then heat emboss.

These are same steps I used for snowflakes on jar.  It has 19 snowflakes on it.


That completes Glitter Snowflakes Jar! I hope you enjoyed this project!

Thanks for visiting!
Judy

Creative Time: 90 Minutes
Skill Level: Intermediate

Materials Needed
Scrapbook Adhesives by 3L®

3D Foam Snowflakes
Adhesive Sheets 4 x 6 inch
Crafty Foam Tape White

Other:
DecoArt® Americana Satin Paint – Cottonball; Ranger Ink Alcohol Inks: Bottle, Pool, Juniper; Ranger Ink Snowflake Tinsel Embossing Powder; Sizzix® Paper Snowflakes Mini Dies; Sparkle N’ Sprinkle® Glitter Seaspray; Spellbinders® Standard Circles SM; White Cardstock

Pin It!

DIY Foiled Planner Clips Tutorial

Can you believe it’s almost 2019? The New Year means it is time to set up your next planner! Teri here today, and I’m going to show you a fun way to add a touch of creativity and organization to your planner by making some simple DIY Foiled Planner Clips to use in it!

DIY Foiled Planner Clips by Teri Anderson for Scrapbook Adhesives by 3L

These sweet paperclips are easy to make with 3D Foam Products from Scrapbook Adhesives by 3L.

Making the Planner Clips

Start by cutting down one 3D Foam Creative Sheet with your paper trimmer to 4 inches by 4 inches. The 3D Foam Sheets are from the 3D Foam Creative Embellishment Kit. If you don’t have a paper trimmer you can use scissors. Simply mark a line with a pencil and cut. It’s that easy.

DIY Foiled Planner Clips by Teri Anderson for Scrapbook Adhesives by 3L

Cut four squares of patterned paper. Remove the backing paper on one side of the 3D Foam Creative Sheet. Place the paper pieces on it. Set a circle die over the sheet and run it through your die-cutting machine. You’ll repeat this process until you end up with four patterned paper circles. Alternatively, you could use a circle punch.

DIY Foiled Planner Clips by Teri Anderson for Scrapbook Adhesives by 3L

You’ll also want to use your circle die to cut four circles from white cardstock.

DIY Foiled Planner Clips by Teri Anderson for Scrapbook Adhesives by 3L


Flip your patterned paper circles over. Remove the other piece of backing paper from each one. Set a paperclip on each circle. Be sure to put the single loop side onto the adhesive.

Place one of the cardstock circles over the clip and onto each circle. Repeat this process until you have four circle-topped paperclips.

Decorating the Planner Clips

Now, it’s the time for the fun part: decorating the planner clips.

Scrapbook Adhesives by 3L has a number of awesome fun 3D Foam Shapes that work for this project! We’re going to use the 3D Foam Stars, 3D Foam Hearts and 3D Foam Butterflies today. but you may want to use a different shape on future clips.

DIY Foiled Planner Clips by Teri Anderson for Scrapbook Adhesives by 3L

Take some of the 3D Foam embellishments and mount them to each clip. Be creative! Look for ways to use different shapes together to make an interesting design.

DIY Foiled Planner Clips by Teri Anderson for Scrapbook Adhesives by 3L

Remove the paper liner on top of each 3D Foam Shape. Use your fingers to burnish foil onto each shape. There are five different colors of foil that are included in each of the foil kits: 3D Foam Creative Embellishment Kit, Metallic Transfer Foil Variety and Metallic Transfer Foil Holographic kit.

You could call things good, but we are going for a two-toned foiled look with these clips! Take some 3D Foam Circles and adhere them onto each clip. You can place them on or next to the shapes you’ve already added foil to.

Select a second color of foil and then burnish it to each of the 3D Foam Circles.

If you are worried about there being any sticky residue from the foam on your clips, rub each clip on a non-static embossing bag. Don’t have one of those? Use a sheet of fabric softener instead!

DIY Foiled Planner Clips by Teri Anderson for Scrapbook Adhesives by 3L

Complete your clips by adding a bow to each one with twine or ribbon.

Using the Clips

These clips look amazing when used in a planner!

DIY Foiled Planner Clips by Teri Anderson for Scrapbook Adhesives by 3L

DIY Foiled Planner Clips by Teri Anderson for Scrapbook Adhesives by 3L

They also make great bookmarks! You may want to make a few to use as you tackle your reading list for the new year.

DIY Foiled Planner Clips by Teri Anderson for Scrapbook Adhesives by 3L

DIY Foiled Planner Clips by Teri Anderson for Scrapbook Adhesives by 3L

DIY Foiled Planner Clips by Teri Anderson for Scrapbook Adhesives by 3L

Creative Time: 30 Minutes
Skill Level: Beginner

Materials Needed
Scrapbook Adhesives by 3L®
3D Foam Circles White Mix
3D Foam Creative Embellishment Kit with Foil
3D Foam Shapes: 3D Foam Stars, 3D Foam Hearts and 3D Foam Butterflies
Metallic Transfer Foil Holographic
Metallic Transfer Foil Variety

Other:
The Brights 6×6 Paper Pad by Avery Elle; Twine by Whisker Graphics; Circle Die by Spellbinders; Paperclips; White Cardstock

Pin It!

DIY Foiled Planner Clips by Teri Anderson for Scrapbook Adhesives by 3L Pinterest