You are in our US store • Switch to Europe store

Creative Uses for Adhesive Sheets

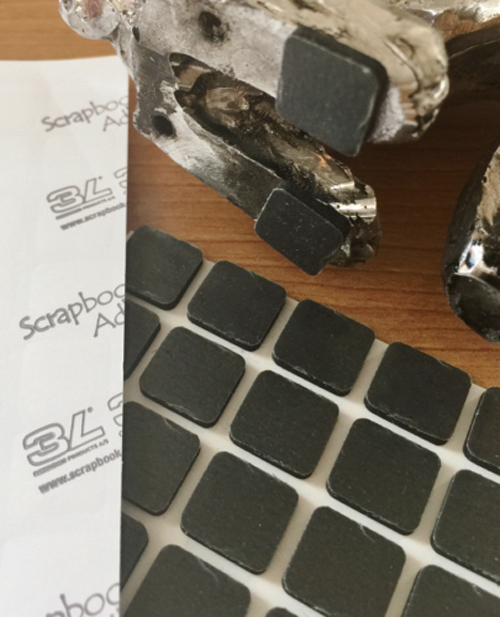
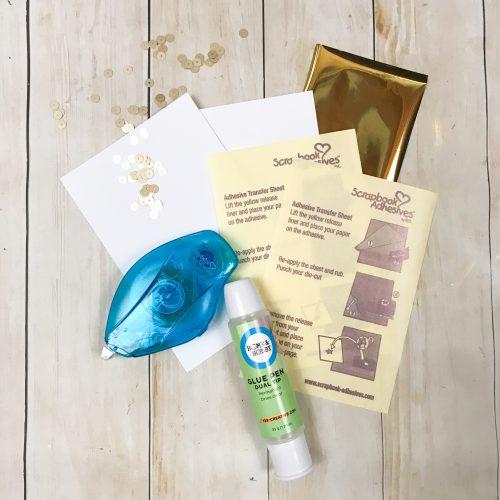
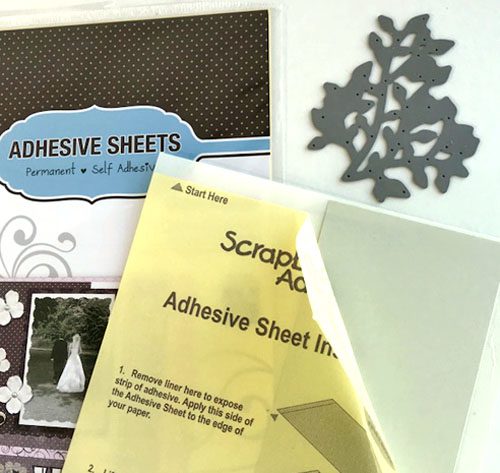
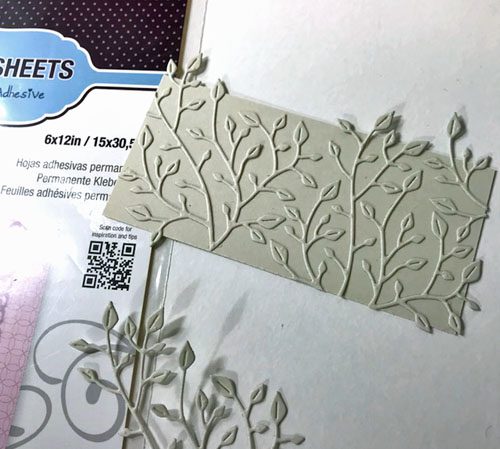
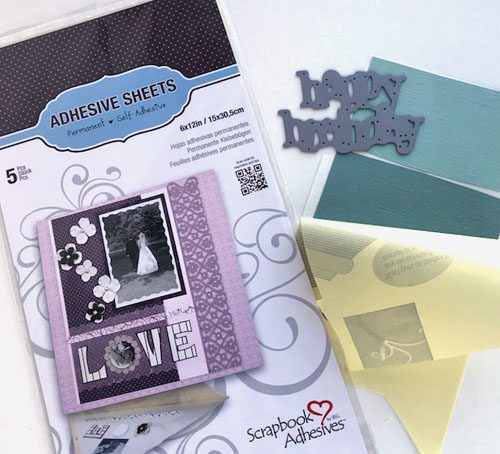
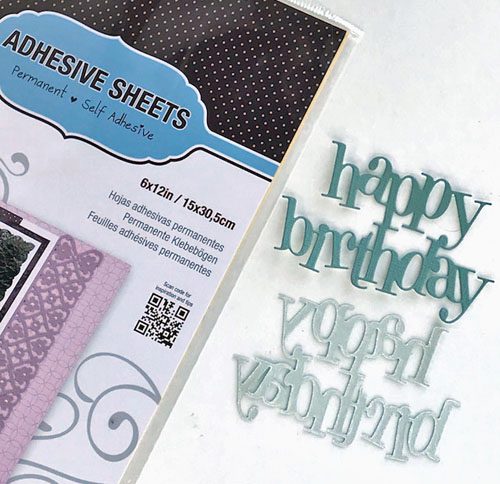
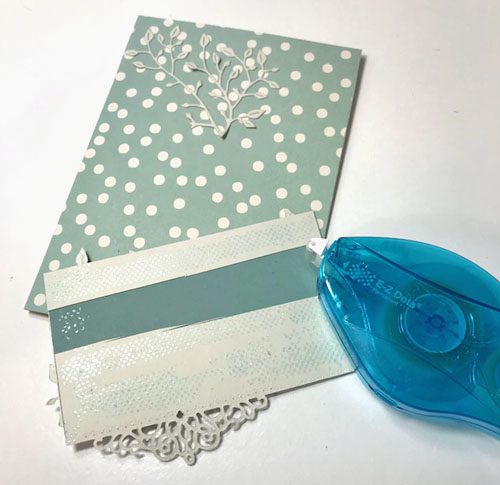
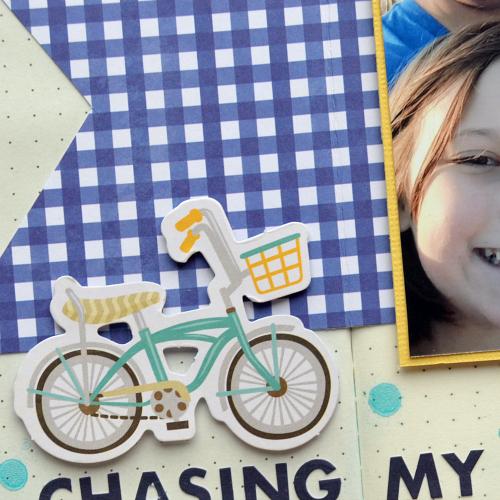
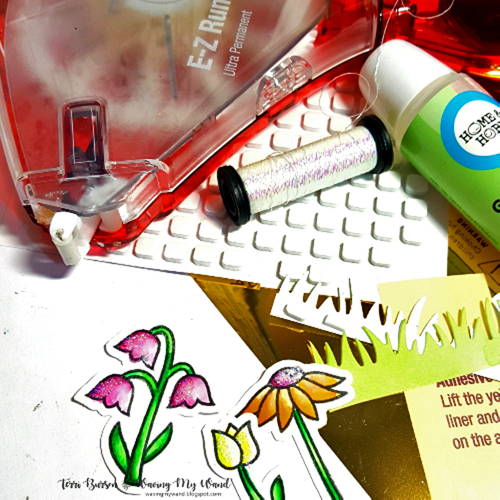
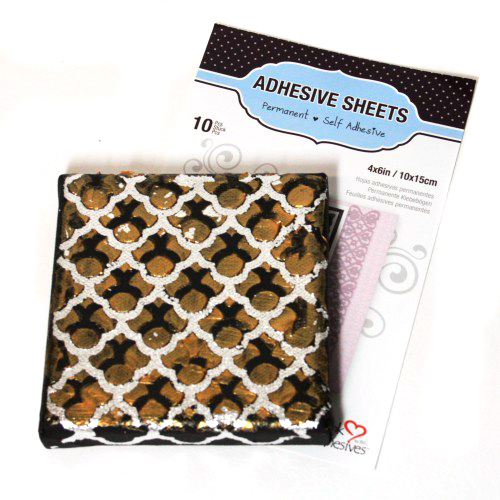
Did you know our Adhesive Sheets are perfect for die-cutting? They are a thin transparent layer of permanent adhesive between two liners. They provide strong, clear, edge-to-edge coverage of permanent adhesive. Use them with paper, fabric, ribbon, leather, and just about any media. They’re perfect for acrylics and vellum paper too!

How to use Adhesive Sheets

These sheets are non-stringy and will not gum up or leave residue on dies, punches, scissors or other cutting elements. They work in manual and electronic die-cut machines.

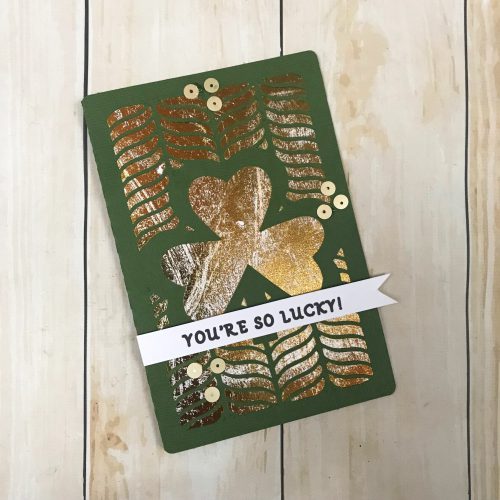
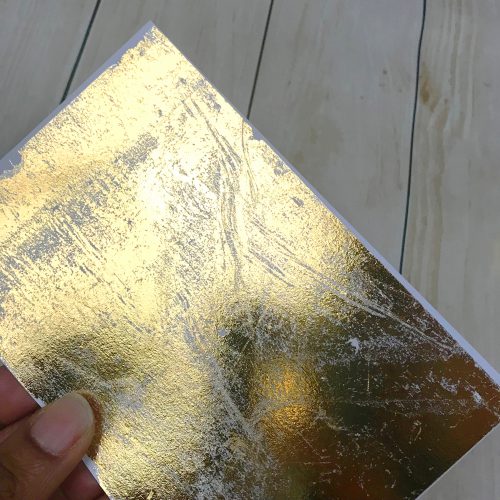
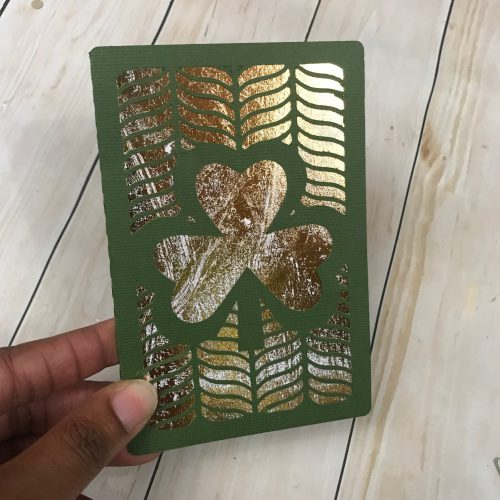
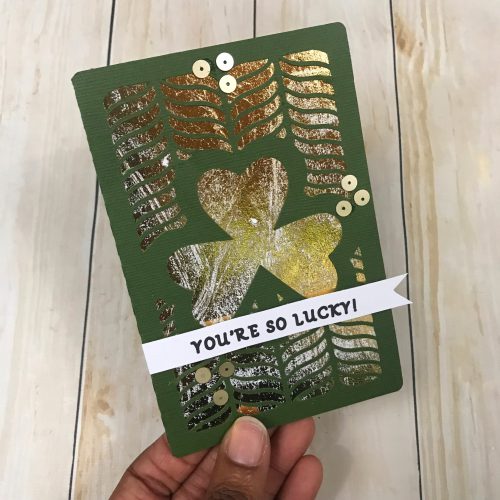
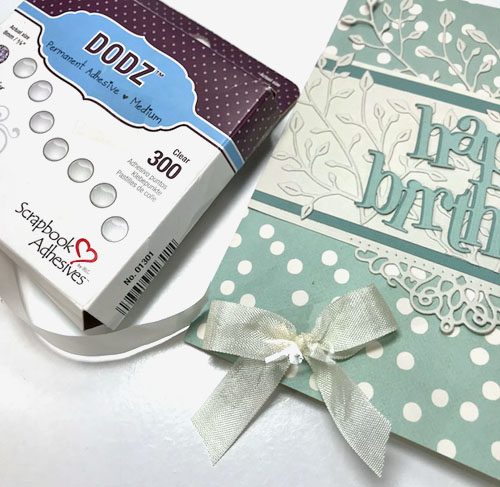
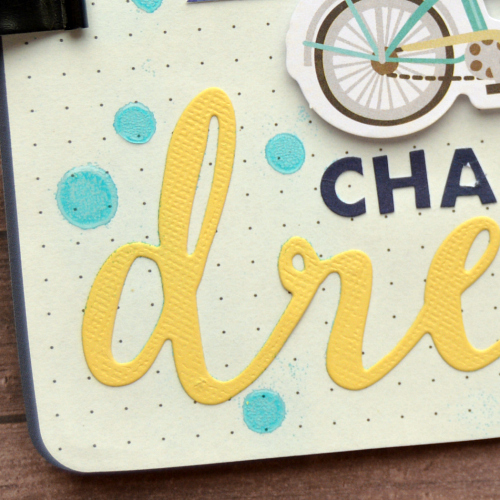
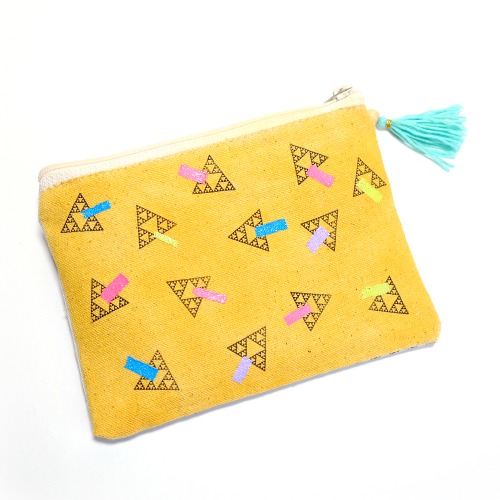
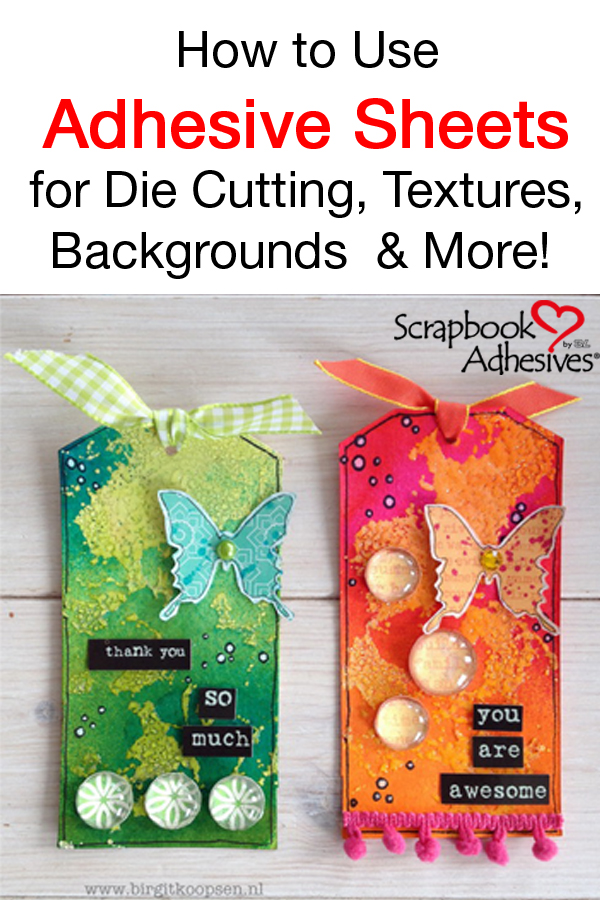
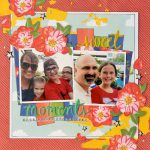
For additional flair, apply the sheets to the front side of your project to Wear Your Adhesives on the Outside. Cover with Foil, glitter, embossing powder, pigment powder, microbeads, etc. See how Birgit Koopsen uses embossing powder on her tags, shown above.

Watch our quick video to see them in action:

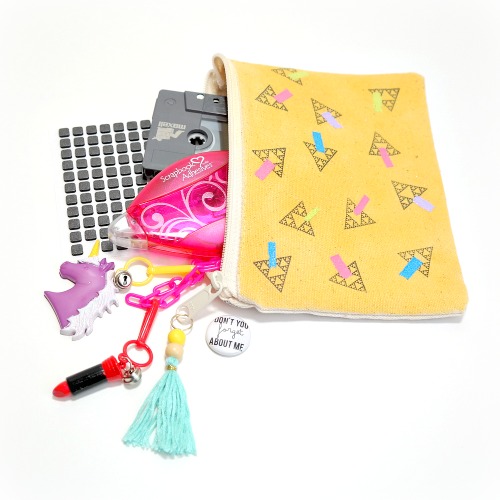
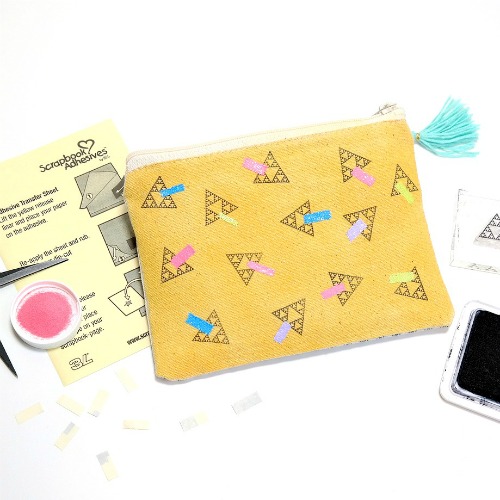
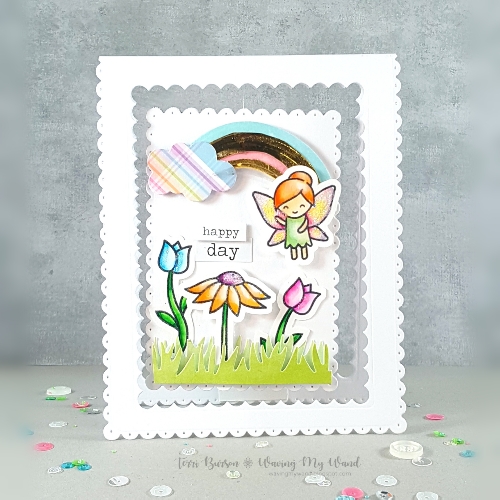
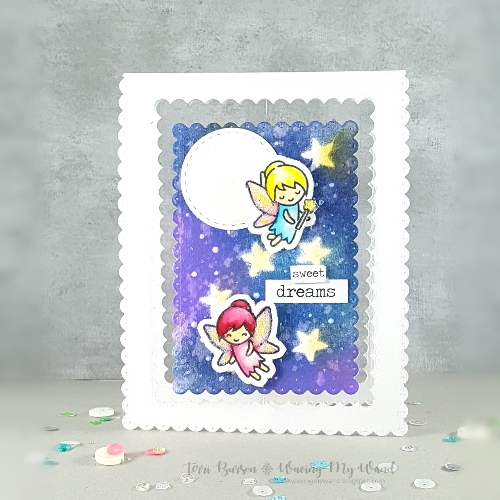
Check out these fun and creative projects and tutorials by our Design Team!

Click on photo or text to get more details.

Paper Piecing Made Easy- Adhesive Sheets- by Christine Emberson Adhesive Sheets + Foil Card Punching and Embossing Adhesive Sheets from Scrapbook Adhesives by 3L Tissue Paper Faux Leather Journal wtih Adhesive Sheets
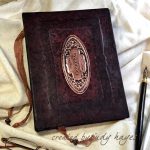
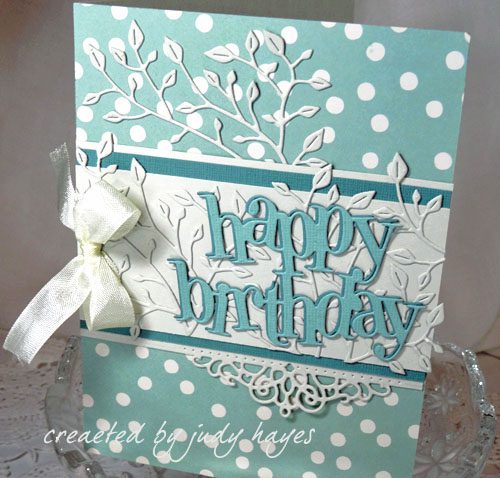
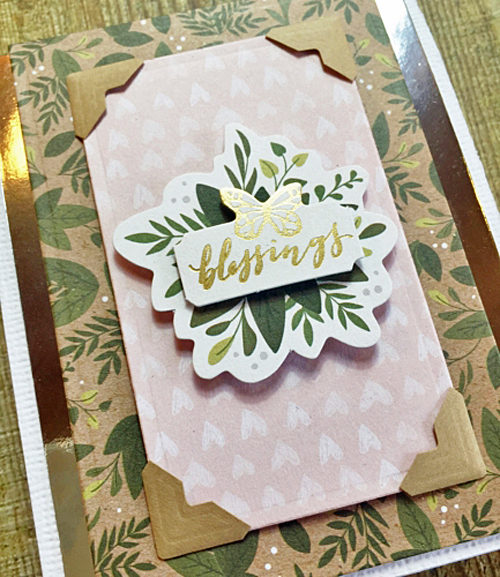
Paper Piecing Made Easy by Christine Emberson Adhesive Sheets with Die Cuts and Foil by AJ Otto Embossing with Adhesive Sheets by Christine Meyer Tissue Paper Faux Leather by Judy Hayes
Colorful Backgrounds with Adhesive Sheets Layered Mask Technique by Angela Ploegman Card with Adhesive Sheets, Scrapbook Adhesives by 3L, Yvonne van de |Grijp Adhesive Sheet Photo Transfer
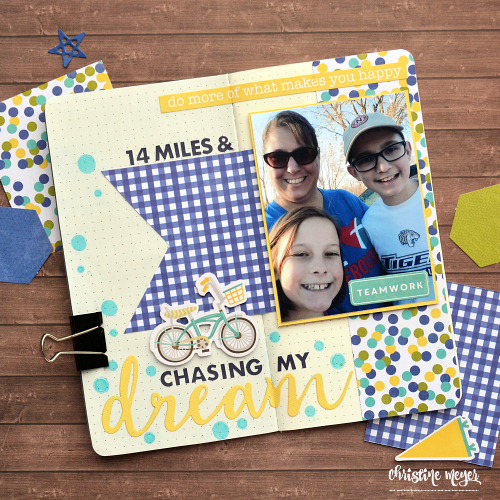
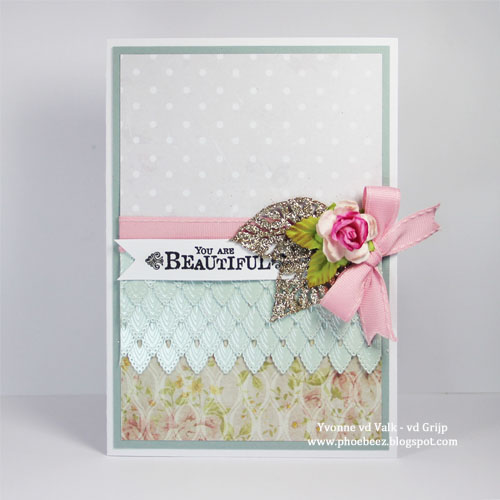
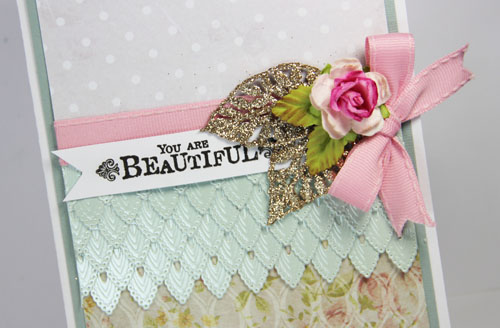
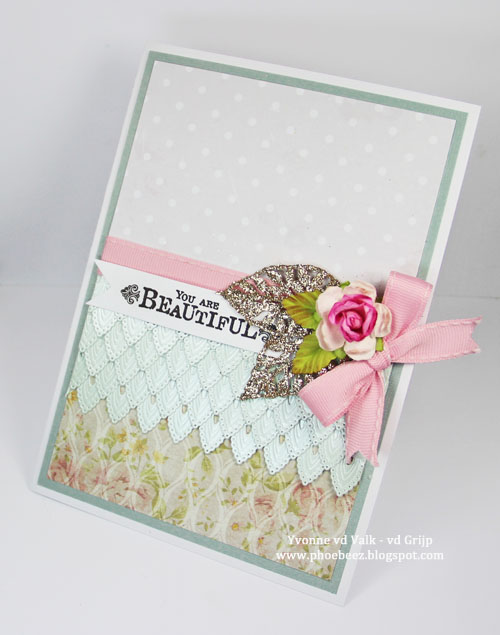
Create Colorful Backgrounds by Christine Meyer Layered Masking Tutorial by Angela Ploegman Intricate Die Cuts with Adhesive Sheets by Yvonne van de Grijp Wood Slice Photo Plaques with Adhesive Sheet Transfer by Dana Tatar

To find more tutorials and inspiration, click this link.

How have you used them? Tag your projects on Instagram with #scrapbookadhesivesby3L and #adhesivesheets to show us!

Top 4 Adhesive Tips for Around the House

Did you know that having Scrapbook Adhesives by 3L products around the house can be helpful? Christine here today and I have some tips to share so stick with me! I keep a supply of products in the handy drawer in my kitchen. They’re not just for crafting!

TOP FOUR ADHESIVES for around the house:

Tip 1: Gift Wrapping

Top 4 Adhesive Tips for Around the House by Christine Emberson for Scrapbook Adhesives by 3L

Do you get in a tangle when gift wrapping?  Do you find sticky tape never behaves? Not a problem anymore with MyStik® Permanent Strips.

You can apply a line of adhesive exactly where you need it, and no more unsightly tape to show.  Your gifts will look professionally wrapped.  Such a time saver especially around Christmas.

Tip 2: Photo Framing

Putting those photos into frames is so easy now.  Just use some Crafty Power Tape to ensure they stay affixed to the photo mount.  It remains sticky, doesn’t discolor and spoil your special photos.

In fact, all of our Scrapbook Adhesives by 3L products are photo and archival safe, acid and lignin free.

Tip 3: Avoiding Scratches on Furniture

Apply 3D Foam Squares to the base of ornaments. Keep their liners on or remove them and add something soft like flock to protect surfaces. I’ve used 3D Foam Squares Black Regular but they are also available in white and come in small and variety packs. These work perfectly as cushions to stop any scratches on your special furniture.

Tip 4: Securing Vases

Accidents can happen but to help avoid items toppling over apply Adhesive Dots Small to the base.  These will secure your vase down, and are very useful if you have pets, children or that someone who is a little accident prone!

Be sure to check out all the useful adhesives on the website. Thanks for stopping by!
Christine

Scrapbook Adhesives by 3L®:
MyStik® Permanent Strips
3D Foam Squares Black Regular
Crafty Power Tape
Adhesive Dots Small

Gold Foiled Shamrock Card

All things green, gold, and St. Patrick’s Day at my house – it’s March! My Irish husband and kids love when I create special treats or send cards in their lunches 🙂 This year I’m still going to send sweet cards in their lunches. Today I am sharing with you one of those cards.

Gold Foiled Shamrock Card by Latrice Murphy for Scrapbook Adhesives by 3L

Adding a little gold!

Shamrocks and gold go together like peanut butter and jelly. I found a great card base and wanted to make it more exciting. So I pulled out my Adhesive Sheets 4×6″, foil and gold sequins. I also grabbed my Dual Tip Glue Pen and E-Z Dots® Permanent Refillable Dispenser.

I started with adhering the Adhesive Sheets 4×6″ to some white cardstock. Press the sheet of gold foil from the 3D Foam Creative Embellishment Kit to the adhesive and rub with your fingers. Once you’ve rubbed it well, pull it off.

Once that foil piece is complete adhere this piece to the backside of the card front. The adhesive runner I used was the E-Z Dots® Permanent Refillable Dispenser. Your card should look like this at this point.

For extra sparkle to play off the gold, I added gold sequins by dotting with Dual Tip Glue Pen first and then placing my sequins down.

Add a sentiment and you’re all done. My card says “You’re so lucky!” on the front and on the inside “Your mom adores you.” I’ll add some chocolate coins in there since it’ll be in their lunches. They’ll love it so much, I hope. Who wouldn’t, right?

It’s a simple idea, but using the gold foil, shamrock card, and the best adhesives around makes it fun and easy.

Thanks for stopping by. I hope you have a great March!
Latrice

Scrapbook Adhesive by 3L®:
Adhesive Sheets 4×6
E-Z Dots® Permanent Refillable Dispenser
3D Foam Squares White Regular 
3D Foam Creative Embellishment Kit

HomeHobby by 3L®:
Dual Tip Glue Pen

Other:
Cardstock; Sequins; Dies

Adhering Intricate Die Cuts on a Birthday Card

How do you adhere your intricate die cuts on your projects? Try using our Adhesive Sheets 6 x 12 inch. You won’t go back to anything else!

Today, I’m thinking spring with a Happy Birthday Card in soft aqua/mint color.  I used Adhesive Sheets 6 x 12 inch, E-Z Dots® Permanent Refillable Dispenser and Dodz Adhesive Dots Medium to make it all work.

How to Adhere Intricate Die Cuts on a Happy Birthday Card by Judy Hayes for Scrapbook Adhesives by 3L

The Intricate Details

Create a 4.5 x 6.25 inches card base from cardstock. The dot-patterned panel was fastened to the card front with E-Z Dots® Permanent Refillable Dispenser.

Die-cut a lace border from taffy cardstock and fastened to a piece of aquamarine cardstock with E-Z Dots® Permanent Refillable Dispenser.  A strip of Taffy cardstock is fastened to back top edge using  E-Z Dots® Permanent Refillable Dispenser. Next, place a piece of taffy cardstock band to fit over the aquamarine piece.

Apply Adhesive Sheets 6 x 12 inch on the back of the taffy cardstock. For accents, die-cut the leaf die three times.

Here’s a quick video on How to use Adhesive Sheets for Die-Cutting and More, view below.

Fasten the three die cuts over the Taffy cardstock band by simply removing backing and pressing in place.  Trim excess off along the edges.

Adhesive Sheets 6 x 12 inch was applied to the back of aqua and aquamarine cardstock.

Use both cardstock pieces to die-cut Happy Birthday as the sentiment.

To create a shadow effect, layer the lighter one on top of the darker die cut by removing the backing to adhere together. Fasten the layered sentiment over leaf band.

Place one leaf branch die cut to the card front.  The Happy Birthday band was fastened over branch using E-Z Dots® Permanent Refillable Dispenser.

Finally, a bow of seam binding was fastened with Dodz Adhesive Dots Medium

Thank for stopping by and Happy Creating!
Judy Hayes

Scrapbook Adhesives by 3L®:
Adhesive Sheets 6 x 12 inch
Dodz Adhesive Dots Medium
E-Z Dots® Permanent Refillable Dispenser

Other Supplies:
Bazzill Basics Paper – Taffy, Aqua; My Colors Cardstock-Aquamarine; Simple Stories I AM Collection –Vertical Elements; Penny Black® Dies: little branch, your day, pop on a fold-royal swirl; Seam Binding

Visit our Website and Blog!
Sign up for our Newsletter so you never miss a contest or giveaway!

instagram purple icon facebook icon purple pinterest purple icon twitter purple icon YouTube icon blog subscription purple icon

Travelers Notebook Adhesive Ideas

Have you jumped on to the Travelers Notebook trend yet?  I have dabbled in it over the last year but I recently had some inspiration for how I could really incorporate it into my regular routine.  I like to go on long distance bike rides. Often that results in pictures…whether it be scenery or selfies of me and my riding partners.  Since I had a pile of about 30 pictures from the last riding season, it was time to get documenting.  BUT I did not want to do 20 layouts all about bike riding.  Enter the Travelers Notebook.  I am going to start using that to document all the memorable rides.  Today I am going to share with you my first entry and how I incorporated a variety of Adhesives into my Travelers Notebook.

Adhesives for your Travelers Notebook

One of the things I like about this medium is that it is a lot faster than a traditional 12 X 12 layout but still allows you to play and experiment with techniques.  Having the right adhesives on hand definitely speeds up the job.  I recommend that when you sit down you have an E-Z Runner (you pick which one), 3D Foam Squares, Crafty Foam Tape, Adhesive Dots (you pick the size), and Adhesive Sheets.  Even if you don’t need all of these – you’ve got everything covered from dimension to dimension to speed to excelllent coverage.

I don’t think I will always want dimension on my pages – because they will just get too bulky.  But for this one I opted for Crafty Foam Tape under my picture and 3D Foam Squares under the bicycle.  It just felt flat – so up they went!

My title was a long die cut that could have been a pain to attach.  But I used a 4 X 6 Adhesive Sheet and that made it so simple!  I also used the Adhesive Dots in both Large and Medium size to add a little embellishing.  I just put them on and then added embossing powder to them and heated them up.  By adding these I was able to both embellish and pull the whole spread together with dots and Wear My Adhesive on the Outside!

There’s a lot going on here – how about a quick video to walk you thru the details?  Here’s one for the whole spread:

Thanks so much for joining me today!
Christine

Scrapbook Adhesive by 3L®:
E-Z Runner® Grand Refillable Dispenser
Dodz Adhesive Dots Medium
3D Foam Squares White Regular Size
Dodz Adhesive Dots Mini
Crafty Foam Tape White
Adhesive Sheets 4×6 inch
Adhesive Dots Large

Other:
Travelers Notebook Insert – Paper House Productions, Embossing Powder – Stampendous, Patterned Papers, Stickers, and Ephemera – Jillibean Soup.


Neon Zipper Clutch with Adhesive Sheets

Hi friends! Dana Tatar here today sharing a fun and colorful zipper clutch. I was born in the 1980s and I am so excited to see geometric designs and neon colors come back into fashion. My young daughters aren’t sold on this trend, but I’m happy to relive the days of my youth! I colored, stamped, and embossed a plain canvas clutch to make a rad accessory.

80s Inspired Neon Embossed Zipper Clutch by Dana Tatar

I used Adhesive Sheets with embossing powder to add neon accents to this clutch. Adhesives Sheets are flexible enough to adhere to a textured surface like canvas and also provide a strong bond for a no-mess application of embossing powder. The solid blocks of bright color really helped add flair to my design.


80s Inspired Neon Zipper Clutch by Dana Tatar for Scrapbook Adhesives by 3L

How to Transform a Canvas Clutch from Blah to Bodacious

  1. First, prime the canvas for maximum color absorption with a spritz of water. Next, choose a bright color of spray mist to apply to the clutch. Spread the color around the canvas with a paintbrush and blend with more water if necessary to achieve a solid base color. Dry with a heat tool.
  2. Stamp a geometric pattern onto the canvas in a random fashion. Be sure to use a dark color of permanent ink.
  3. Cut an Adhesive Sheet into quarter-inch rectangles. Then, remove the yellow backing layer and firmly press the Adhesive Sheets onto the stamped shapes.
  4. Finally, peel off the backing paper, apply neon embossing powder to the adhesive, and apply heat to set.

80s Inspired Neon Clutch with Embossed Adhesive Sheets by Dana Tatar

I’m ready to jet with all my essentials like my mix tape, a charm bracelet, and emergency adhesive! Thanks for stopping by today! What would you carry in this clutch? Let me know in the comments section.

Scrapbook Adhesive by 3L®:
Adhesive Sheets 4×6 inch

Other Supplies: Zipper Clutch; Mist; Black Permanent Ink; Neon Embossing Powder; Sacred Geometry 2 Clear Stamp Set (Paper Wings Productions)

Night and Day Fairy Spinner Card

Spinner cards are a favorite of mine.  They’re fun, easy to make and mesmerizing!   Hello, Terri here, with creative tips for making this colorful spinner card that sparkles and shines!


Details on the Spinner Card

To bring these colorful fairies die cuts to life, apply a little glue from the Dual Tip Glue Pen to its wings and sprinkle with glitter (a.k.a.  fairy dust!) to “Wear Your Adhesive On The Outside!”

Create a foiled rainbow from a trimmed section of Adhesive Sheets 4×6 inch applied to card stock, sticky side up.  Next, add gold foil from the 3D Foam Creative Embellishment Kit, shiny side up.  Trim and paper piece your foiled rainbow with various additional colored paper cuts, using the E-Z Runner® Grand Refillable Dispenser.  I’ve swapped my cartridge for the E-Z Runner® Grand Ultra Strong Refill.

Pop Up Your Scenes:

Many of the die cut elements are popped up with the 3D Foam Squares White Mix, which provides added dimension to your project.  Mix flat layers next to popped up layers for added interest.

Mask Your Background with Foam Shapes:

Foam shapes can be used in a variety of ways.  Masking is another creative use of the 3D Foam Stars.  Simply place them in a random pattern, then blend with distress ink.  Once dried, simply peel and toss your foam stars!


View my process video below for bonus tips and the full tutorial. The full product list is available on my blog, as well.

Thanks for stopping by!
Terri

Scrapbook Adhesives by 3L®:
Adhesive Sheets 4×6 inch
3D Foam Creative Embellishment Kit
E-Z Runner® Grand Refillable Dispenser
E-Z Runner® Grand Ultra Strong Refill
3D Foam Stars
3D Foam Squares White Mix

HomeHobby by 3L®:
Dual Tip Glue Pen

Other:
Cardstock, Distress Ink, Dies, Brush Markers, Glitter, Stamps, and Thread

Gorgeous Layered Elegant Card

Who does not love elegant cards? I know I do, especially when they are easy to make. Elegant cards are often about layering intricate die-cuts.

Yvonne here to show you how to make a card with a simple layering technique. For my card, I “think outside the box” with a fold-flower die cut as a ruffle and using E-Z Runner® Grand Refillable Dispenser and Dodz Adhesive Dots Medium ?

Gorgeous Layered Elegant Card by Yvonne van de Grijp for Scrapbook Adhesives by 3L

Creating Layered Elegant into the Card

On a white rectangle card base, adhere a slightly smaller piece of grey cardstock as a card panel with the E-Z Runner® Grand Refillable Dispenser.

Put together two pieces of patterned papers (a dotted and a floral pattern) and cut to slightly be smaller than the grey panel.

Die-cut borders and layer them one row after another, like ruffles, onto the lower side of card panel. Secure with the E-Z Runner® Grand Refillable Dispenser. Next, adhere the layered panel (the floral pattern half) onto the card base with the E-Z Runner® Grand Refillable Dispenser.

Wrap a piece of pink ribbon at the bottom edge of the dotted pattern half) and adhere the ends to the back of the cardstock with the E-Z Runner® Grand Refillable Dispenser and then adhere to the card base to create one whole card panel.

Stamp a sentiment, cut to a banner shape, bend slightly for dimension before adhering to the card with two Dodz Adhesive Dots Medium.  Use the adhesive dots to adhere the mulberry flower, leaves, and bow to the card base. And voila….you have finished making the card!

I hope you enjoyed making the card and hope you got inspired creating your own special card. Thanks for stopping by and wishing you happy crafting!

Hugs from Holland,
Yvonne

Scrapbook Adhesive by 3L®:
E-Z Runner® Grand Refillable Dispenser
Dodz Adhesive Dots Medium

Other:
Spellbinders Paper Arts® (Lily Pearl Flat Fold Flower), Stempelglede (Follow Your Heart Stamp Set), White, Blue Pearl, Grey and Patterned Cardstock, Black Ink Pad, Ribbon, Mulberry Flower, and Leaves, Glittered Leaves

Shimmer and Shine Layout with Adhesive Dots

Welcome back, my scrappy friends! Tracy here and today I have a Shimmer and Shine layout to share featuring Adhesive Dots and some of my other Scrapbook Adhesives by 3L favourites.

I think I might be part crow, because I love ANYTHING that makes it shimmer and shine 🙂 With that comes some adhesive challenges. Something I have always struggled with was keeping sequins attached to my layouts. Well, in this post I have your solution.

Shimmer and Shine Layout with Adhesive Dots by Tracy McLennon for Scrapbook Adhesives by 3L

This layout began with my base layers. Cream and white cardstock were used to make the largest 2 layers and the cream cardstock ring. If you have an electronic cutting machine, this will be easy. Me, I used 2 different sized dinner plates, traced them and cut them it out with scissors.

Adhere the base layers together with the E-Z Runner® Grand Refillable Dispenser. Then I used 3D Foam Squares to adhere the ring to the layout.

Once the ring is popped up on the layout I added Adhesive Lines ALL the way around the ring. This is what will keep your sequins exactly where you want them to be.

I added the sequins one-by-one around the middle of the cardstock ring. Then added a gold doily to the inside of the ring. When I work with more delicate papers, I like to get out my E-Z Runner® Permanent Fine Adhesive Dispenser, it will keep it down without destroying it in the process.

Next, I added my matted photo. In this case, I knew I was going to be using some dimensional embellishments. I wanted the photo to be extra popped up so that it didn’t get lost in the background. When I do this, I just double up those 3D Foam Squares.

Once the photo is in place, then I start to attach my embellishments. Adhesive Dots are my go-to adhesive to add anything from flowers to buttons.

I’d already gone glitzy, so of course, I added Creative Photo Corners Gold to my photo. Then I used Dodz Adhesive Dots Mini to add the acetate title.

Thanks so much for stopping by!
Tracy

Scrapbook Adhesives by 3L®:
E-Z Runner® Grand Refillable Dispenser
E-Z Runner® Permanent Fine Adhesive Dispenser
Creative Photo Corners Gold
Adhesive Dots Medium Ultra Thin
3D Foam Squares White Regular Size
Dodz Adhesive Dots Mini
Adhesive Lines

Other:
Cardstock- Cream and Black, Sequins, Buttons, Tag, Black Burlap String, Little Birdie Crafts Flowers, Heidi Swapp Acetate Word

The Decorated Notebook

Sharing a confession…I’m addicted to making lists. Therefore, I buy many notebooks and jotter pads! BUT they often look plain so I really need them to look pretty.  Somehow writing a list in something pretty is much less of a chore. LOL!

Christine here today get crafty with my trusty Scrapbook Adhesives by 3L® products to make it an enjoyable easy project.

The Decorated Notebook by Christine Emberson for Scrapbook Adhesives by 3L


Creating my Notebook

First I cut a panel of white card the same width as the notebook/jotter cover.  Using strips of Extreme Double-Sided Tape 1/4″, I affixed the card to the front overlapping at the top.

I then began to decorate, I affixed a rectangle of silver foil card using MyStik® Permanent Strips.

My next step was to die cut a small rectangle and apply Creative Photo Corners Kraft to each corner.  Remember you can apply ink and color to Creative Photo Corners.

This is then attached to the notebook cover using Crafty Foam Tape.

The finishing touch is the die cut embellishment held securely in place with 3D Foam Squares White Regular.


Purely optional if you wish to place the heart patterned paper the right way up or upside down! These notebooks/jotter pads are ideal for gifts too, work colleagues, teachers.  Don’t forget to check out all the great products on the website.

Thanks for stopping by!
Christine

Scrapbook Adhesives by 3L®:
MyStik® Permanent Strips
Crafty Foam Tape White
3D Foam Squares White Regular
Creative Photo Corners Kraft

HomeHobby by 3L®:
HomeHobby Extreme Double-Sided Tape 1/4″

Others:
Dies: Spellbinders Paper Arts (A2 Matting Basics A)
White Cardstock, Silver Foil Card, Patterned Paper and Die Cut Embellishment – Jen Hadfield, Heart of Home