You are in our US store • Switch to Europe store

Stamped Popcorn Card Tutorial

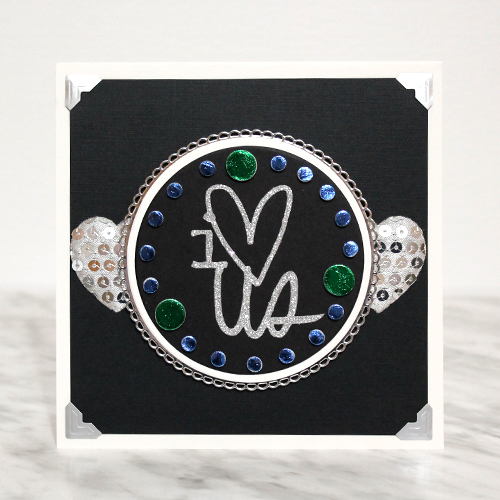
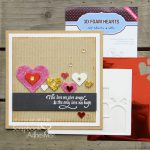
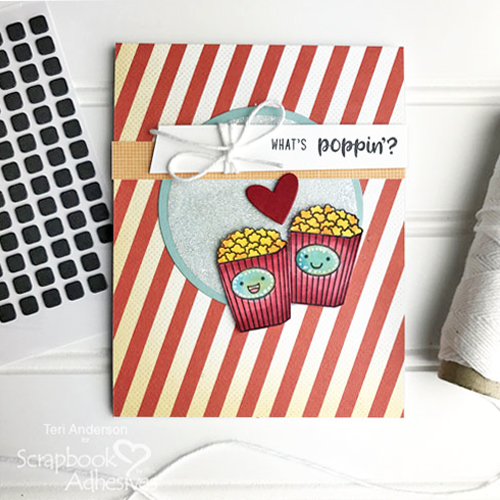
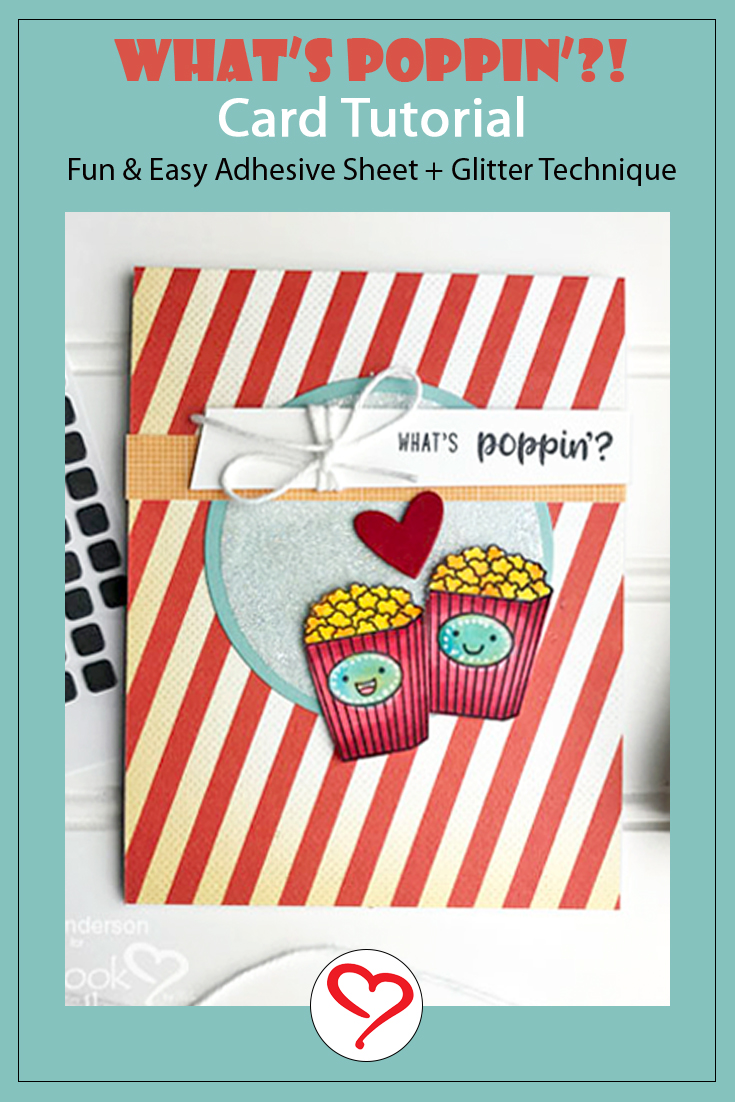
We’re going to be putting together a fun stamped popcorn card using products from Scrapbook Adhesives by 3L®. Featuring Adhesive Sheets to create a glittery circle and add some pop and dimension with 3D Foam Squares. To hold everything together, we’ll be using the E-Z Runner Grand Refillable Dispenser! Hi, everyone! Teri here today with a tutorial so let’s get started!

Stamped Popcorn Card Tutorial by Teri Anderson for Scrapbook Adhesives by 3L

Stamped Popcorn Card with an Adhesive Sheet Technique

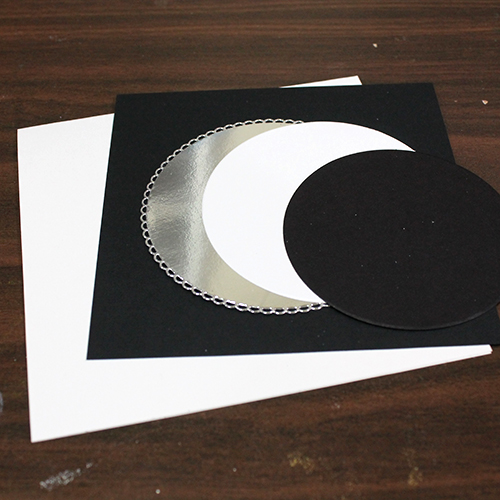
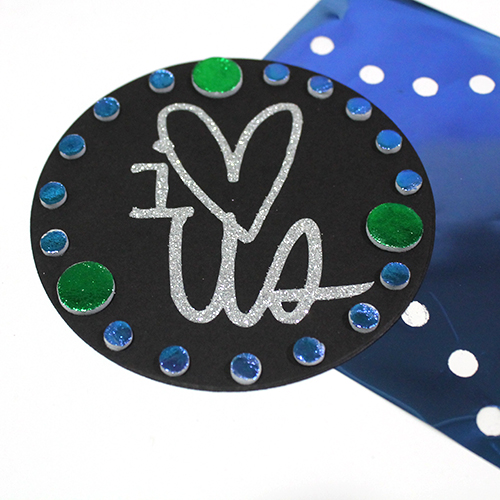
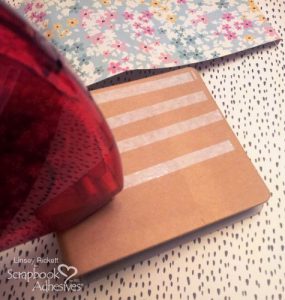
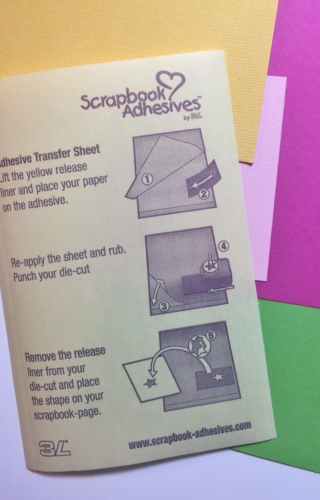
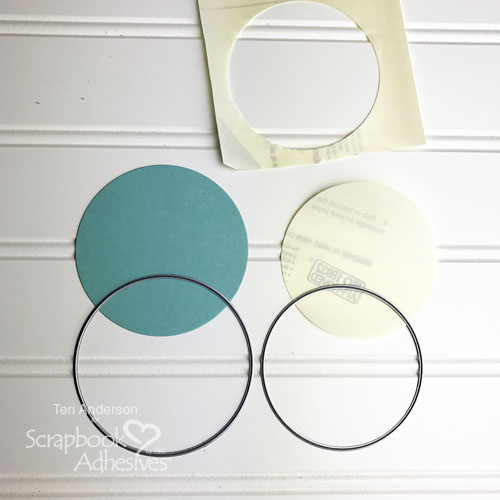
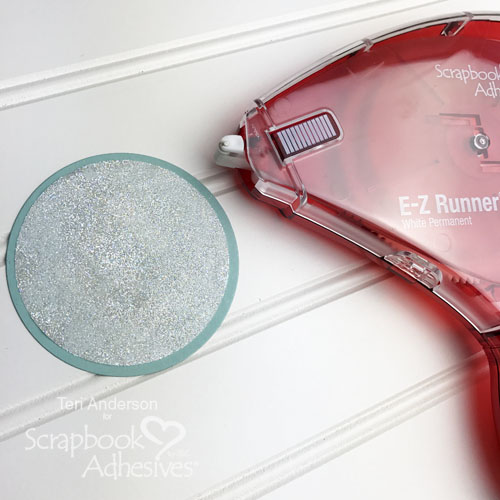
Start by die-cutting two circle shapes. You’ll cut a large circle from cardstock and the smaller circle from a scrap piece of an Adhesive Sheet 12×12 inch.

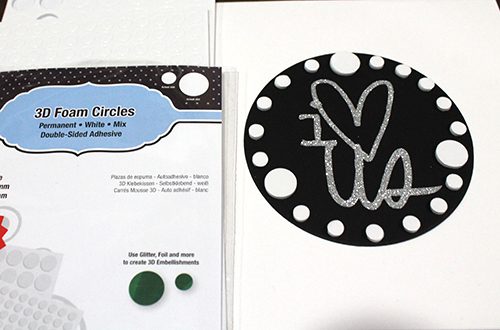
Take the adhesive sheet circle and remove the liner. Dump glitter over the exposed adhesive. I prefer fine glitter when I craft, but you can use any type of glitter. If chunky glitter is your thing, go with chunky glitter. It’s all good!

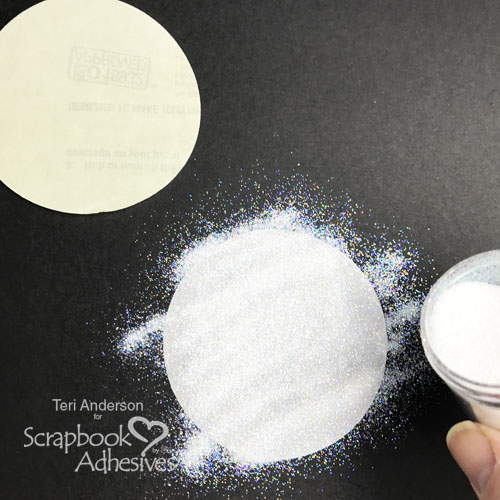
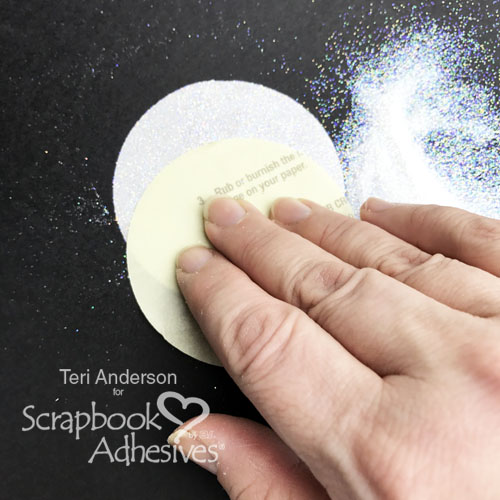
Shake off the excess glitter. Use the liner paper to burnish the glitter into the circle shape. It helps to ensure a good even coating of glitter.

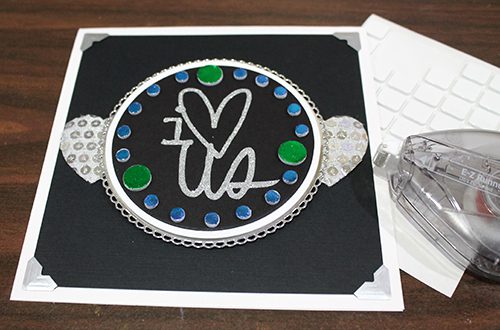
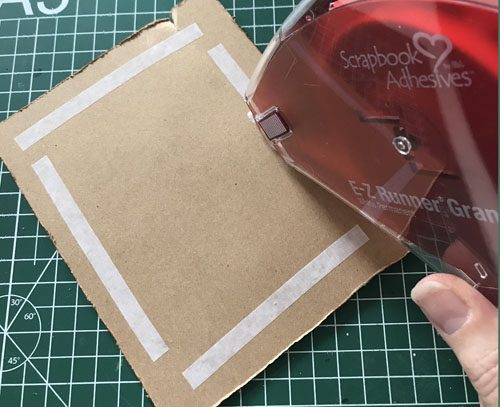
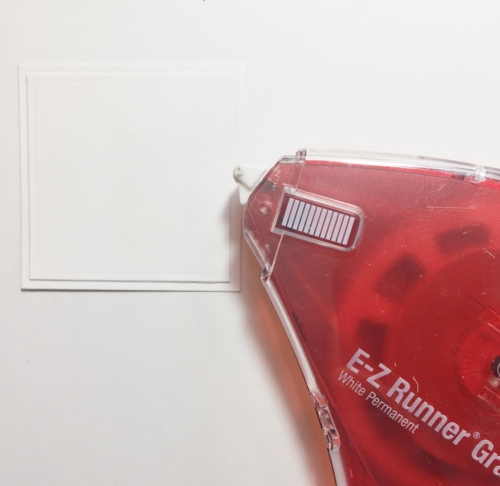
Use the E-Z Runner Grand Refillable Dispenser to layer the circles together.

Finishing Up

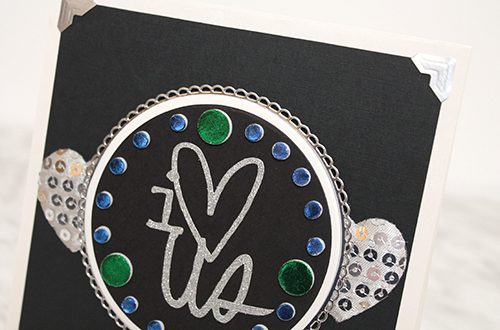
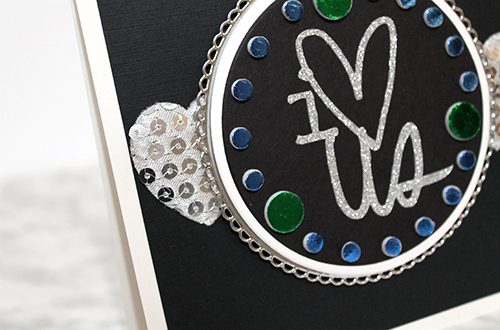
Add patterned paper to a card folded from cardstock and adhere the glittered circle.

Stamp and color with markers the adorable popcorn tubs. Fussy cut them out with your scissors.

Next cut a strip of white cardstock and stamp a sentiment onto it. Tie white twine around it.

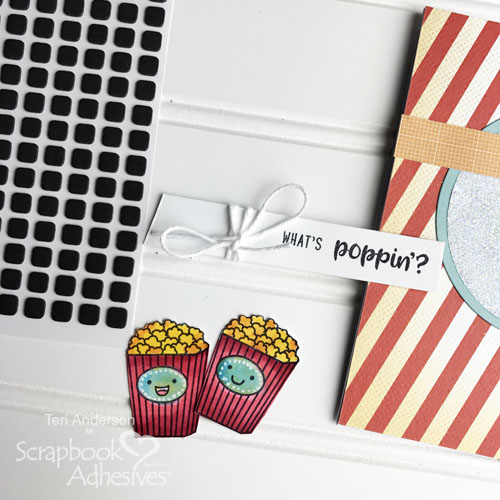
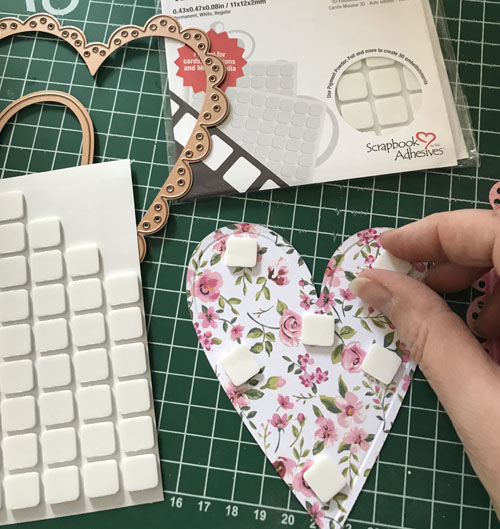
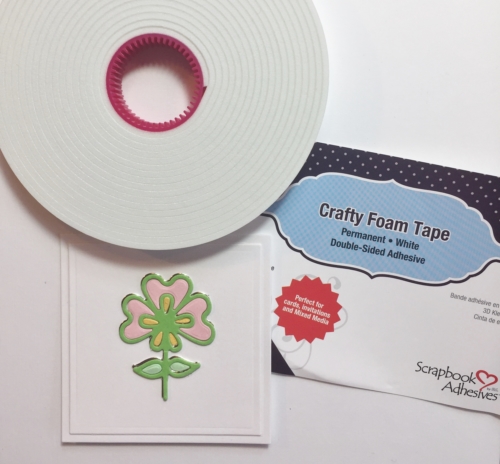
Adhere the popcorn tubs and sentiment to your card with 3D Foam Squares. These 3D Foam Squares are awesome because they will give your card just a bit of pop to help make them really stand out.

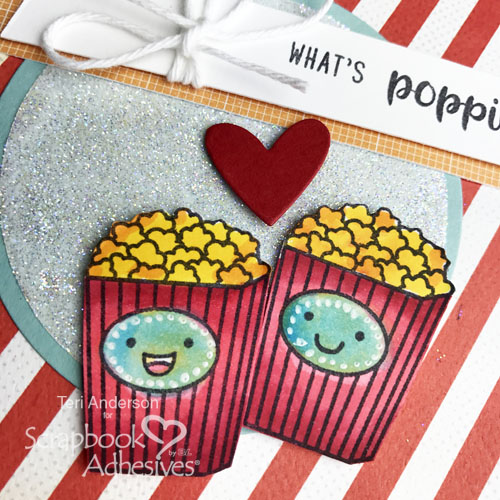
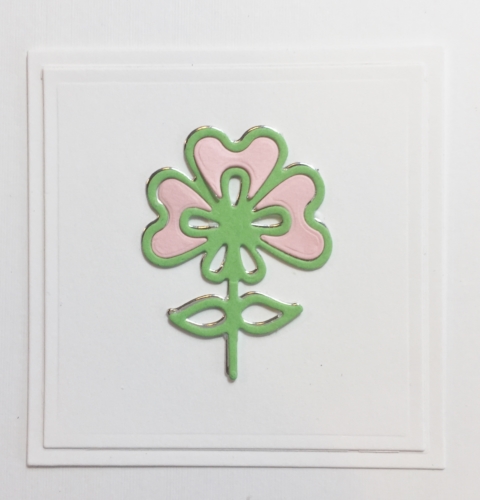
Finish your card by adding a die-cut heart to it! Again, use the 3D Foam Squares to adhere it to your Stamped Popcorn Card!

Scrapbook Adhesives by 3L®:
E-Z Runner® Grand Refillable Dispenser
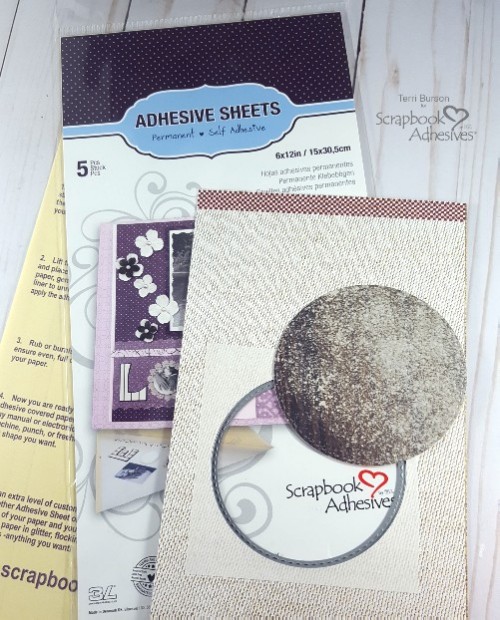
Adhesive Sheets 12×12 inch
3D Foam Squares Black Mix

Other:
Sunny Studio Stamps Fast Food Fun stamps, Carta Bella A Very Merry Christmas Patterned Paper, Cardstock (white, red), Black Ink Pad, Markers (red, yellow, blue), White Twine, Glitter, Circle Cutting Dies

Save It on Pinterest!

Visit our Website and Blog!
Sign up for our Newsletter so you never miss a contest or giveaway!

instagram purple icon facebook icon purple pinterest purple icon twitter purple icon YouTube icon blog subscription purple icon

Simple 3D Foam and Foil Card

Welcome back crafty friends! Today I have a fun little card to share that I created using 3D Foam and Foil. Here are all of the details.

Crafty confession: I love simple, geometric and symmetrical design. So when I saw that Scrapbook Adhesives by 3L had come out with 3D Foam Circles, I knew I wanted to create a card design using them as an embellishment rather than JUST as an adhesive.

Simple Foam and Foil Card by Tracy McLennon for Scrapbook Adhesives by 3L

Using Foil with Adhesives

First I started by creating my cardstock card layers. The base of my card is 6×6. I used  circle dies for the smaller layers.

On the smallest black cardstock circle, I added the sticker sentiment in the middle and then started adding the 3D Foam Circles to create a decorative border.

Remove the top liner from only the large 3D Foam Circles and use green foil from the 3D Foam Holiday Embellishment Kit add colour to the foam. Simply touch the foil to the adhesive – colored side up – and rub gently.

Next, remove the liner from all of the small 3D Foam Circles, and use the blue foil to add colour. (Again, apply with the colored side facing up!)

Next use the E-Z Runner Ultra and Silver Creative Photo Corners, and adhere the black cardstock (5.5 x 5.5 inches) to the 6 x 6 inches card base.

Once the silver sequined adhesive heart embellishments were added, I used 3D Foam Squares to adhere the layered circle to the card base.

I love the sparkle and dimension that the 3D Foam Circles with foil adds to the card. They’re no longer just for hiding between the layers!

Happy crafting and have a sparkly day.

Thanks so much for stopping by!
Tracy

  • Creative Time: 30 mins
  • Skill Level: Beginner

Scrapbook Adhesives by 3L Supplies:
3D Foam Squares White Regular
Creative Photo Corners Silver
E-Z Runner® Ultra Strong Refillable Dispenser
3D Foam Circles White Mix
3D Foam Holiday Embellishment Kit

Other Products Used:
Cardstock (White, Black), Silver Cardstock, Heidi Swapp Glitter Word, Heartfelt Creations Circles Dies

Click image or text to see more of our 3D Foam Shapes and Foil ideas:

Create a Textured Background Using Adhesive Sheets

Are you looking for a fun and fresh way to create a background?  Or just a different approach to get those creative juices flowing? It’s Christine joining you today with a boy layout that showcases a background created with Adhesive Sheets and Embossing Powder!

How to Create a Textured Background using Adhesive Sheets from Scrapbook Adheisives by 3L and Embossing Powder

I love to play with mixed media BUT sometimes it’s fun to go a different route when you are making a background.  In this case I knew I wanted a lot of splotchy white in my background.  But I didn’t want anything wet.  This is where Adhesive Sheets came into play for my background.  I used them in combination with embossing powder to get the job done. I made a process video that will walk you thru exactly how I created the background.

Adhesive Sheet Background Video Tutorial:

As you can see the combination makes for a bold and textured look that is very different from a wet mixed media approach.

Using opaque embossing powder made it really stand out but there are so many options out there to experiment with.  If you want something more subtle you can definitely play around and find out what works for you!

I also incorporated the Adhesive Sheets as I used my metal die cut machine to cut out small stars for embellishments. I used the sheets in a very traditional manner in this case – using them to back my embellishments. Additionally I opted to pop some stars up and the 3D Foam Circles were the perfect candidate for that work!


Thanks for joining me today – I hope you can find some fun ways to Wear Your Adhesive on the Outside too! Be sure to see my other Adhesive Sheet tutorial Colorful Background Using Adhesive Sheets

Colorful Backgrounds with Adhesive Sheets by Christine Meyer

-Christine

Scrapbook Adhesives by 3L® Products used:
Adhesive Sheets 4″ x 6″
E-Z Runner Grand® Refillable Dispenser
Crafty Foam Tape White
Adhesive Dots Mini
3D Foam Squares White Mix
3D Foam Circles White Mix

Other Supplies Used: April Flavors of the Month Kit from The ScrapRoom


Customized Travelers Notebook Cover

Travelers notebooks are a great way to document life moments in a convenient diary-style format.  Although this journal cover is designed to chronicle my teenager’s culinary adventures, the theme works perfectly for documenting your own food travels, weight loss journey or other diary usages.  Hello, Terri here, sharing ideas to help you create a fun, themed cover for your special journey!

Themed Elements for Your Travelers Notebook

No matter the topic of your journal, you’ll want to tie everything together.  Since I have a teenager involved in the culinary world, I’ve been slowly building a little nest egg of food themed craft supplies, many of which are featured in today’s project.    My “clock” represents setting the timer and also, the timed cooking competitions that he participates in.  I chose the words “Good Eats” to represent the various recipes and food adventures that will be chronicled here, as well.  Lastly, I’m using food themed designer papers and die cuts for added “spice”!

Die Cutting with Adhesive Sheets

Today’s project features the Adhesive Sheets 6×12 in for my paper clock background, the clock numbers and the sentiment.  Whether using a hand crank or electric die cut machine, you’ll love the versatility of the entire adhesive sheets product line.  Keeping in mind that my TN journal is 5″ x 8.25″, I’ve designed all my elements accordingly.

Here’s a quick run-down of my element dimensions:

  • 3.5″ Circle for clock
  • 1/2″ numbers for clock
  • 4″W x 3.5″H Sentiment

Place a 4″ section of the adhesive sheet to the back of your designer paper, then die cut your circle, peel backing and apply to upper half of journal.

Embellish Your Die Cuts

Next, use the black sheet from the 3D Foam Creative Sheets to cut images from the Spellbinders What’s Cookin’ die cut set with your table top die cut machine.  For the bowl, peel the top lining off, then apply silver foil from the 3D Foam Creative Embellishment Kit, shiny side up.  Gently rub and peel lining.  For the mixing blender die cut, I stabilized my die cut with one of the dots from the Adhesive Dots Large Repositionable, placing it on the backing.  Next, peel the top lining, and sprinkle with black embossing powder.  Tap off excess and heat with a craft heat tool.  Peel the back lining on both die cuts and adhere to center of the circle.  A great way to Wear Your Adhesive On The Outside!

I used my electric die cut machine with the adhesive sheets for the numbers and sentiment.   For the die cut numbers, peel adhesive backing, then place your numbers at the 15 minute mark first, to better center the rest of your numbers.  Cut your sentiment in the same manner and adhere to the lower portion of your journal.  I actually, cut two sets of the adhesive sentiments and stacked them for more dimension.

I’m so happy with how my cover turned out.  Hopefully, I can show you some journal pages in the future, once we start documenting, which will be very soon; my teen is headed to the FCCLA National Competition in Atlanta this summer!

Be sure and visit my blog for the full product list.
See you next time!  Terri

Scrapbook Adhesives by 3L®:
3D Foam Creative Embellishment Kit
3D Foam Creative Sheets
Adhesive Sheets 6×12 in
Adhesive Dots Large Repositionable

Other:
Carpe Diem travelers notebook, die cut machine, steel dies, black cardstock, Kaisercraft Bon Appetit papers, black embossing powder

You may enjoy these posts too!

Building Layers of Love Card Tutorial

With spring love is in the air, it is a great time to make a romantic card for someone special or even a wedding card! Scrapbook Adhesives by 3L® has all you need to build and make a multiple layered card. Just like the one I would like to share with you!

Hello everyone, Yvonne here sharing a love themed card using lots of Scrapbook Adhesives by 3L® products to make assembling super easy. The 3D Foam Squares for the dimensional effect, Adhesive Dots for clean and easy adhering flowers and embellishments and the Dual Tip Glue Pen for precision on an intricate die cut.

Building Layers of Love by Yvonne van de Grijp for Scrapbook Adhesives by 3L

Building Layers of Love

On the patterned kraft cardstock layer, alter, ink and tear for a distressed look first then mount on a piece of pink cardstock panel with the E-Z Runner® Grand Refillable Dispenser. Then adhere both layers cardstock to a white card base.

Die-cut the hearts from pink and pink patterned cardstock. Sand the pink heart to highlight its embossed design. Adhere both hearts to the card base using 3D Foam Squares White Regular Size.

Die-cut and ink a banner. To adhere the banner to the card base, use 3D Foam Squares White Small Size: one on both ends and stack two in the middle for an extra dimension.

Die-cut the sentiment and adhere to the banner using the smaller tip of the Dual Tip Glue Pen for precision.

Adhere the flowers, leaves, buttons, and rhinestones to the card using Adhesive Dots: Adhesive Dots Large for the leaves, flowers and larger buttons and Adhesive Dots Micro for the small buttons, sequins, and rhinestones.

I hope you enjoyed my instructions on how to make the card and wish you happy crafting!

Hugs from Holland,
Yvonne

Scrapbook Adhesives by 3L®:
E-Z Runner® Grand Refillable Dispenser
3D Foam Squares White Regular Size
3D Foam Squares Small Size
Adhesive Dots Large
Adhesive Dots Micro

HomeHobby by 3L®:
Dual Tip Glue Pen

Other:
Etched Dies: Spellbinders® Paper Arts (Sew Sweet Valentine, Sew Sweet Sentiments), Cardstock (white, pink, black and patterned), Brown ink pad, ink blending tool, mulberry flowers and leaves, sequins, rhinestones, buttons, white and black ink, paper trimmer, paper distresser, tweezers, sanding tool

Love this? See our  Pinterest board Hearts and Love DIY Ideas  and these projects:

Love Layout by Erica Houghton

Love Scrapbook Layout

I Am Mini Album with E-Z Runner Grand

Hello friends! Linsey here today sharing my very first design team project with you! My chipboard mini album featuring the awesome E-Z Runner® Grand Refillable Dispenser was so easy and fun to make. I hope you enjoy my easy tutorial!


Creating a Mini Album

I started with a naked 4×4 chipboard mini album. I cut my cover patterned paper to size. Then I used the E-Z Runner® Grand Refillable Dispenser to permanently adhere the paper to the album base.

Next, I decorated the front of the album using chipboard pieces, adding White Mix 3D Foam Squares to some of the pre-made embellishments to create more dimension and interest. This product is great because it contains a mix of small and regular 3D Foam Squares, which is extra useful when working with different sized embellishments.

Complete the inside of the album and chipboard pages in the same manner as the front cover.

Tip: use a nail file to gently remove any excess paper from page edges and to make the corners smooth. 

Now, my project is complete and ready to be filled with beautiful memories! Simply add photos and ephemera to the pages using adhesives from Scrapbook Adhesives by 3L®.

Thanks so much for stopping by and letting me share my chipboard mini album with you!

Until next time, happy crafting!
Linsey

Scrapbook Adhesives by 3L® Products used:
E-Z Runner® Grand Refillable Dispenser
3D Foam Squares White Mix

Other:
Maya Road 4×4 Chipboard Album; Simple Stories I Am Patterned Paper, Chipboard Elements, Enamel Dots; RRR 5/8″ Satin Swirls Ribbon Daffodil, Crosshatch on Tropic Satin Ribbon, Burlap String Black; Buttons; Nail File, Trimmer.

Check out these Mini Album ideas:

Heat Embossing with Adhesive Sheets

Good Morning! My name is Valerie, and I’m very excited because today I have my first post for the Scrapbook Adhesives by 3L® Design Team! When I found out a couple months ago that I had made it onto their team, I was absolutely thrilled! I have used their products since I began crafting years & years ago. Now I will get to share these great products with you! Today I have a birthday card featuring heat embossing with Adhesive Sheets.

Using Heat Embossing with Adhesive Sheets on a Birthday Card by Valerie Ward

For my first project, I decided to make a fun Birthday Card. I really wanted to have some fun with the alien beaming out of the space ship, and I used Adhesive Sheets to do that (they come in 3 different sizes: 4×66×12, & 12×12).

Using the Adhesive Sheets for Embossing

The light beam is a semi-transparent shape using just adhesive and embossing powder. First, I die cut the light beam shape from an Adhesive Sheet.

Then I prepped the paper for heat embossing by using my powder tool. Adhere the shape by removing one liner, adhere it to the paper, then peel off the top layer.

The revealed sticky permanent adhesive layer was dipped into the embossing powder. Edge to edge coverage means the entire shape will be covered with adhesive.

Now tap off the excess powder and melt the embossing powder with the heat tool.

The next part of the project is the alien that will be in the beam coming from the spaceship! First, I stamped the image and colored it. Then cut a small piece of the Adhesive Sheet.

I peeled off the top layer and adhered it to the front of the image. Peel off the bottom layer to expose the adhesive and dip the sticky piece into the embossing powder.

After heat embossed the image, die-cut it.

Using the Adhesive Dots, 3D Foam Squares, & Dual Tip Glue Pen

Using Adhesive Dots (I used the Adhesive Dots Large this time; they come in so many great sizes!), I adhered the image onto the section I had worked on first; it stuck perfectly.

The next step on this card was to apply Thin 3D Foam Squares to the backs of the pieces I wanted slightly raised. I also put little dots of glue onto the bottoms of the aliens using the Dual Tip Glue Pen so that the bottoms wouldn’t pull up off of the hill.

Using Permanent E-Z Dots® Permanent

To adhere the larger panels, I used the E-Z Dots® Permanent runner. Here is the final card and most of the Scrapbook Adhesives by 3L products used (oops, I forgot to add the Adhesive Sheets!).

I just love how this scene turned out, especially the light beam coming from the space ship!


Hope you enjoyed this project; thank you for stopping by, and Happy Crafting!

Scrapbook Adhesives by 3L®:

HomeHobby by 3L®:

Other:
Stamp Sentiment, Etched Dies, Patterned Paper, Ranger Bridal embossing powder, Zig Gold Wink of Stella Pen, Pretty Pink Posh Large Silly Eyes

Find More Adhesive Sheet Embossing Projects Here:

Origami Wall Art with Adhesive Sheets

Hi! Dana here today sharing how to create a piece of 3D origami wall art for the home. Did you know that Adhesive Sheets come in 3 sizes? Strong, clear, permanent edge-to-edge adhesive coverage is available in 4×6-inch, 6×12-inch, and 12×12-inch sheets! I went big with this project and created artwork using an entire 12×12 Adhesive Sheet.

Origami Wall Art with Adhesive Sheets by Dana Tatar for Scrapbook Adhesives by 3L

I chose map print patterned papers for this project. While these papers were purely decorative, I think it would be a fun way to remember a great vacation and use maps from a favorite travel destination. I folded up 132 4×4-inch pieces of patterned paper for this piece of wall art that measures just over 12×12 inches.

How to Create 3D Origami Wall Art

I find that I can learn new techniques much faster visually, so I created a process video.

Not all of my paper folds were perfect, and as a result, my finished piece did not fit together as tightly as I would have liked. If you have a similar problem, it is OK!

Origami Wall Art with Adhesive Sheets by Dana Tatar for Scrapbook Adhesives by 3L

I fixed this problem with embellishments. The new 3D Foam Circles were the perfect way to secure small cork circles to the center of each hexagon shape.

I hope I have inspired you to use paper to create a fun home décor piece! If you would like to see how to use Scrapbook Adhesives by 3L products to create 3D home décor that can sit on a shelf, click over to my previous post about how to create a 3D Paper Cactus Trio.

Thanks for stopping by today!
~Dana Tatar

Creative Time: 120 minutes
Skill Level: Intermediate

Materials Needed
Scrapbook Adhesives by 3L®

Adhesive Sheets 12×12 Inch
3D Foam Circles White Mix
Adhesive Dots Medium Ultra Thin

Other
Map Print Patterned Paper (Pepin van Roojen); Cork Circles (Recollections); Cardboard

Find more Wall Art inspiration on our blog, click the links below, or on our Home Decor Pinterest Board


Pin It!

Origami Wall Art with Adhesive Sheets by Dana Tatar for Scrapbook Adhesives by 3L Pinterest


Easter Card using Paper Piecing with Adhesive Sheets

Hi everyone, Christine here with an Easter card using Adhesive Sheets 4 x 6″ and paper piecing. Find out how to use up scraps to make this lovely card.

Our Easter here in the UK is spread across the full four-day holiday weekend so I make sure I have a good supply of cards (and chocolate eggs).  Having a speedy card design is perfect!

Easter Paper Piecing Card by Christine Emberson

 Paper Piecing with Adhesive Sheets

Firstly, I delve into my scrap box for various colored pieces of cardstock.  Take off the top liner sheet of a 4×6-in Adhesive Sheet and apply cardstock on to it. I find this size of Adhesive Sheet is perfect for using up my smaller card and paper scraps.

Now die cut with your chosen dies. Do this again with the various colors of cardstock.  Each die cut (and fallout piece) now has a layer of permanent adhesive with edge-to-edge coverage, this makes paper piecing perfect.

My card base has an aperture that I am going to place a design into. I affix two white cardstock mats with the E-Z Runner Grand® Refillable Dispenser.

Next, position and affix the flower die cut to the mat, just a little pressure and it’s fine. I’ve also die cut a further flower from silver mirror card to act as a drop shadow behind.  Using your fall out pieces, begin to paper piece.

Use a pokey tool to help placement, the die cuts will slot into place and because of that adhesive sheet backing, they will stay there!  This is the relaxing part.

Once my design is completed with all paper piecing, I used Crafty Foam Tape White on the reverse to insert inside the card aperture.

Lastly, add a few more of the flower die cuts in white cardstock for the base of the card to finish and a stamped sentiment.

 How to use Adhesive Sheets Video


Thanks for stopping by today. Don’t forget to check out all the great products on the website.Christine

Scrapbook Adhesives by 3L® Products used:
Adhesive Sheets 6″ x 4″
E-Z Runner Grand® Refillable Dispenser
Crafty Foam Tape White
Others:
Dies: Spellbinders Paper Arts (Dainty Florals, 6×6 Matting Basics)
White, Green, Pink Cardstock; Pearls; Silver Mirror Card; Creative Expressions Lavish Sentiment Stamp.

Find more Easter inspiration on the blog!

DIY Easter Craft Ideas and How-to Instructions

Easter Card Featuring Foil and Personalizing Tips

Did you know the Easter egg has special meaning?  Although Easter eggs are especially fun for children, egg hunts and Easter baskets, it also represents the Resurrection of Christ.

Hello, Terri here, with an Easter Egg card that features foil, adhesives and creative ways in personalizing your card.

Easter Card Featuring Foil and Personalized Tips by Terri Burson for Scrapbook Adhesives by 3L

Personalizing an Easter Egg Card: Hand Cut versus Die Cut

If you don’t have shaped metal dies for this project, fear not. Draw your own images and hand cut!  It doesn’t get any easier than drawing an egg, so give it a try. Mine is approximately 3 inches and layered with various ink and splattered with acrylic white paint. You can also use pretty patterned paper, if you prefer. For the cross, use a ruler and trace onto the sticker backing of a foam sheet from the 3D Foam Creative Embellishment Kit. Make it a little larger than the egg, then trim the edges.  Lay silver foil on the foam cross, shiny side up, gently rub and peel back the lining.

Other Creative Ways to Embellish

To enhance and give dimension to the card edges, use the Creative Photo Corners Kraft and the brand new 3D Foam Circles Black Mix, heating the top with black embossing powder. For a little sparkle, tap tiny dots of glue from the Dual Tip Glue Pen onto the egg, sprinkling with extra fine glitter. There are so many ways to Wear Your Adhesive On The Outside!

Finish with a Phrase or Sentiment

If you don’t have lettering skills, simple handwriting looks great too!  Just pick your favorite phrase or quote and hand write plain or cursive, but take your time.  Don’t rush!  I’m using lyrics from an old hymn for my quote.  A nice sentiment works as well if you prefer to stamp or add a die cut phrase.  Lastly, adhered the panel to a black top-fold card with the E-Z Runner® Grand Refillable Dispenser.

I’ve had several friends ask how I previously made this galaxy background. I hope to do a video soon, so be sure you’re following me on social media if you’re interested in this.

Check out this blog post for more Easter inspiration

DIY Easter Craft Ideas and How-to Instructions

Scrapbook Adhesives by 3L®:
3D Foam Creative Embellishment Kit
E-Z Runner® Grand Refillable Dispenser
3D Foam Circles Black Mix
Creative Photo Corners Kraft

HomeHobby by 3L®:
Dual Tip Glue Pen

Other:
Fine-tip scissors, black cardstock, white mixed media paper, calligraphy pen, glitter, black embossing powder, trimmer.